Tutorial
ADOBE PHOTOSHOP 5.0
Back to Contents
Combining Illustrator Graphics and
Photoshop Images
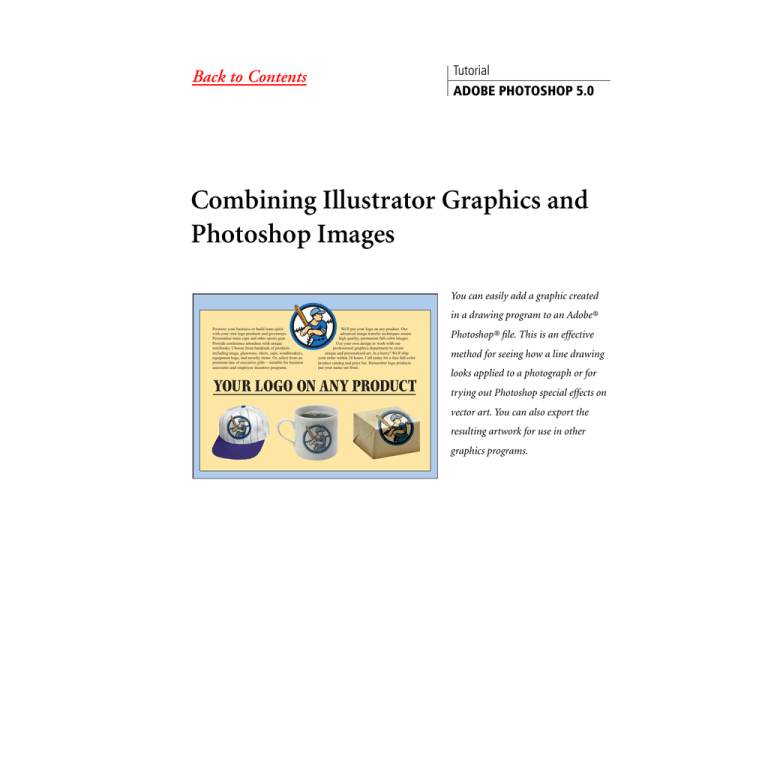
You can easily add a graphic created
in a drawing program to an Adobe®
Promote your business or build team spirit
with your own logo products and giveaways.
Personalize team caps and other sports gear.
Provide conference attendees with unique
notebooks. Choose from hundreds of products
including mugs, glassware, shirts, caps, windbreakers,
equipment bags, and novelty items. Or, select from an
premium line of executive gifts— suitable for business
associates and employee incentive programs.
We'll put your logo on any product. Our
advanced image transfer techniques assure
high quality, permanent full-color images.
Use your own design or work with our
professional graphics department to create
unique and personalized art. In a hurry? We'll ship
your order within 24 hours. Call today for a free full-color
product catalog and price list. Remember logo products
put your name out front.
Photoshop® file. This is an effective
method for seeing how a line drawing
looks applied to a photograph or for
trying out Photoshop special effects on
vector art. You can also export the
resulting artwork for use in other
graphics programs.
COMBINING ILLUSTRATOR GRAPHICS AND PHOTOSHOP IMAGES
PAGE 2 OF 9
This lesson shows you how to do the following:
•
Differentiate between bitmap and vector graphics.
•
Place an Adobe Illustrator® graphic in an Adobe Photoshop file.
•
Scale the placed graphic.
•
Distort a graphic to match the perspective of a photograph.
•
Apply different blending modes to a graphic.
Use the Export Transparent Image wizard to prepare a Photoshop image for use in an
Illustrator file.
•
Combining artwork
You can combine Photoshop artwork with art from other graphics applications in a variety of ways
for a wide range of creative results. Sharing artwork between applications allows you to combine line
art with continuous-tone paintings and photographs. It also allows you to move between two types
of computer graphics—bitmap images and vector graphics.
Bitmap vs. vector graphics
Adobe Photoshop uses bitmap images, also called raster images, which are based on a grid of pixels.
In working with bitmap images, you edit groups of pixels rather than objects or shapes. Because
bitmap graphics can represent subtle gradations of shade and color, they are appropriate for
continuous-tone images such as photographs or artwork created in painting programs. A disadvantage of bitmap graphics is that they lose definition and appear “jagged” when scaled up.
Vector graphics, also called draw graphics, are made up of shapes based on mathematical expressions
and are created in drawing applications. These graphics consist of clear, smooth lines that retain
their crispness when scaled. They are appropriate for illustrations, type, and graphics such as logos
that may be scaled to different sizes.
Logo drawn as vector art
Logo rasterized as bitmap art
COMBINING ILLUSTRATOR GRAPHICS AND PHOTOSHOP IMAGES
PAGE 3 OF 9
In deciding whether to use Photoshop or a vector graphics program such as Illustrator for creating
and combining graphics, consider both the elements of the image and how the image will be used.
In general, use Photoshop for images that have the soft lines of painted or photographic art and for
applying special effects to line art. Use Illustrator if you need to create art or type with clean lines
that will look good at any magnification. In most cases, you will also want to use Illustrator for
laying out a design, since Illustrator allows you more flexibility in working with type and with
reselecting, moving, and altering images.
Project overview
To illustrate how you can combine vector art with bitmap images and work between applications,
this lesson steps you through the process of creating a composite image. In this lesson, you will add
a logo created in Adobe Illustrator to a photographic image in Adobe Photoshop and adjust the logo
so that it blends with the photo. You will then save the resulting image so that it can be brought back
into Illustrator for final layout as a print advertisement.
Promote your business or build team spirit
with your own logo products and giveaways.
Personalize team caps and other sports gear.
Provide conference attendees with unique
notebooks. Choose from hundreds of products
including mugs, glassware, shirts, caps, windbreakers,
equipment bags, and novelty items. Or, select from an
premium line of executive gifts— suitable for business
associates and employee incentive programs.
Logo drawn in Illustrator
Logo applied to image
in Photoshop
We'll put your logo on any product. Our
advanced image transfer techniques assure
high quality, permanent full-color images.
Use your own design or work with our
professional graphics department to create
unique and personalized art. In a hurry? We'll ship
your order within 24 hours. Call today for a free full-color
product catalog and price list. Remember logo products
put your name out front.
Final layout in Illustrator
Getting started
Before beginning this lesson, delete the Adobe Photoshop Preferences file to restore the program’s
default settings. To delete the Preferences file in Windows®, exit Photoshop, and then delete the
Adobe Photoshop 5 Prefs file in the Adobe Photoshop Settings subdirectory inside the Photoshop5
directory. To delete the Preferences file in Mac® OS, quit Photoshop, locate the Adobe Photoshop 5
Prefs file in the Adobe Photoshop Settings folder inside the Adobe Photoshop 5.0 folder, drag the
file to the Trash, and choose Special > Empty Trash.
After you have deleted the Preferences file, restart the Photoshop program. Then open the final
Photoshop image for this project to see how the adjustments you’ll make affect the final artwork.
1 Choose File > Open. Locate and open the Training\Lesson04 folder in the Adobe Photoshop 5.0
application folder or on the tutorial CD. Then select end04.psd and click Open.
2 If you like, choose View > Zoom Out to make the image smaller, and leave it on your screen as
you work. If you don’t want to leave the image open, choose File > Close.
Now you’ll open the start file, the photographic image to which you will add a logo.
3 Choose File > Open. Locate and open the Lesson04 folder, select Start04.psd, and click Open.
4 Choose File > Save As, type the name Work04.psd, and click Save.
COMBINING ILLUSTRATOR GRAPHICS AND PHOTOSHOP IMAGES
PAGE 4 OF 9
Placing an Adobe Illustrator file
You can open an Adobe Illustrator file as a new Adobe Photoshop file, or you can use the Place or
Paste commands to add an Illustrator file into an existing Photoshop file. When you open, place, or
paste an Illustrator image, Photoshop rasterizes it so that it becomes a bitmap, or raster, image.
In this lesson, you will be using the Place command to add an Illustrator file to an existing
Photoshop image. The advantage of the Place command is that it allows you to scale the image while
it is still vector art, so that the scaling does not sacrifice image quality. With the Place command, a
graphic is not rasterized until you press Enter (Windows) or Return (Mac OS). Alternatively, if you
were to cut and paste a graphic from Illustrator into Photoshop, the image would come in already
rasterized at the size it was in the Illustrator file. If you then scaled the graphic, it would lose
image quality.
Scaling placed Illustrator graphic Result
Scaling pasted Illustrator graphic Result
1 With the photo of the gift box open, choose File > Place. Select the file Logo.ai located in the
Lesson04 folder, and click Place. Notice that the logo appears with a bounding box around it and
that Photoshop automatically creates a new Logo.ai layer for the image in the Layers palette.
2 Hold down Shift, and drag a corner handle of the bounding box to scale the logo to fit the gift
box. (Holding down Shift constrains the proportions of the logo.)
COMBINING ILLUSTRATOR GRAPHICS AND PHOTOSHOP IMAGES
PAGE 5 OF 9
3 Position the pointer outside the bounding box (the pointer turns into a curved arrow), and drag
to rotate the logo slightly counter-clockwise.
Scaling logo
Rotating logo
Repositioning logo
4 If necessary, position the pointer inside the bounding box so that you see a move pointer ( ), and
drag to reposition the logo so that it fits within the borders of the box. Fine-tune with other rotation
or scaling adjustments; then press Enter (Windows) or Return (Mac OS) to apply the changes and
rasterize the logo.
Distorting the graphic to match the photograph
Your next step is to distort the logo so that it appears to wrap around the top and front of the box.
To create this effect, you’ll cut the logo in half, place each half on its own layer, and then apply the
distortion to the logo’s top half.
1 With the Logo.ai layer active, select the polygon lasso tool ( ), and click the right front corner of
the box top. Drag to the next corner, click, and then continue dragging around the box top, clicking
at each corner. Complete the selection by crossing over the starting point.
Top half of box selected
Selection placed on new layer
2 Choose Layer > New > Layer Via Cut to cut the top half of the logo from the Logo.ai layer and
place it on its own layer. Notice that a new layer, Layer 1, has appeared in the Layers palette. To see
the artwork on the layer, turn off the other two layers by clicking the eye icon ( ) to the left of the
layers in the Layers palette. Click again to turn all layers back on.
Now you’re ready to distort the top of the logo.
3 Make sure that Layer 1 is active, and then choose Edit > Transform > Skew. A transformation
bounding box appears around the top half of the logo.
COMBINING ILLUSTRATOR GRAPHICS AND PHOTOSHOP IMAGES
PAGE 6 OF 9
4 Experiment by dragging the handles of the bounding box to distort the logo so that it matches the
perspective of the box. In particular, try dragging the upper left handle in the direction of the back
left corner of the box top.
Top half of logo distorted via
Skew command
Result
To undo the last handle adjustment, choose Edit > Undo. To cancel the transformation,
press Escape.
5 When the logo appears to wrap around the top of the box, apply the transformation by pressing
Enter (Windows) or Return (Mac OS).
Using blending modes on the graphic
Now you’ll make the logo appear more integrated with the box by using different blending modes
on each half of the logo. First you’ll lighten the top half of the logo so that it matches the box top.
1 With Layer 1 still active in the Layers palette, change the opacity of the layer to 60% and make
sure that Normal is selected for the blending mode. Changing the opacity of the layer lightens the
top of the logo and makes it blend better with the highlights on the top of the box.
Normal mode for top half
of logo
Multiply mode for bottom half
of logo
Result
Next you’ll darken the bottom half of the logo so that it blends with the shadow on the box front.
2 Click the Logo.ai layer in the Layers palette to make it active, change the opacity to 70%, and select
Multiply from the blending mode menu. Using the Multiply blending mode on the layer darkens the
bottom of the logo and makes it appear to be in shadow.
3 Choose File > Save.
COMBINING ILLUSTRATOR GRAPHICS AND PHOTOSHOP IMAGES
PAGE 7 OF 9
Exporting the image
You’ll now prepare the new composite image so that it can be placed back into Illustrator for its final
layout. By default, when you export an Adobe Photoshop file to another program such as Illustrator,
the entire image becomes opaque, including the background. In this project, the gift box in the
Photoshop file is targeted for an Illustrator file with a colored background. Therefore, if you were to
export the file without any adjustment, the white background around the box would appear as an
opaque white area against the colored Illustrator background.
With the help of a Photoshop wizard, you can export a Photoshop image to Illustrator and hide, or
clip, the background. Wizards are assistants available through the Help menu that guide you
through common tasks in Photoshop. To hide the background around the box image, you will use
the Export Transparent Image wizard, which identifies the desired portion of the photograph and
makes everything outside it appear transparent when the image is exported.
Placed Photoshop file, exported
with background
Placed Photoshop file, exported
via Export Transparent Image
Before running the Export Transparent Image wizard, you must select the part of the image you
want to make transparent. In the Work04.psd file, you will select the white background around
the box.
1 In the Layers palette, click Background to make it active.
2 Select the polygon lasso tool, and draw a selection around the box. Then choose Select > Inverse
to select the background around the box.
Selecting box with polygon
lasso tool
Box selected
Background selected via
Select > Inverse
COMBINING ILLUSTRATOR GRAPHICS AND PHOTOSHOP IMAGES
PAGE 8 OF 9
You’re now ready to run the wizard, which uses dialog boxes to step you through the process of
exporting the file.
3 Choose Help > Export Transparent Image.
4 In the first dialog box, choose the second option, indicating that you have already selected the area
of the image you want to make transparent. Then click Next.
5 In the next dialog box, choose Print and click Next.
6 In the third dialog box, accept the Photoshop EPS default file format and the default file name,
and click Save.
7 In the EPS Options dialog box, for Preview choose the option TIFF (8 bits/pixel) for Windows or
the option Mac OS (8 bits/pixel) for Mac OS, and click OK.
Note: If you place an EPS file with a TIFF preview into Adobe Illustrator, the transparency created by
the wizard won’t display properly. This display affects the on-screen preview only; when the image prints
to a PostScript® printer, the areas designated for transparency in the wizard will in fact be transparent.
8 In the final dialog box, click Finish.
Note that you now have two files open on your desktop: Work04 and Export Wizard Work04
(Windows) or Export Assistant Work04 (Mac OS). Because you are finished with the Work04 file,
you can close it. Be careful not to save the file, however, since the Export Transparent Image wizard
flattened the file’s layers as one of the steps in preparing the file for export. If you save this version
of the file, you will lose the original file’s separate layers.
9 With the Work04.psd file active, choose File > Close.
10 In the dialog box, click the Don’t Save option.
The final step in preparing the Photoshop file for export to a print color publication is to change the
image to CMYK color mode so that it will be printed correctly in four-color process inks. You can
use the Mode command to change the image’s color mode.
Note: For more information on color modes, see Chapter 4, “Choosing a Color Mode,” in the Adobe
Photoshop User Guide.
11 With the Export Wizard Work04 (Windows) or Export Assistant Work04 (Mac OS) window
active, choose Image > Mode > CMYK.
12 Choose File > Save.
The box-and-logo image is now fully composed and ready for placement in the Adobe Illustrator
layout. If you have a copy of Illustrator, you can try placing the exported image in the Mailer.ai file
located in the Lesson04 folder.
COMBINING ILLUSTRATOR GRAPHICS AND PHOTOSHOP IMAGES
PAGE 9 OF 9
Exploring on your own
Now that you’ve learned the basic steps involved in combining an Illustrator graphic with a
Photoshop image, you can try applying the logo to a new Photoshop image.
1 Locate and open the Lesson04 folder. Then select Cap.psd or Cup.psd, and click Open.
2 Choose File > Place. Select the Logo.ai file, and click Place.
Now try out techniques presented here to blend the graphic with the Photoshop image. For
more information on combining graphics and Photoshop images, refer to the Adobe Photoshop
User Guide.
This tutorial is excerpted from Adobe Photoshop Classroom in a Book®, part of the official training series for Adobe graphics and
publishing software. Published by Adobe Press, the series is available in several languages. For purchasing information, contact
Macmillan Publishing at http://mcp.com or 1-800-428-5331.
Adobe, the Adobe logo, Classroom in a Book, Illustrator, Photoshop, and PostScript are trademarks of Adobe Systems Incorporated which may be
registered in certain jurisdictions. Windows is a registered trademark of Microsoft Corporation in the U.S. and other countries. Mac is a trademark
of Apple Computer, Inc. registered in the U.S. and other countries. 1998 Adobe Systems Incorporated. All rights reserved.
