SURE-LITES IMPORTANT SAFEGUARDS Installation Instructions For AC L.E.D. Exit Signs, CX Series
advertisement
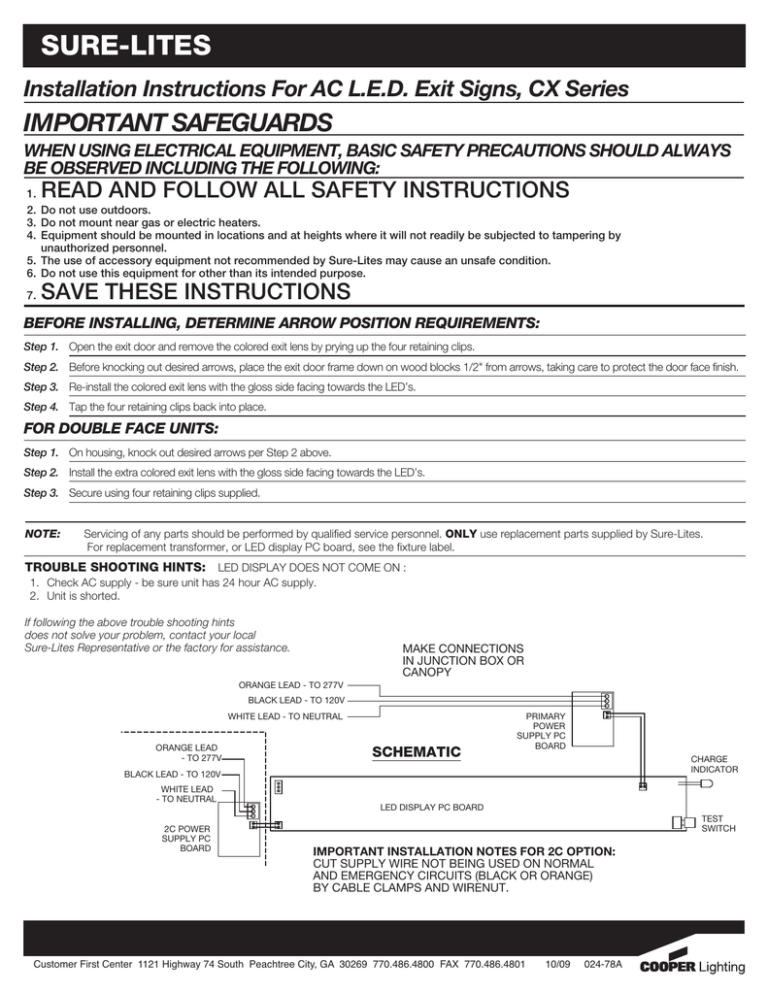
SURE-LITES Installation Instructions For AC L.E.D. Exit Signs, CX Series IMPORTANT SAFEGUARDS WHEN USING ELECTRICAL EQUIPMENT, BASIC SAFETY PRECAUTIONS SHOULD ALWAYS BE OBSERVED INCLUDING THE FOLLOWING: READ AND FOLLOW ALL SAFETY INSTRUCTIONS 1. 2. Do not use outdoors. 3. Do not mount near gas or electric heaters. 4. Equipment should be mounted in locations and at heights where it will not readily be subjected to tampering by unauthorized personnel. 5. The use of accessory equipment not recommended by Sure-Lites may cause an unsafe condition. 6. Do not use this equipment for other than its intended purpose. 7. SAVE THESE INSTRUCTIONS BEFORE INSTALLING, DETERMINE ARROW POSITION REQUIREMENTS: Step 1. Open the exit door and remove the colored exit lens by prying up the four retaining clips. Step 2. Before knocking out desired arrows, place the exit door frame down on wood blocks 1/2" from arrows, taking care to protect the door face finish. Step 3. Re-install the colored exit lens with the gloss side facing towards the LED’s. Step 4. Tap the four retaining clips back into place. FOR DOUBLE FACE UNITS: Step 1. On housing, knock out desired arrows per Step 2 above. Step 2. Install the extra colored exit lens with the gloss side facing towards the LED’s. Step 3. Secure using four retaining clips supplied. NOTE: Servicing of any parts should be performed by qualified service personnel. ONLY use replacement parts supplied by Sure-Lites. For replacement transformer, or LED display PC board, see the fixture label. TROUBLE SHOOTING HINTS: LED DISPLAY DOES NOT COME ON : 1. Check AC supply - be sure unit has 24 hour AC supply. 2. Unit is shorted. If following the above trouble shooting hints does not solve your problem, contact your local Sure-Lites Representative or the factory for assistance. ORANGE LEAD - TO 277V MAKE CONNECTIONS IN JUNCTION BOX OR CANOPY BLACK LEAD - TO 120V WHITE LEAD - TO NEUTRAL ORANGE LEAD - TO 277V SCHEMATIC PRIMARY POWER SUPPLY PC BOARD CHARGE INDICATOR BLACK LEAD - TO 120V WHITE LEAD - TO NEUTRAL 2C POWER SUPPLY PC BOARD LED DISPLAY PC BOARD TEST SWITCH IMPORTANT INSTALLATION NOTES FOR 2C OPTION: CUT SUPPLY WIRE NOT BEING USED ON NORMAL AND EMERGENCY CIRCUITS (BLACK OR ORANGE) BY CABLE CLAMPS AND WIRENUT. Customer First Center 1121 Highway 74 South Peachtree City, GA 30269 770.486.4800 FAX 770.486.4801 10/09 024-78A SURE-LITES WALL MOUNTING INSTALLATION: Step 1. Extend unswitched 24 hour AC supply of rated voltage to junction box (by others). Circuit should not be energized at this time. Step 2. Knock out wire access hole and the appropriate mounting pattern to fit junction box being used. Step 3. Dress wires through wire access hole. Secure wires inside housing by positioning cable tie mounting pad near wire access hole and secure with cable tie. Step 4. Connect AC supply wires and ground wire in accordance with local codes. Wirenut any unused supply wire. 120V-BLACK, 277V-ORANGE, NEUTRAL-WHITE, GROUND-GREEN. Dress wires and push into junction box. Step 5. Mount housing to junction box with 2 screws (by others). Step 6. Energize AC supply, LED display will come on. CEILING OR END MOUNT INSTALLATION: Step 1. Extend unswitched 24 hour AC supply of rated voltage to junction box (by others). Circuit should not be energized at this time. CEILING MOUNT 3" LONG THREADED NIPPLE 1-1/4" APPROX. Step 2. Screw 3" long threaded nipple approximately 1-1/4" into mounting plate, Attach mounting plate to junction box with 2 screws (by others). Dress wires through large slots. MOUNTING PLATE Step 3. Unscrew bracket from housing by removing 2 screws. HEX NUT Step 4. Remove three 5/8" diameter knockouts (top or sides as required). Support each knockout within 1/2" on two sides before removing. Step 5. Fasten canopy to housing by using 3/4" long threaded nipple and 2 hex nuts. CANOPY HOUSING Step 6. Relocate wires on bracket towards canopy location being used. Dress wires through small hole into canopy. 3/4" LONG THREADED NIPPLE Step 7. Connect AC supply wires and ground wire in accordance with local codes. Wirenut any un0used supply wire. 120V-BLACK, 277VORANGE, NEUTRAL-WHITE, GROUND-GREEN. Step 8. Mount housing/canopy by sliding 3" long threaded nipple on mounting plate through center hole in canopy and securing with hex nut. BRACKET Step 9. Screw bracket back into housing. Take care on end mount installation to dress wires through slots on sides of bracket. HEX NUT Step 10. Energize AC supply, LED display will come on. END MOUNT IF END MOUNTING THIS SIDE: DRESS WIRES UNDER TAB AND THROUGH SLOT ON BACK HOUSING CANOPY MOUNTING PLATE BRACKET HEX NUT IF END MOUNTING THIS SIDE: DRESS WIRES UNDER TAB AND THROUGH SLOT ON SIDE 1-1/4" APPROX. 3/4" LONG THREADED NIPPLE 3" LONG THREADED NIPPLE HEX NUT Customer First Center 1121 Highway 74 South Peachtree City, GA 30269 770.486.4800 FAX 770.486.4801 10/09 024-78A
