For ConTech Lighting RL8SQF 8" Square Non-IC CFL Recessed Housing;... INSTALLATION PROCEDURES
advertisement
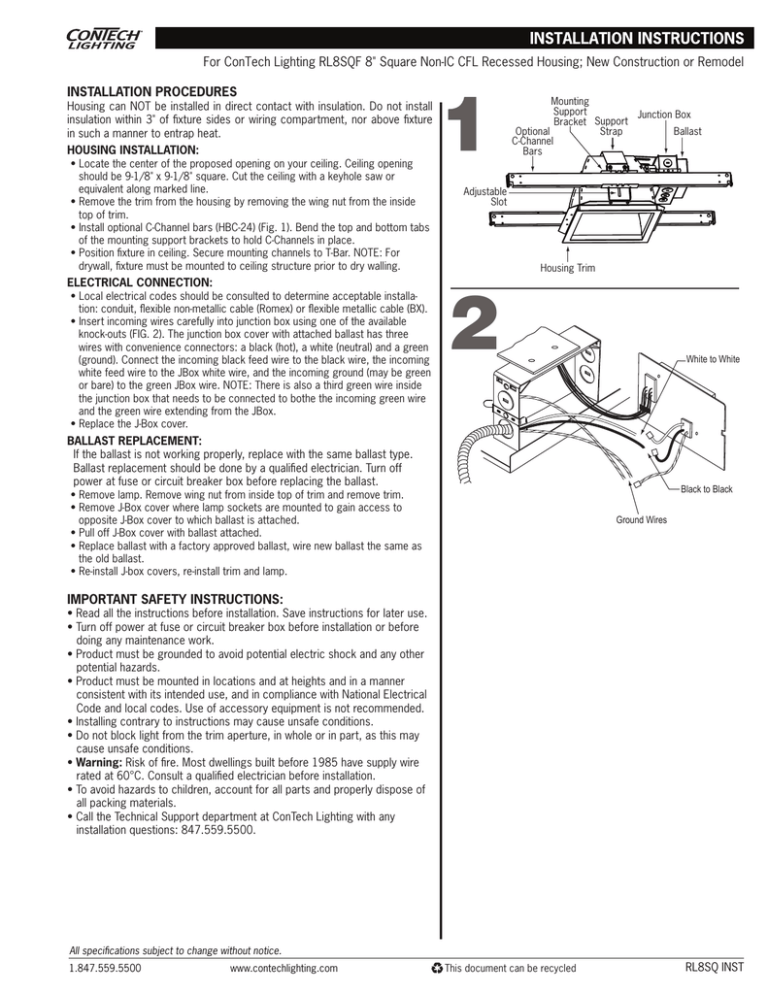
For ConTech Lighting RL8SQF 8" Square Non-IC CFL Recessed Housing; New Construction or Remodel INSTALLATION PROCEDURES Mounting Support Junction Box Bracket Support Optional Strap Ballast C-Channel Bars Housing can NOT be installed in direct contact with insulation. Do not install insulation within 3" of fixture sides or wiring compartment, nor above fixture in such a manner to entrap heat. HOUSING INSTALLATION: • Locate the center of the proposed opening on your ceiling. Ceiling opening should be 9-1/8" x 9-1/8" square. Cut the ceiling with a keyhole saw or equivalent along marked line. • Remove the trim from the housing by removing the wing nut from the inside top of trim. • Install optional C-Channel bars (HBC-24) (Fig. 1). Bend the top and bottom tabs of the mounting support brackets to hold C-Channels in place. • Position fixture in ceiling. Secure mounting channels to T-Bar. NOTE: For drywall, fixture must be mounted to ceiling structure prior to dry walling. ELECTRICAL CONNECTION: • Local electrical codes should be consulted to determine acceptable installation: conduit, flexible non-metallic cable (Romex) or flexible metallic cable (BX). • Insert incoming wires carefully into junction box using one of the available knock-outs (FIG. 2). The junction box cover with attached ballast has three wires with convenience connectors: a black (hot), a white (neutral) and a green (ground). Connect the incoming black feed wire to the black wire, the incoming white feed wire to the JBox white wire, and the incoming ground (may be green or bare) to the green JBox wire. NOTE: There is also a third green wire inside the junction box that needs to be connected to bothe the incoming green wire and the green wire extending from the JBox. • Replace the J-Box cover. Adjustable Slot 2 Housing Trim White to White BALLAST REPLACEMENT: If the ballast is not working properly, replace with the same ballast type. Ballast replacement should be done by a qualified electrician. Turn off power at fuse or circuit breaker box before replacing the ballast. Black to Black • Remove lamp. Remove wing nut from inside top of trim and remove trim. • Remove J-Box cover where lamp sockets are mounted to gain access to opposite J-Box cover to which ballast is attached. • Pull off J-Box cover with ballast attached. • Replace ballast with a factory approved ballast, wire new ballast the same as the old ballast. • Re-install J-box covers, re-install trim and lamp. Ground Wires IMPORTANT SAFETY INSTRUCTIONS: • Read all the instructions before installation. Save instructions for later use. • Turn off power at fuse or circuit breaker box before installation or before doing any maintenance work. • Product must be grounded to avoid potential electric shock and any other potential hazards. • Product must be mounted in locations and at heights and in a manner consistent with its intended use, and in compliance with National Electrical Code and local codes. Use of accessory equipment is not recommended. • Installing contrary to instructions may cause unsafe conditions. • Do not block light from the trim aperture, in whole or in part, as this may cause unsafe conditions. • Warning: Risk of fire. Most dwellings built before 1985 have supply wire rated at 60°C. Consult a qualified electrician before installation. • To avoid hazards to children, account for all parts and properly dispose of all packing materials. • Call the Technical Support department at ConTech Lighting with any installation questions: 847.559.5500. All specifications subject to change without notice. 1.847.559.5500 www.contechlighting.com This document can be recycled RL8SQ INST
