Project 3: Image Modification Deadline: 6:00pm , 2 Oct, Monday. Description:
advertisement
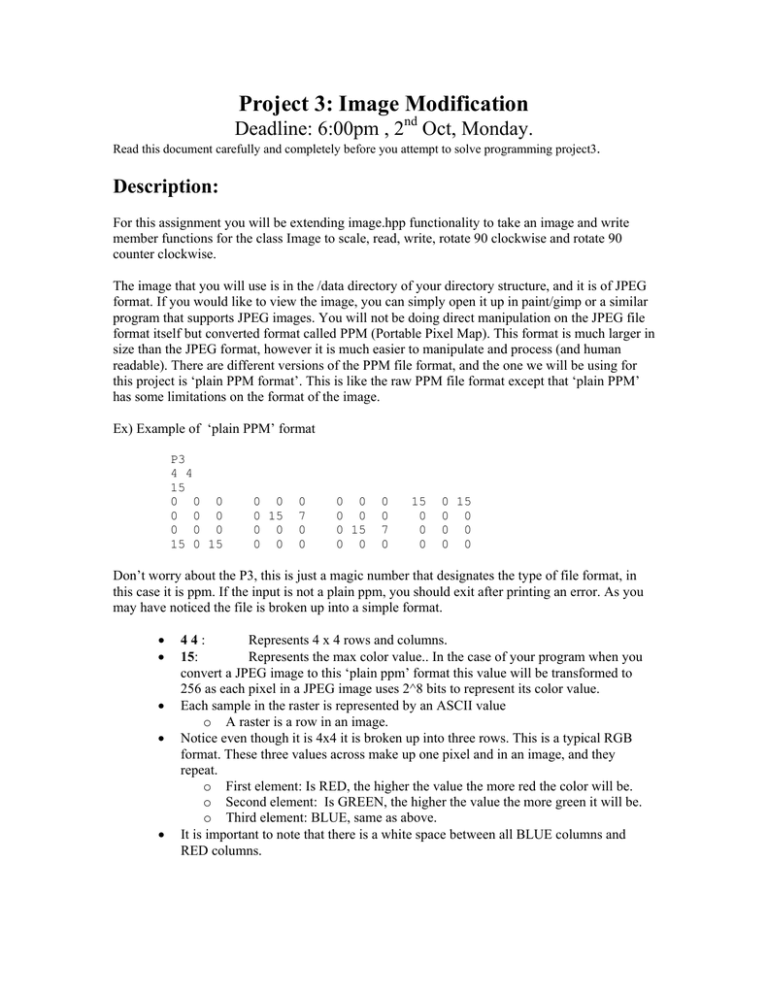
Project 3: Image Modification Deadline: 6:00pm , 2nd Oct, Monday. Read this document carefully and completely before you attempt to solve programming project3. Description: For this assignment you will be extending image.hpp functionality to take an image and write member functions for the class Image to scale, read, write, rotate 90 clockwise and rotate 90 counter clockwise. The image that you will use is in the /data directory of your directory structure, and it is of JPEG format. If you would like to view the image, you can simply open it up in paint/gimp or a similar program that supports JPEG images. You will not be doing direct manipulation on the JPEG file format itself but converted format called PPM (Portable Pixel Map). This format is much larger in size than the JPEG format, however it is much easier to manipulate and process (and human readable). There are different versions of the PPM file format, and the one we will be using for this project is ‘plain PPM format’. This is like the raw PPM file format except that ‘plain PPM’ has some limitations on the format of the image. Ex) Example of ‘plain PPM’ format P3 4 4 15 0 0 0 0 0 0 0 0 0 15 0 15 0 0 0 15 0 0 0 0 0 7 0 0 0 0 0 0 0 15 0 0 0 0 7 0 15 0 0 0 0 15 0 0 0 0 0 0 Don’t worry about the P3, this is just a magic number that designates the type of file format, in this case it is ppm. If the input is not a plain ppm, you should exit after printing an error. As you may have noticed the file is broken up into a simple format. • • • • • 44: Represents 4 x 4 rows and columns. 15: Represents the max color value.. In the case of your program when you convert a JPEG image to this ‘plain ppm’ format this value will be transformed to 256 as each pixel in a JPEG image uses 2^8 bits to represent its color value. Each sample in the raster is represented by an ASCII value o A raster is a row in an image. Notice even though it is 4x4 it is broken up into three rows. This is a typical RGB format. These three values across make up one pixel and in an image, and they repeat. o First element: Is RED, the higher the value the more red the color will be. o Second element: Is GREEN, the higher the value the more green it will be. o Third element: BLUE, same as above. It is important to note that there is a white space between all BLUE columns and RED columns. To convert, between JPEG format and PPM then to PPM –plain and back to JPEGformat is done by the following commands. • user@linprog4.cs.fsu.edu/prj_3/data> jpegtopnm image.jpg > image.ppm • user@linprog4.cs.fsu.edu/prj_3/data> pnmtopnm –plain image.ppm > image.pnm o Once in the pnm format you can view the image and it will be similar to the format listed above. This image will be quite large. • user@linprog4.cs.fsu.edu/prj_3/data> pnmtojpeg image.pnm > jpg_image.jpg If you would like to read further about this file format you can view these links. • http://www.die.net/doc/linux/man/man5/ppm.5.html • http://www.die.net/doc/linux/man/man1/jpegtopnm.1.html • http://www.die.net/doc/linux/man/man1/pnmtopnm.1.html • http://www.die.net/doc/linux/man/man1/pnmtojpeg.1.html Implementation: • scaledown(int factor): o This function will basically create a scaled down image of the original image. Given an image size of say 804x600 pixels and some reduction factor your image will be reduced by that factor. For example, if you have an 804x600 image and you reduce by a factor of 6, the resulting image will be 804/6 x 600/6 = 134 x 100 pixels. Ex) • rotate_clockwise: o This function will rotate the image 90 degrees to the right. For example, if you store information for each pixel in an image. Ex) • rotate_counter_clockwise: o Is the same as Rotate 90 clockwise function except that you rotate clockwise 90 degrees to the left. Ex) • Load Image: o The load image function will read the image.pnm file and save its data into a mapping. • Save Image: o Save Image function will take your modifications to the mapping and resave them as a image.pnm file. ScaleDown Algorithm: • When reducing the size of an image each pixel is found by averaging the number of pixels from your original image. Each pixel location is made up of two points; and ‘x’ coordinate and a ‘y’ coordinate. If we have a picture ‘P’ (our original) and a destination picture ‘D’(our scaled down image), the pixel location in D[x0, y0] can be shown by the equation below, where factor is the reduction value. factor −1 factor −1 • • D ( x0 , y0 ) = ∑ ∑ x =0 y =0 P((x0 * factor ) + x,( y0 * factor ) + y ) factor * factor Each pixel in the original image ‘P’ is reduced by averaging the pixel locations in ‘P’ to corresponding points in image ‘T’ using the above equation. For sake of ease, you may want to avoid creating fractional results by your reduction factors. For example, if you have an image that is 640x480 and your reduction factor is 6, then you destination image will be of (640/6) x (480/6) = 106.67 x 80. So, you may want to ignore that last 4 pixels of this image and use you a reduction factor of 6 on 636 x 480 instead. Hence, making your destination image of size (636/6) x (480/6) = 106 x 80 Your projects directory structure: • • The same as described in project 2. You must comment your code using Doxygen. We will read you code using Doxygen generated documentation. Running make should produce the prj_3 executable under the bin directory. Running ‘doxygen’ with the included Doxyfile should produce documentation under your doc/html directory Getting Started: • • • • • svn checkout https://svn.cs.fsu.edu/repos/teamXY/prj_3 In your /data directory will be the image.jpg file. Familiarize your self with conversion commands listed above. Given those commands you should be able to freely convert between the formats. o Note: Be aware since you are using a vector to store bit representations of the ASCII characters shown as number in that file you will have to devise a way to convert between the ASCII value of the number to binary format. Make modifications (i.e rotate, scale) then convert back to ASCII from binary. o Remember that since the bit set for the vector is set to 24, each of the R G B will be represented by 8 bits, 1 Bytes per color value. Start with the save and load member functions of the image class. You want to be able to read in the data from a file, store it, and then write back out to a file first. Then work on rotate functions Last, work on scaling function Input and Output Format: • Input: o Your input will be your pnm image file path with the scale down factor on the command line. linprog4@cs.fsu.edu/prj_3/bin:> prj_3 ../data/image.pnm 4 • Output: o Your program should output three separate image pnm files for each function implemented in the data directory (when run from the bin directory). rotate90.pnm anti-rotate90.pnm scale.pnm (Scaled down by a factor of 4 in this case) o Remember, you can check these by converting the pnm image file back to jpeg format by the commands listed above in the description. o If you run into a problem, post your problems on the discussion board of the blackboard.
