Adding UNCW courses Using “My Seaport”

Adding UNCW courses Using “My Seaport”
1.
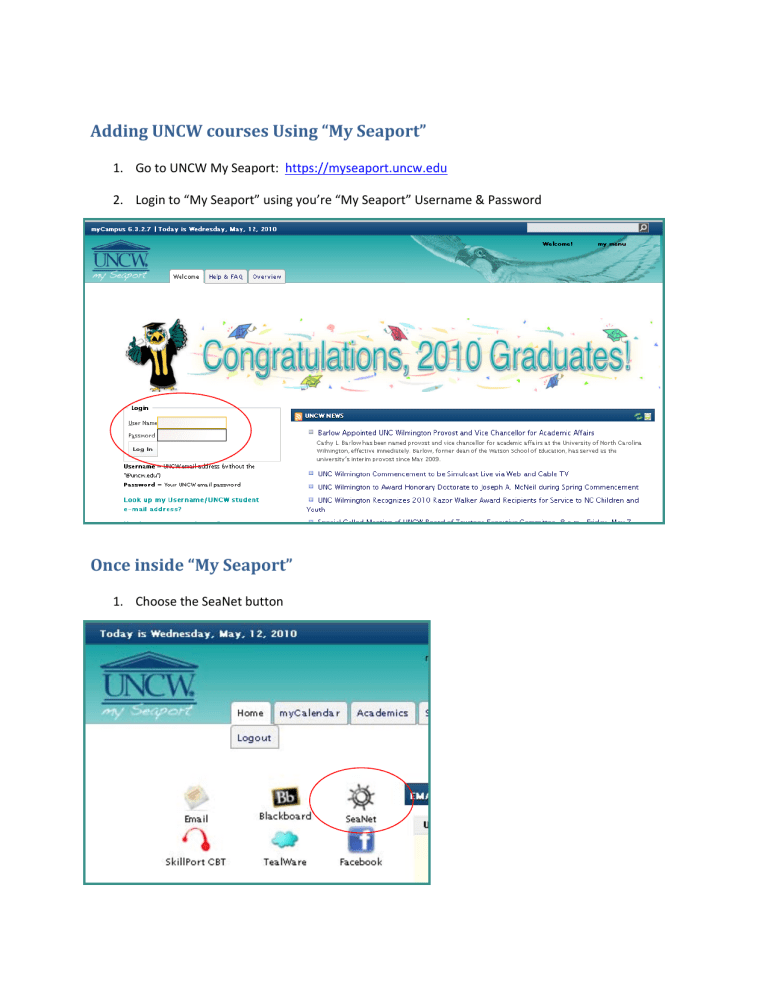
Go to UNCW My Seaport: https://myseaport.uncw.edu
2.
Login to “My Seaport” using you’re “My Seaport” Username & Password
Once inside “My Seaport”
1.
Choose the SeaNet button
Login to SeaNet
1.
By using My Seaport, you are automatically logged in to SeaNet.
However, if you start at the
SeaNet login screen (instead of My Seaport) you will need to login.
Login to SeaNet by entering your UNCW ID number and PIN (your PIN is originally the 6 numbers of your date of birth in the following order, 2 ‐ digit month, 2 ‐ digit day, 2 digit year).
Choosing the correct SeaNet Menu
Select the Option “Student Services & Financial Aid” to register for classes.
Choose “Registration”
Verify that you have been given the permission you need to register for advanced level courses
Select “Check your Registration Status”
Adding Classes through SeaNet
Choose the correct term
Select Registration Term
If you have been granted any special registration permissions, the course information would be listed at the bottom of this screen:
If professor gave you permission to take this class, then the overrides you need would be listed here.
Most frequently you would need major & pre ‐ requisite overrides.
If the overrides have not been entered, follow ‐ up with the professor – he or she may have forgotten.
Once Registration Opens, From the Main SeaPort Tab, choose “Add
Classes”
Choose Add/Drop Classes, scroll down to the bottom of the screen.
Enter the CRN #’s for each course that you want.
If you don’t know the CRN #’s, click “Class Search.”
To search from the list, choose the subject then scroll down and click
“Class Search”
Then subject screen provides a list of all the available courses in that subject.
Select the classes you want, and then scroll to the bottom and click either “Register” or “Add to Worksheet.”
Clicking either “Register” or “Add to Worksheet” will take you back to the Add/Drop Classes screen.
If you were able to successfully add the course it should be listed at the top under “Current Schedule.”
If you chose to “Add to Worksheet” the CRN number will be sitting in the little box at the bottom of the screen waiting for you to click submit.


