Adding a Service Indicator to a Student
advertisement

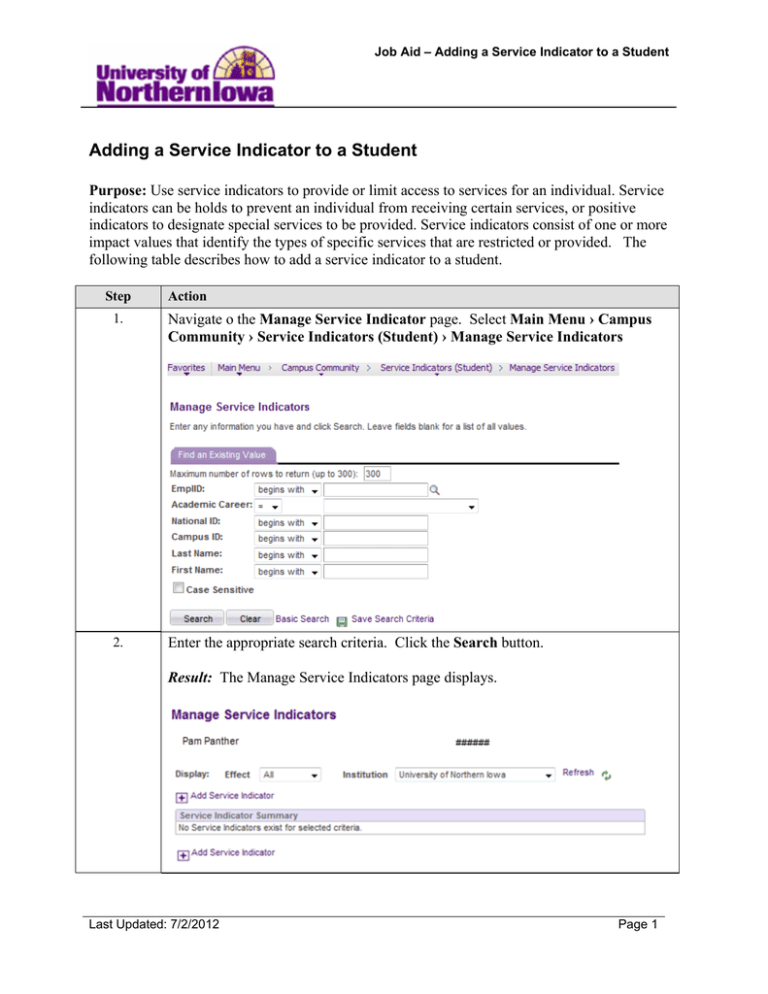
Job Aid – Adding a Service Indicator to a Student Adding a Service Indicator to a Student Purpose: Use service indicators to provide or limit access to services for an individual. Service indicators can be holds to prevent an individual from receiving certain services, or positive indicators to designate special services to be provided. Service indicators consist of one or more impact values that identify the types of specific services that are restricted or provided. The following table describes how to add a service indicator to a student. Step Action 1. Navigate o the Manage Service Indicator page. Select Main Menu › Campus Community › Service Indicators (Student) › Manage Service Indicators 2. Enter the appropriate search criteria. Click the Search button. Result: The Manage Service Indicators page displays. Last Updated: 7/2/2012 Page 1 Job Aid – Adding a Service Indicator to a Student Step 3. Action Click the Add Service Indicator link. Result: The Add Service Indicator page displays. Page 2 Last Updated: 7/2/2012 Job Aid – Adding a Service Indicator to a Student Step 4. Action Use the Add Service Indicator page to assign a new service indicator to the person ID. Complete the following: • • • • • Institution – Enter or select UNICS Service Indicator Code – Select the appropriate code. See handout. Service In Reason Code – Select the appropriate reason. Description – This field populates based on the reason selected. Effect – The system displays Negative or Positive 5. Notice that the system populated the Department field based on the value entered in the Service Ind Reason Code field. This field defines the department that is responsible for placing the service indicator (or that requested it be placed) on this individual's record. 6. In the Effective Period section, service impacts associated with a service indicator can be term-based or date-based. They are applied or released based on the start and end information that you enter. In this example, you want to apply the service indicator to specific terms. Enter or select “2112” (for Fall 2011) in the Start Term field and “2113” (for Sprint 2012) in the End Term field. Last Updated: 7/2/2012 Page 3 Job Aid – Adding a Service Indicator to a Student Step 7. Action In the Assignment Details section, enter: • Reference – Enter appropriate text (enter a reference number or other data that • 8. may assist in tracking and identifying the service indicator and its resolution.) Amount – The amount needed to satisfy and remove the service indicator In the Contact Information section, enter: • Contact ID – Enter or select the ID of the person to contact with questions about this service indicator. Note: The system populates the Contact Person field when you tab out of the Contact ID field. The Placed Person ID field contains the ID of the person who created the service indicator. 9. In the Services Impacted section, click the Impact Code link to view the Service Impact Description page. Click the Return button. 10. Note that the system displays the current day and time to indicator when the service indicator was assigned. Click the OK button. Result: The Manage Service Indicators page displays with the service indicator you just added. Page 4 Last Updated: 7/2/2012


