Job Aid Creating a Special Request
advertisement
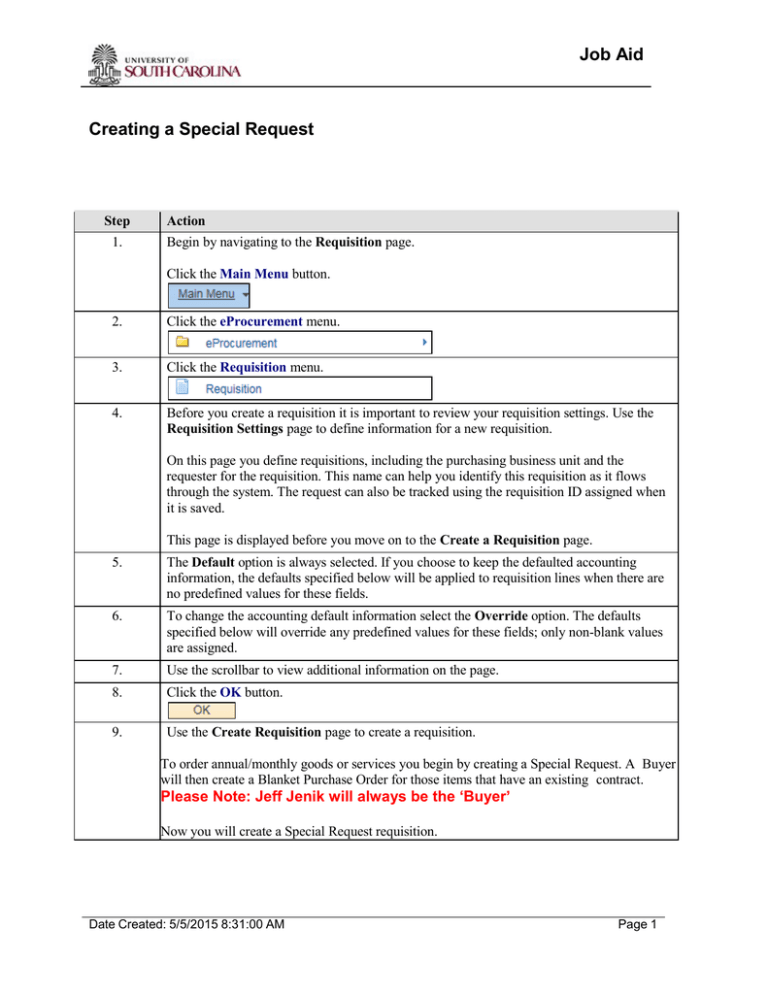
Job Aid Creating a Special Request Step 1. Action Begin by navigating to the Requisition page. Click the Main Menu button. 2. Click the eProcurement menu. 3. Click the Requisition menu. 4. Before you create a requisition it is important to review your requisition settings. Use the Requisition Settings page to define information for a new requisition. On this page you define requisitions, including the purchasing business unit and the requester for the requisition. This name can help you identify this requisition as it flows through the system. The request can also be tracked using the requisition ID assigned when it is saved. This page is displayed before you move on to the Create a Requisition page. 5. The Default option is always selected. If you choose to keep the defaulted accounting information, the defaults specified below will be applied to requisition lines when there are no predefined values for these fields. 6. To change the accounting default information select the Override option. The defaults specified below will override any predefined values for these fields; only non-blank values are assigned. 7. Use the scrollbar to view additional information on the page. 8. Click the OK button. 9. Use the Create Requisition page to create a requisition. To order annual/monthly goods or services you begin by creating a Special Request. A Buyer will then create a Blanket Purchase Order for those items that have an existing contract. Please Note: Jeff Jenik will always be the ‘Buyer’ Now you will create a Special Request requisition. Date Created: 5/5/2015 8:31:00 AM Page 1 Job Aid Step 10. Action Use the Special Request link to create requisitions for items or goods that have no item ID number. This special request can be created for any procurement type, but not limited to the following: *Purchasing for Capital Projects *Operating Expenses *Assets *Other Projects 11. Click the Special Requests link. 12. Use the Item Details section to provide specific details about the item that you need. 13. Enter the desired information into the Item Description field. Enter a valid value e.g. "Fertilizer". 14. Enter the desired information into the Price field. Enter a valid value e.g. "24.99". 15. Enter the desired information into the Quantity field. Enter a valid value e.g. "10". 16. Use the Category Lookup button to search for a description of the item you are purchasing. Category information helps reduce redundant data entry during both item setup and requisition and purchase order processing. When looking for a Category it is important to remember that you are looking for something that matches closely to what you are requesting. It does not need to be an exact match. For this example, you will select a category from the ALL PURPOSE ITEMS options. 17. Click the Category Lookup button. 18. Click the Find button. 19. Use the scrollbar to view additional information on the page. 20. Click the 4900 link. 21. Click the Choose a date button. 22. Click the 30 object. Page 2 Date Created: 5/5/2015 8:31:00 AM Job Aid Step Action 23. Click the Supplier Name Lookup button. 24. Click the Find button. 25. Enter the desired information into the Name field. Enter a valid value e.g. "Fair". 26. Click the Find button. 27. Click the C000000516 link. 28. Use the scrollbar to view additional information on the page. 29. If you've finished adding items click the Add to Cart button. 30. As you add items to the requisition, they appear in the Cart Summary indicated by the number of lines added. To view the items in your cart click the cart icon. 31. Click the Checkout button. 32. Use the Checkout - Review and Submit page to review, edit, and submit a requisition for approval. 33. Use the scrollbar to view additional information on the page. 34. It is important to remember to always Check Budget before saving and submitting. Click the Check Budget link. 35. Budget checking saves your requisition in an Open Status if there are funds available and the system will show the status as "Valid". If there are insufficient funds for this a c c o u n t i n g line, your requisition saves with an Error Status. To continue with this requisition, funds need to be placed in the account and the requisition process begins again. 36. Click the OK button. 37. Use the scrollbar to view additional information on the page. 38. Note that the Budget Checking Status is now "Valid". The requisition for Fertilizer is complete. You can now submit the requisition. 39. Click the Save & submit button. 40. The Confirmation page displays basic information about the requisition and the number of items it contains. It also displays the Status of the item submitted for approval. Date Created: 5/5/2015 8:31:00 AM Page 3 Job Aid Step 41. Action A Pre-Encumbrance Balance is the amount that you expect to spend but have no legal obligation to spend. A requisition is a typical Pre- Encumbrance-encumbrance transaction. 42. The requisition is saved and assigned a Requisition ID number. 43. Use the Dept & Project Approval Line to view the workflow. The requisition requires approval of amounts and ChartFields. After a requisition is created, the system routes the transaction to an approver. The approver will view and take action. 44. You have completed your request and it is now in your approver's worklist and email. 45. Congratulations, you have successfully learned how to create a special request for a requisition. End of Procedure. Please Note: • The ship to ID is your building number. (ex. 903=Penland) Jeff Jenik will always be the ‘Buyer’ Page 4 Date Created: 5/5/2015 8:31:00 AM
