MR Training Manual 8.11.15 - Vanderbilt University Medical Center
advertisement
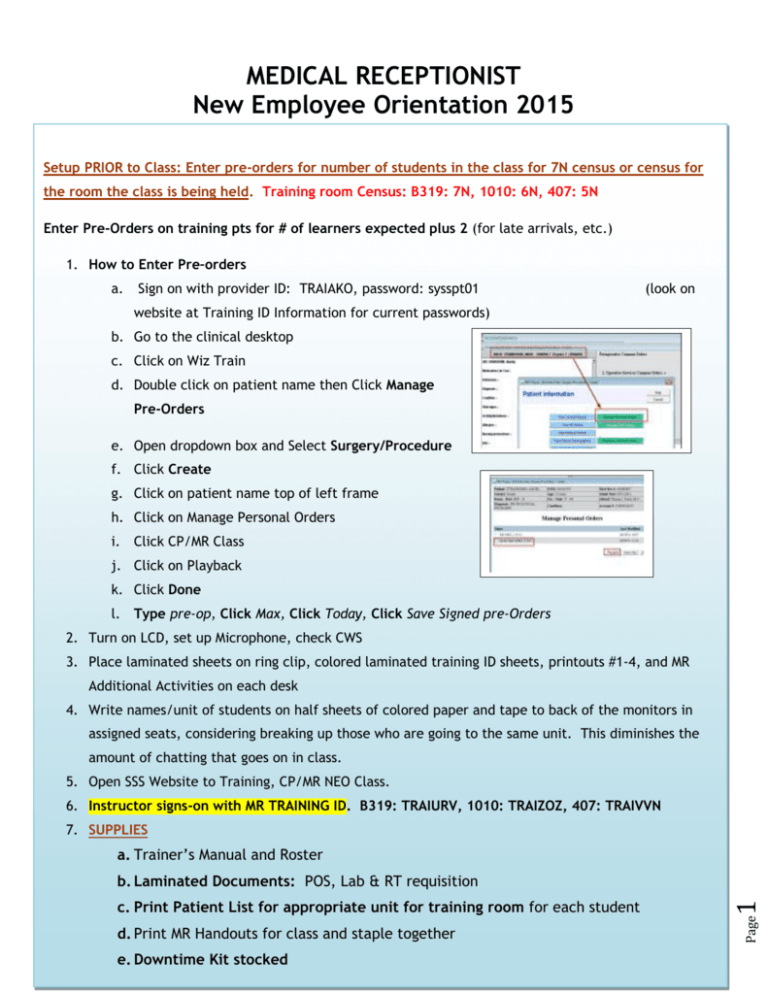
MEDICAL RECEPTIONIST New Employee Orientation 2015 Setup PRIOR to Class: Enter pre-orders for number of students in the class for 7N census or census for the room the class is being held. Training room Census: B319: 7N, 1010: 6N, 407: 5N Enter Pre-Orders on training pts for # of learners expected plus 2 (for late arrivals, etc.) 1. How to Enter Pre–orders a. Sign on with provider ID: TRAIAKO, password: sysspt01 (look on website at Training ID Information for current passwords) b. Go to the clinical desktop c. Click on Wiz Train d. Double click on patient name then Click Manage Pre-Orders e. Open dropdown box and Select Surgery/Procedure f. Click Create g. Click on patient name top of left frame h. Click on Manage Personal Orders i. Click CP/MR Class j. Click on Playback k. Click Done l. Type pre-op, Click Max, Click Today, Click Save Signed pre-Orders 2. Turn on LCD, set up Microphone, check CWS 3. Place laminated sheets on ring clip, colored laminated training ID sheets, printouts #1-4, and MR Additional Activities on each desk 4. Write names/unit of students on half sheets of colored paper and tape to back of the monitors in assigned seats, considering breaking up those who are going to the same unit. This diminishes the amount of chatting that goes on in class. 5. Open SSS Website to Training, CP/MR NEO Class. 6. Instructor signs-on with MR TRAINING ID. B319: TRAIURV, 1010: TRAIZOZ, 407: TRAIVVN 7. SUPPLIES a. Trainer’s Manual and Roster d. Print MR Handouts for class and staple together e. Downtime Kit stocked Page c. Print Patient List for appropriate unit for training room for each student 1 Gettingb. Laminated Started: 5 min POS, Lab & RT requisition Documents: Welcome: Trainer show slide #1 Introductions with explanation of CAPs role Restrooms Length of class is 4 hours with 1 break. Explain handouts – o Class Handouts 1. Computerized POS (laminated on ring clip) 2. Computerized Requisition (laminated on ring clip) 3. Patient list o Unit handout (paper copies to take and use in class and on unit) 1. MR HANDOUT #1: Notes page. If users learn best by taking notes, this page was made for them! 2. MR HANDOUT #2: One Time Set Ups use immediately on the unit 3. MR HANDOUT #3: Systems Access Checklist Refer users to partner with their Security Manager to get racfid issued and setup. Will prevent access to Medipac if not issued. 4. 3 blank lab requisitions for practice activity 5. MR additional activities handouts Trainer: Your job as a Medical Receptionist will vary based on your specific unit. Today you will learn about patient care applications as they related to your job. For class today, everyone will be using a Training ID. Your permanent ID and systems access will be set up by your security manager (on most units, the AA). A checklist is provided for things that need to be done to complete your systems access and set up your Virtual Clinical Page 2 Workstation. StarPanel: (30 min) Driver: Show slide #2 OBJECTIVES and explain StarPanel is the full electronic medical record. StarBrowser is the inpatient view of StarPanel designed for inpatient clinicians and quick link includes icons down the left side of the screen. Inpatient Whiteboard: Trainer: 1. Until you sign on you have a nonsecure view of the patient list, and indicators for orders, labs, etc. 2. Nurses ONLY acknowledge orders here . Sign on: Trainer/Driver: 1. Press Spacebar…sign-on **Unclick Virtual to sign in 2. a. VCWS vs non virtual b. Explain VCWS: i. Tap in or Sign on to virtual and open all your applications. ii. Don’t close applications, use Red X to sign off or tap out. iii. As you move from one computer to another you will go right into where you left off. iv. Always check patient name in new room to avoid documenting on wrong patient! You will only do it once! StarPanel practice: Trainer: 1. HANDOUT #2: Refer user to one-time setups for inpatient whiteboard & frame sub tabs Driver: Page click in a white spot or drag lines between up and down 3 2. Navigating in StarPanel: Numbered tabs at top =Frame number, or resize a frame by double 1. Click inpatient census in black bar 2. Locate patient’s name on Patient List and find patient on census list…may need to scroll or resize to locate 3. Click MR# to load patient’s entire chart 4. Click Pt List to view full census for unit 5. Click ACTIONS to the right of your patient’s name 6. Click CHANGE 7. Select Medical Receptionist’s Menu Actions Menu: Trainer: Review most frequently used functions by MR from Actions menu. Instruct how to change the view to Medical Receptionist view by using the change button and choosing the appropriate actions menu view. Remind to click on Actions from the patient list in top frame. Driver: 1. Click AllDocuments (will open in frame 2) – Trainer: this contains a record of any document that pertains to a patient’s medical history at Vanderbilt University Medical Center. Frame below census opens with all of the documents in the pt’s chart a. Type “Property” in the Title search field b. Press ENTER c. Click on one of the Property Records 2. Property documents opens in a new popup window. Review the scanned document of 4. Click frame 1 tab to return to patient list Page 3. Click on the red X at the top R to close the popup 4 the property the pt had with them at admission. 5. Click Actions menu next to your patient’s name 6. Click e-Docs (will open in frame 2) a. Opens in a new popup window b. Click Downtime tab. 2nd document listed Downtime and Code Req (bottom of list) c. Trainer: Explain broken up into Acute Care, Specialty, and ICU areas. When HEO/Wiz, the order entry system goes down, this document used to order labs, blood products and other tests. 7. Click on the red X at the top R to close the popup 8. Click on Actions menu next to your patient’s name 9. Click OPC (will open in frame 2) a. Overview of Patient Care b. Printed by MR for nurses prior to shift change c. Nurses use to give and receive report… Handover tool d. Pt information from orders, test results, nursing & MD Trainer: Point out the following as learners locate on OPC Situation: Team Page can be done from here Patient Contact Information… phone # nurse collected Synopsis: Residents note if what brought patient to the hospital Alerts: Allergies, Isolation, Fall, Advance Directive: end of life document Background: past medical/surgical history Assessment: Nursing documentation Recommendations: Orders from HEO Wiz Explain OPC are printed for nurses prior to shift change a. Click Actions b. Click OPC Click frame 1 tab 11. Point out Care partner and Charge nurse snapshot 12. Explain CarePartner Snapshot printed prior to shift change…same steps as OPC 13. Explain Charge Nurse Snapshot printed prior to shift change a. One document prints with all patients listed Page 10. 5 c. Note Print button - DO NOT click 14. Click IVT Request Form. (learner will just watch as you will show live patients) Trainer: MR, CP or RN completes this form to request IVT services. It displays on their dashboard so they are not interrupted by calls and pages. See Handout #2 for instructions on setting up the IVT dashboard in your favorites. Point out the following as learners locate on Actions Menu (no need to go to them) Appointments: If the pt has upcoming appointments, they will display here Consent Documents: Some consents will be handwritten and scanned but many are electronically collected now. Demographics: Insurance and patient contact information displays in frame below MR Dashboard: (15 min) Trainer: MR Dashboard is what you should see when you first sign on to the computer as an MR. It was designed for MR’s to promote efficiency and facilitate notification of orders once requisitions no longer print– see HANDOUT #2: One Time Set ups handout for instructions to set this up on your own ID. Go through the dashboard and have users watch since these are live patients. 1. The MR dashboard is located under the Dashboards list in the black menu bar of Page 6 StarPanel. a. On your own ID you will save the Inpatient Whiteboard and the MR ancillary Dashboard to your favorites as you see here so you can easily toggle back and forth if change roles i. MR dashboard – use as MR ii. Inpatient WB – use as CP Driver: 1. Show the dashboard by clicking on MR Ancillary 2. Check the unit census – 3. Click on Change Panel if you need to change 4. Trainer selects ___(census of training room) (this will take you into the live region). 5. Show them how to select single and multiple units. 6. 7. Click OK 8. The dashboard is a view of the unit census with columns to show: a. Pt. MRN, age, location and including security codes b. Action button (OPC is here) c. Team Pager – Click to text the provider (x out -don’t click send) d. Orders - shows new orders, red for STAT orders, P for Preorders you need to playback at appropriate time (more on this later) e. Ancillary Orders – initially just RT and EKG i. RT – green is a routine order and red is for STAT. From the MR Dashboard, click on the order indicator. Review the order and click “Acknowledge orders” to acknowledge you have seen the order. A hollow box indicates the order has been acknowledged. By acknowledging, you are showing you saw the order and it is the electronic equivalent of picking the paper requisition up off of the printer. STAT orders are called to the RT team. Page 7 Routine orders will be seen by RT on their dashboard. ii. EKG – the indicator colors are the same as RT’s but the process for notifying EKG will be specific for each unit. There is no automatic notification for EKG orders. f. Indicators. Currently there are indicators for Orders/preorders, RT orders, EKG orders, code status, Discharge Appointments and Discharge orders. g. In the notes column, click in the blank space to make notes for MR or Charge RN. For example, this is a way to track Consents, pt specific data from shift to shift and contact precautions, etc. h. Discharge Appointment indicator provides notification of any follow-up appointments made since admission. If the indicator is white, no appointments have been scheduled and follow up is needed with the patient’s RN. i. D/C indicator shows if there has been an order placed to discharge the patient. HEO/Wiz: (30 min) Driver: show HEO/Wiz video (3 min) Driver: show slide #3 OBJECTIVES Driver: 1. Double click on Green Wizard hat to open HEO/ Wiz Training region Trainer: Confidential Status N= pt requested no info be given out G= general info such as room number can be given out U = unknown NS = No info and Security Risk, i.e. Victim of violent crime Search for patient. Type Ztest Printouts button Refresh(refreshes the census after a Medipac transfer/discharge) Printouts Button: Trainer: Page 8 Other Things from Census View Printouts button used for printing most important list of day…The patient list used for tracking patient movements throughout the shift. Driver: Click on Printouts, demonstrate printing a patient list from Printouts button – Don’t print Diet List is printed (for Adult Units) prior to the arrival of the food cart in Adult Hospital. Pre-Orders Playback: Trainer: What did the purple P indicate to the left of a pt’s name? Preorders are entered by a provider and stored prior to the patient being placed in a Medipac bed. A purple “p” alerts medical receptionist to activate the orders. Driver: 1. Double click on your same patient 2. Click Manage PreOrder (list of preorders with today as playback date will be displayed) 3. Verify the correct preorder set is selected Trainer: Do NOT Attempt to playback Unsigned orders-check with Charge Nurse for date to playback. Driver: 4. Click Playback. Preorders load 5. Scroll to bottom and click next. The orders will load & flash across the screen 6. Click Next. The preorders report will be displayed. This document is also sent to StarPanel and if Wiz were down during the time you needed to playback the orders you could access this 8. Click Playback Orders Page 7. Scroll to bottom of the View/ Playback orders screen 9 document in StarPanel, print it and use for downtime orders. 9. Click Yes to “Are You Sure?” HEO closes once orders are played back. POS and Reqs print 1. Click REFRESH - Purple P goes away Some units get more preorders than others. Dialysis orders are only played back by Dialysis Staff Reprint Requisition: Driver: 1. Click on Patient’s name 2. Select Reprint Req…Reqs can be printed for yesterday, today, tomorrow 3. Reprint “cbc/plt/diff in 0500 – prints to closest printer on unit Trainer: Why would you reprint a req? Lost, damaged, need early Processing Orders: Trainer: When orders are entered directly by a provider or nurse or playback by the MR, a hard copy of the orders print on the inpt units. CLASS HANDOUTS (laminated): have class get out the packet to use for this section Computerized Physician Orders ► Print to Medical Receptionist’s critical printer when orders entered in HEO/WIZ and the MR’s either distribute them per unit protocol. RN’s will acknowledge orders online Patient information and MD who authorized order is at top - show on handout # 1 Each order has a number STAT orders display bold … see page 2 Start & stop times (right side of page) Open-ended orders (continuous) display start time. Remain until deleted or pt discharged – see #10 NHO One-time orders - see #13 culture urine bacteria Computerized POS is not a permanent chart document 10 Shredded after replaced – see unit protocol for details Page Timed orders – See #23 (pg 2) Morphine. 72 hrs stops Requisitions: Lab (class handout #2) ► Reqs print on unit if procedure or test done on unit. The MR distributes the reqs per unit protocol. You will learn what your unit does from your preceptor. ► Other Reqs print in performing department, i.e. Radiology ► Multiple tests print on same Req if tests can be run in same dept (CBC and PCV) ► Full signature, VUNet ID, dates & time from person collecting specimen. ► Text in center section gives directions on how to collect specimen, color of tube ► If RT or EKG test ordered STAT, MR calls the performing department, except for Labs. ► Batch Reqs print after midnight if the test is to be done after MN, ie, next day’s labs Break Time (10min) Medipac: (45 min) Driver: show Medipac video (7 minutes) Driver: show slide #4 OBJECTIVES Refer to MR HANDOUT#4 Acronyms and Medipac tips Trainer: Whiteboard unit’s census is managed in 3 ways via the Medipac system: a. Admitting department admits a new patient into Medipac b. Unit staff discharge patients in Medipac when they leave VUMC c. Unit staff transfers patients in Medipac to a different location When a change is made in the Medipac system, the census is changed in StarPanel and in other applications. Maintaining an accurate unit census is one of the most important aspects of the Medical Receptionist’s job. Trainer: Find your patient on the patient list, use MR training ID TRAIURV, nurse___ so your screen matches the students. Snapshot of current census at the time it is printed Headers across top: unit, bed, pt’s name, age, sex, admission status (all here are inpts (IA), MR#, Case #, date admitted and Attending At the Beginning of shift, print a Patient List. Page 11 Review Patient List from laminated packet Will Use this list to practice transfer and discharge Case # = Account # - always use this account #, not blue card Driver: Show slide #5 (Medipac keyboard tips) and #6 (Pavilions) Trainer: What unit is your patient on? 7N (or census for the room training is being held) What Pavilion is 7N in? Heart and Vascular institute – pavilion 4 Driver: 1. Click Go to Desktop… 2nd icon from black bar 2. Double click Medipac Icon 3. Medipac & StarBrowser display lower tool bar 4. Click Medipac…rsf from lower tool bar to view the application 5. Tab to MEDP3M 6. Type A at the white square 7. Press ENTER. Patient management menu displays Transfers: Trainer: Turn over your training card and practice transferring a patient from current unit (ie 7N) to the unit and bed listed on the card (MCE5 Cardiac Short Stay MCE or 5S) Page 12 What Pavilion displays? Pavilion 1 Trainer: If you need to transfer a patient to a different pavilion or from a different pavilion you will have to change the pavilion. Driver: 1. Tab to Nurse unit Transfer (NXFE) 2. type A & press Enter 3. Press TAB key until the white box stops to the right of the Account # 4. Type the number zero 5. Locate your pt’s case # on the laminated sheet 6. Type a zero (leading zero). Following the zero, Type the 12 digit case # 7. Press Enter Trainer: Always confirm that the name in the top left corner matches the name on the Patient List. Transfer Date and time defaults to current time. Never transfer or discharge till you see the patient actually leaving the floor! F8 turns page forward F7 goes back a page Pause/Break goes back to the home screen Tab goes forward Shift Tab goes backward If you see the stick man, press Esc Driver: 8. The patient is transferred within Pav so no Pavilion change is needed 9. Tab to LOC 10. Type ?? 11. Press Enter 12. Review the list of locations patient can be transferred to 13. Turn your patient card over and see what unit your patient is being transferred to and find it on the list and type in the appropriate line number 14. Press ENTER Driver: 15. Locate line number and bed on the Patient List Page of their patient card. No two people should select the same bed. 13 Trainer: A list of available beds display, have students assign their patient to bed on the back 16. Type LINE # …be careful to select correct bed for your pt 17. Press Enter 18. Confirm Medipac bed matches what’s on the Patient List 19. Note Message …Transfer complete Transfer Back to Home Unit: Trainer: When the patient returned to the unit from surgery or other areas, the MR should transfer the patient immediately to their unit’s census. Driver: 1. Tab to Account # 2. Type zero 3. Type the 12 digit account number 4. Press Enter 5. Tab to LOC 6. Delete Red text 7. Type ?? 8. Select 7N… the pt’s home unit 9. Type line number for the original bed, based on the patient list 10. Press Enter. Transfer complete displays at bottom left screen Trainer: Additional Transfer Information: Transfer Notice will print When transferring to the OR, CCL or other procedure areas, select any available bed. When transferring to unit, select actual room patient is going in to Discharge for IA: Trainer: Practice discharging your SAME patient. All patients should be moved back to their 1. Press Pause/Break to get out of transfer function 2. Tab to NDSC “Nurse Unit Discharge” Page Driver: 14 original bed. Where can you find their original bed placement? (The Patient List) 3. type A 4. Press Enter 5. Tab to Account # 6. Type zero 7. Type account # 8. Press Enter 9. Type over date /time if not time patient leaves unit 10. Tab to disposition code 11. Type E 12. Press Enter 13. Press Enter again after message -Warning, pt inhouse on this day 14. message at bottom left Additional Discharge Information: Never perform the Medipac discharge or transfer function until the patient physically leaves the unit Transfer complete displays at bottom left screen Admitting department must cancel all discharges… i.e., patient is leaving unit but collapses at elevators and MD decides not to discharge Trainer: REVIEW questions… What admissions types are discharged, IA or OT? IA…on Patient list Is there urgency in getting a discharge cancelled if pt didn’t leave? Yes, orders are lost in 4 hours and no new orders can be entered until patient is back in Medipac. What happens if disposition code 7 is selected instead of E? Pt will not have MR # to schedule clinic visits/hospital readmits. the problem? Change pavilion 15 If you correctly typed in the acct #, but get message “Pt not in this Pavilion”, what’s Page Hardware Checks: (15 min) Driver: show hardware video (2 minutes) Driver: Show slide #7 OBJECTIVES 1. What printer is termed “Critical? Order’s printer 2. Do critical printers look any different than demand printers? No, but they are monitored by the HD and unit will be notified if a problem 3. Electronic Script Printer, locked and has special paper 4. Is it your job to make sure all printer on your unit function properly at all times? Yes 5. What should you do if you find a printer or a CWS that isn’t working? troubleshoot 6. What kind of problems can happen to a printer that you can solve? Jam - Off line Out of paper – Unplugged -Out of toner 7. If unable to solve the problem what should you do? Turn off and back on Notify the HD: by phone for Critical printers, Prescription printers and Zebra printers. The HD should replace the printer very quickly. Paper Documents are being scanned into the medical record and your unit also has a Scanner, copier, and fax all in one. Issues with the scanning equipment should be called into the vendor. Check with your AA for your unit’s process. Open HELP Desk Ticket: Trainer: When you find CWS or a demand printer that doesn’t work, it’s your responsibility to get it fixed. First reboot the CWS and do routine printers checks. If that doesn’t work, notify Page Driver: 16 the HD by placing a self-service ticket – faster than a phone call! 1. Click StarBrowser on lower tool bar 2. Click HD icon left of black bar 3. Click Here to open Pegasus 4. Enter VUNET ID and Password 7. Type Title and Description and add any attachments 8 Click ADD Scanning Documents: (15 min) Driver: Show slide #8 workflow for scanning Trainer: Explain there needs to be a current patient label affixed to each side of the document. 1. Explain documents are scanned in batches of 10 pages. Patients may not be mixed and two-sided and one-sided documents may not be mixed. Each batch can be 5 two-sided documents or 10 one-sided documents. 2. After the scanning process is complete, put a yellow highlight check mark on the patient sticker to indicate completion. 3. The type of documents needing to be scanned varies by unit. Please ask your preceptor or CAPS person for further information. Driver: show slide #9 case study for scanning Then discuss Patient A will need 25 stickers and will have 3 batches to scan (2 two sided batches and 1 one sided batch). Patient B will need 22 stickers and will have 3 batches to scan (1 two sided batch and 2 two sided batches). TOTAL OF 6 batches!! Downtime: 35 min Downtime can occur with any of the systems we have learned about. Generally speaking: Page Driver: show slide #10 OBJECTIVES 17 MR is gatekeeper and tone setter! StarPanel: seldom goes down Medipac: has scheduled DT for Maintenance and Upgrades HEO/ Wiz and HED: scheduled DT for Maintenance and upgrades and sometimes unscheduled DT. 1. Email announcements are posted around unit ahead of time if DT is scheduled 2. StarPanel banner with DT info is entered 3. AOC texts the CSL’s – especially for unplanned DT 4. Overhead announcements are made prior to DT(if scheduled), start of DT and at end of DT 5. Downtime Kit for ALL types of Downtimes: MR’s job to keep stocked. E-docs is the electronic warehouse where documents can be found for the downtime kit. Use the Downtime tab (SSS website is a good resource for information.) 6. Each patient room must have a blue chart for downtime documents as needed. DEMO Downtime kit: a. Black accordion folder on each unit & some units have multiple kits b. Point out “Quick Reference” laminated sheet describing what EVERYONE on unit should do during DT and everything that should be stocked in the kit (30 rooms = 30 MARS, etc.) c. Mention Policies c. Refer to example of completed POS (for HEO/Wiz DT) for Providers to hand-write orders and manually process (unit has supply). Fax Pharmacy a copy to enter meds when system back up d. Mention Peds / adult packets (critical & general care) to their specific area Flowsheet (for HED DT)- for nurses and CP to document patient care (from e-docs) e. MAR: (for Admin-RX DT) –Pharmacy will print computer generated MARs for scheduled and unscheduled DT for nurses to document medications on during the DT. If Pharmacy can’t print and admin-Rx is down, a paper MAR can be printed from edocs. Trainer: tell learners to check with their preceptors to find out where their unit DT computer generated MARs print. DT Handwritten POS (see in e-docs) Page Driver: Show slide #11 POS for requisition exercise 18 A Closer Look at Downtime when HEO/Wiz is down: Which orders are ongoing… that means not a one-time order Locate the code column… what code is in this column for on-going orders? DT – these orders must go in computer after DT is over: Bedrest, full liquid diet Which orders need to go to someone other than the nurse? Full Liquid diet (nutrition svc), PRBC (BB), Aspirin and Metoprolol to (Phm) What code is placed next to these types of orders? Req except for Medications. Phm will receive a faxed copy of the entire order Signoff on POS –Some providers have never written orders on paper. Example sheet is in kit to share Mark large X through any unused area on sheet Fax sheet to Pharmacy Scan in after DT is over Flag orders for nurse. Inform of STATs RN should verify orders were processed accurately and signs full name, date/time at bottom. DT Requisitions (SEE IN E-DOCS) Trainer: Review DT Req’s 3 sections are completed. Send a req for each dept Section I - Lab: MR completes this portion and gives to phlebotomist to finish Section II- Lab: Based on orders from Order sheet, STAT CBC req is sent to lab Section III -Ancillary Depts: Nutrition and other ancillary depts. need a req to know of the change.. “Full liquid diet” note other departments on form and each dept will receive their own req Section IV -Blood Bank: 2 Units PRBC… symptomatic anemia Medicine Administration Record (MAR) –(SEE IN EDOCS) MR prepares an MAR for each patient and puts at bedside per unit protocol End of DT: Follow laminated sheet in kit for instructions on DT recovery Show slide #s 12, 13, 14 (Completed Requisitions) to check their work on activity Page Play Game Show 19 Have students complete the additional activities packet. Be availabale for questions. (20 min) Trainer: SHOW slide #15 End of Class Duties (10 min) 1. Update Amanita (if student is in there): a. Remove Training Flag b. Comments: Trained MR Class (date/yr) 2. Add New MR to SSS distribution list in the correct location (VCH or VUH) – Julie to do 3. Verify all patients are back in the correct beds – cancel any discharges if you need to Page 20 now!
