Manual for BUEHLER Hardness Tester
advertisement
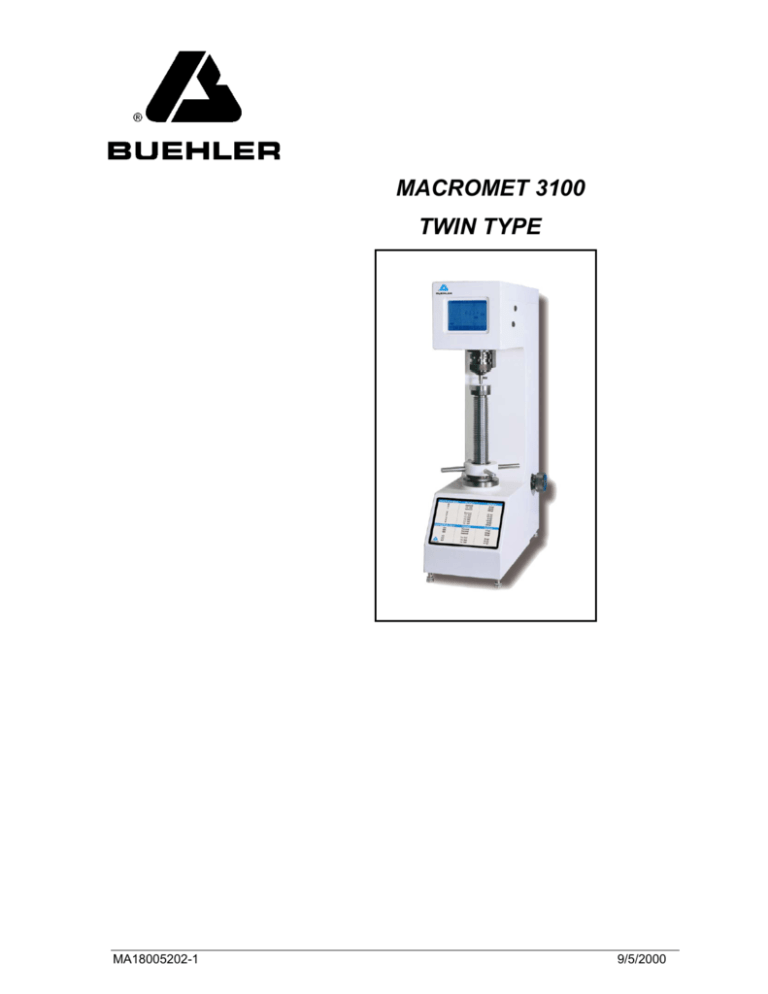
MACROMET 3100 TWIN TYPE MA18005202-1 9/5/2000 Declaration of Conformity Manufacture: Of: Declares the following product: BUEHLER, Ltd. 41 Waukegan Road Lake Bluff, Illinois 60044 Macromet 3100 Twin Type To be in accordance with EC Directive(s): Safety of Machinery: EMC Directive: 89/392/EEC and 91/368/EEC and 93/44/EEC according to the following standards: 89/336/EEC and 92/231/EEC according to the following standards: EN 292 EN 292 EN60204 EN 50081-1: 1992 EN 50082-1: 1992 Part 1 Part 2 Part 1 1991 1991 1993 Position: Director of Engineering Name: Arnie Buchanan Signature: Arnie Buchanan Date: 9/5/2000 THIS MANUAL IS A CUSTOM GENERATED DOCUMENT. IT INCLUDES ALL REVISIONS RELATIVE TO THIS SPECIFIC BUEHLER ITEM AS OF THE DATE DISPLAYED BELOW The items covered in this communication including all attachments may be subject to the export laws of the United States of America, including without limitation the Export Administration Regulations and the Office of Foreign Asset Control Regulations. The export, re-export or diversion of these items in contravention of these or other applicable regulations is strictly prohibited. This information contained in this communication is intended only for the use of the individual or entity to which it is addressed and may contain information that is privileged, confidential and exempt from disclosure under applicable law. . MA18005202-1 9/5/2000 Table of Contents Description Page Warranty ................................................................................................................................................ 3 Unpacking ............................................................................................................................................. 3 Assembly............................................................................................................................................... 3 Specifications ....................................................................................................................................... 6 Explanation of Functions..................................................................................................................... 8 LCD screen flow diagram ............................................................................................. 8 Explanation of LCD screens................................................................................................................ 9 Main Menu screen ........................................................................................................ 9 Utility Mode screen ..................................................................................................... 10 Measurement Condition screen .................................................................... 11 Select Printer screen ..................................................................................... 12 Transmission Rate screen............................................................................. 13 Support Center Display screen. .................................................................... 14 Support Center Record screen - explanation of screen................... 15 Support Center Record screen - explanation of keys ...................... 16 Set Up Mode screen................................................................................................... 17 Time/Date Setting screen.............................................................................. 18 Load Holding Time Setting screen ................................................................ 19 Print Mode Setting screen ............................................................................. 20 Printing Formats ............................................................................................ 21 Measurement Range Setting screen............................................................. 22 Stored Data Item Number Setting screen ..................................................... 23 Batch Number Setting screen .......................................................... 24 Batch Number Setting screen - explanation of keys ........................ 25 Data Edit Mode screen ............................................................................................... 26 Edit Measuring Data screen .......................................................................... 27 Display Conversion Data screen................................................................... 29 Select Conversion Scale screen ................................................................... 30 .Display Total Data screen ............................................................................ 31 Display Total Data screen ............................................................................. 31 Print Out Mode screen .................................................................................. 32 Printer Connection ............................................................................................................................. 33 Transmission Format ......................................................................................................................... 35 Test Precautions................................................................................................................................. 38 Getting Started.................................................................................................................................... 40 Test Method................................................................................................................ 40 Calibration Verification ............................................................................................... 43 Appendix A.......................................................................................................................................... 45 Standard Accessories ................................................................................................ 45 Main Dimensions in millimeters.................................................................................. 46 Appendix B.......................................................................................................................................... 47 Reference Data .......................................................................................................... 47 1 MA18005202-1 9/5/2000 INSTRUCTIONS DIGITAL ROCKWELL HARDNESS TESTER TYPE RMT-1, TYPE RMT-3 2 MA18005202-1 9/5/2000 Warranty This unit is guaranteed against defective material and workmanship for a period of two (2) years from date of shipment by BUEHLER LTD. Warranty is void if inspection shows evidence of abuse, misuse or unauthorized repair. Warranty covers only replacement of defective materials. If, for any reason, this unit must be returned to our plant for warranty service, please apply for prior authorization and shipping instructions. Include the following information: Customer Purchase Order Number, BUEHLER Ltd. Invoice Number and Date, Serial Number, and reason for return. Unpacking Carefully unpack and check contents. If any components are missing or damaged, save the packing list and material and advise the carrier and BUEHLER Ltd. of the discrepancy. Assembly Step 1 Remove machine, weight box and accessory (black) box from carton. Step 2 Place machine on a level surface. Remove four feet from the accessory (black) box and assemble on the bottom of the unit on the four corners. Step 3 Remove four screws that hold on the top cover. Remove top cover. Step 4 Remove the shipping cardboard insert connected to the blue tyrap and discard. (See Figure A) CARDBOARD BLUE TYRAP Figure A (View from top of Macromet) Step 5 Replace top cover on machine and fasten with four screws. Step 6 Remove rear cover with one fastening screw. (See Figure B) 3 MA18005202-1 9/5/2000 FASTENING SCREW LOCATION Figure B (View of rear of machine without rear cover) Step 7 Remove weight set from box, and mount to the rear top inside of the unit as shown in Figure C. WEIGHT SET Figure C (View from inside rear of the machine) 4 MA18005202-1 9/5/2000 Step 8 Replace rear cover, attach with screw that was used to remove the cover. Attach weight set on hook, as displayed Step 9 From the front of the machine; remove the blue tyrap with the Quality Assurance card and silica bag attached to the collar. Q A card and Silica bag 5 MA18005202-1 9/5/2000 Specifications Type Datum load Test load RMT-1 Rockwell only machine RMT-3 Rockwell/superficial combined machine RMT-1 98.07N (10kgf) RMT-3 29.42N, 98.07N (3kgf, 10kgf) RMT-1 588.4 980.7 1471.0 N 60 100 150 kgf 147.1 294.2 441.3 N 45 kgf RMT-3 15 Measurement scale 30 588.4 980.7 1471.0 N 60 100 150 kgf RMT-1 ABCDEFGHKLMPRSV RMT-3 ABCDEFGHKLMPRSV 15N 30N 45N 15T 30T 45T 15W 30W 45W 15X 30X 45X 15Y 30Y 45Y Datum loading setting Automatic setting system, bar graph display, digital audio monitor, fine adjustment unnecessary. Loading control system Automatic (load - hold - release) Start system Auto-start/manual start selection Load holding time 3 to 99 seconds. (Can be set at 1 second intervals) Plastic measurements Equipped as standard. Hardness display timer 0 to 99 seconds. (Can be set at 1 second intervals) Operating switches A Touch control on LCD screen Data display Displayed on backlit LCD screen. (Features screen saver) Memory function Capable of storing up to 256 data items. Hardness conversion SAE (J-417b) ASTM (E-140) function JIS stipulated conversion display Acceptance evaluation Evaluations of HI/OK/LOW compared to preset hardness limit function 6 MA18005202-1 9/5/2000 Data editing functions Edit actual measurement data (correction, deletion) Display converted data Convert stored data all at once Display statistical data (mean, maximum, minimum, standard deviation, variance) Print out after editing data a. Actual measurements, max. value, min. value, variance, mean, standard deviation b. Converted values, max. value, min. value, variance, mean, standard deviation Data output RS232C D-sub25P connection at rear of unit. Output items Measurement data, converted data, mean value, max. value, min. value, variance, standard deviation, and acceptance evaluation Printer Centronics output from 57F-36 at rear of unit. Serial output from D-sub25P at rear of unit. (Interchange with RS232C set at factory) Output items Measurement data only Measurement data and acceptance evaluation Measurement data, max. value, min. value, variance, mean, and standard deviation Measurement data, mean value, and acceptance evaluation on mean value Converted data only Converted data and acceptance evaluation Converted data, max. value, min. value, variance, mean, and standard deviation Converted data, mean value, and acceptance evaluation on mean value Measurable specimens Max. height: 250mm (200mm on RMT-3) Max. depth: 160mm Accuracy Complies with JIS B7726, ASTM E-18 Machine dimensions and 220mm × 550mm × 830mm (W D H) Approx. 85kg weight Power supply 90-132V AC or 180- 264V AC (Supply voltage set at factory) Single phase 50/60Hz These specifications may be changed without notice, due to improvements. 7 MA18005202-1 9/5/2000 Explanation of Functions LCD screen flow diagram * Press the [?] key on each screen to return to the Help screen, explaining each key. 8 MA18005202-1 9/5/2000 Explanation of LCD screens Main Menu screen The Main Menu screen is used to select the mode: The Machine Type and Name is displayed when the power is turned on. The display will then change to the Measurement Mode screen. Pressing the Menu Key at the bottom left of the Measurement Mode screen returns to the Main Menu screen. Advancing to other modes is performed by first changing to this screen: 9 MA18005202-1 9/5/2000 Press the OFF key to clear LCD screen. This feature is used to save energy and extend component life, use it when taking breaks, etc. When resuming use, touch any part of the screen panel to restore the screen to as it was before. Utility Mode screen Advances to the Measurement Condition setting screen. Advances to the Select Printer screen. Advances to the RS232C setting screen. Advances to the Information screen. Returns to the Main Menu screen. 10 MA18005202-1 9/5/2000 Measurement Condition screen Sets various measurement conditions such as indenter type, automatic/manual mode, plastic measurement, etc. Select the indenter type from these five keys: Selects Automatic or Manual measurement. If Automatic is selected, the test load loading operation starts automatically after loading the datum load. If Manual is selected, the test load is loaded by pressing the START key after loading the datum load. Selects the Plastic Measurement timer ON or OFF. If ON is selected, the plastic measurement timer (timer until reading in after unloading the test load) operates. Press to confirm the Measurement Condition settings. Returns to the Utility Mode screen. 11 MA18005202-1 9/5/2000 Select Printer screen Selects the printer connected to the hardness tester for printing out data. The CENTRO key selects a centronics (parallel port) printer. The SERIAL key selects a serial printer. Press the ENT key to confirm the printer type and to return to the Utility Mode screen. 12 MA18005202-1 9/5/2000 Transmission Rate screen Is for setting the RS232C transmission. 9600 BPS 4800 BPS Select the BAUD RATE from these four types. 2400 BPS 1200 BPS Even parity Select the PARITY from these two types. No parity Press the ENT key to return to the Utility Mode screen. 13 MA18005202-1 9/5/2000 Information screen. Records the manufacturer (BUEHLER LTD.) or sales agent that provides after-sales service. Displays the company name, address and telephone number. Returns to the Utility Mode screen. Advances to the Information screen to add information on support resources. This screen may also be used for other purposes. It may be considered convenient to record the internal phone number of persons involved, or the names of supervisors. The headings SUPPORT OFFICE, Address and Telephone number cannot be deleted. 14 MA18005202-1 9/5/2000 Information (Support Office) - explanation of screen 94 different letters, numerals, and symbols can be entered and are displayed over 7 screens. Enter the required characters by selecting from each screen. The character entered is displayed at the cursor position (see above) and the cursor will move to the right with each character input. The characters that can be entered are displayed below: 2nd screen 3rd screen 4th screen 5th screen 6th screen 7th screen 15 MA18005202-1 9/5/2000 Information (SUPPORT OFFICE) screen - explanation of keys Moves to the next screen and the characters that are displayed change. Returns to the previous screen. Used to move the cursor to the desired position when entering a character. The NAME key is used to enter the SUPPORT OFFICE information. Name will display at the top-left of the screen and up to 25 characters can be entered. . The Adr key is used to enter in the Address information. Adr will display at the topleft of the screen and up to 90 characters can be entered. The Tel key is used to enter in the Telephone information. Tel will display at the top-left of the screen and up to 20 characters can be entered. Press ENT to confirmed SUPPORT OFFICE, Address, and Telephone Number. Returns to Information screen. To correct a character already entered, move the cursor to the position of the character to be changed and overwrite it with the correct character. The Space Key overwrites or deletes any unwanted characters. 16 MA18005202-1 9/5/2000 Set Up Mode screen Advances to the Date/Time setting screen. Advances to the Load Holding Time setting screen. Advances to the Print Mode setting screen. Advances to the Measurement Range setting screen. Advances to the Set Up Measuring (Stored Data) setting screen. Advances to the Batch Number setting data screen. Returns to the Main Menu screen. 17 MA18005202-1 9/5/2000 Time/Date Setting screen Sets the Time, Day, Month and Year when sending data to the printer. Press this key below the selected field. The cursor will appear below the field to enable a change in data. Increases the number. Decreases the number. Confirms each item and starts the calendar and clock. Returns to the Setup Mode screen. If the ESC key is pressed without pressing the ENT key to confirm the settings, each item will remain at their original settings and no change will take place. 18 MA18005202-1 9/5/2000 Load Holding Time Setting screen Sets the Test Load Holding Time for normal measurements and the reading-in time after releasing the load for plastic measurements. Press this key below the selected field. The cursor will appear below the field to enable a change in data. The Load Hold Time can be set in a range of 3 to 99 seconds and the Plastic Load Hold Time can be set in a range of 0 to 99 seconds. Increases the number. Decreases the number. Confirms the settings. Returns to the Setup Mode screen. If the ESC key is pressed without pressing the ENT key to confirm the settings, each item will remain at their original settings and no change will take place 19 MA18005202-1 9/5/2000 Print Mode Setting screen Selects the print format sent to the printer. There are 8 different print data formats. Select a key 1 through 8 to determine the type of data to be printed. (See the following page for all the printing formats) Press Key 9 when printing is not required. Advances to the next screen. Returns to the previous screen. Confirms the selection. Returns to the Setup Mode screen. If the ESC key is pressed without pressing the ENT key to confirm the settings, each item will remain at their original settings and no change will take place 20 MA18005202-1 9/5/2000 Printing Formats Measurement data only Measurement data, acceptance evaluation Measurement data, general data Measurement data, mean value, acceptance evaluation Converted data only Converted data, acceptance evaluation Converted data, general data Converted data, mean value, acceptance evaluation 21 MA18005202-1 9/5/2000 Measurement Range Setting screen Sets the upper and lower limits for the hardness value. The acceptance evaluation is displayed on the Measurement Mode screen or an external output device (based on what settings have been selected). Press this key below the selected field. The cursor will appear below the field to enable a change in data. Enter permissible hardness values in the Upper and Lower Limits. A Lower Limit greater than the Upper Limit cannot be entered. Increases the number. Decreases the number. Confirms the settings. Returns to the Setup Mode screen. If the ESC key is pressed without pressing the ENT key to confirm the settings, each item will remain at their original settings and no change will take place. 22 MA18005202-1 9/5/2000 Set Up Measuring (Stored Data) screen The Macromet 3100 is capable of temporarily storing measured data. The Set Up Measuring screen is used to set the number of stored data items. Data is stored sequentially for each measurement. Data cannot be stored for measurements once the Set Number has been reached. Press this key below the selected field. The cursor will appear below the field to enable a change in data. Increases the number. Decreases the number. Confirms the settings. Switches to the Setup Mode screen. If the ESC key is pressed without pressing the ENT key to confirm the settings, each item will remain at their original settings and no change will take place. 23 MA18005202-1 9/5/2000 Batch Number Setting screen Sets a batch number when outputting data to an external device. 94 different letters, numerals, and symbols can be entered and are displayed over 7 screens. Enter the required characters by selecting from each screen. The character entered is displayed at the cursor position (see above) and the cursor will move to the right with each character input. The characters that can be entered are displayed below: 2nd screen 3rd screen 4th screen 5th screen 6th screen 7th screen 24 MA18005202-1 9/5/2000 Batch Number Setting screen - explanation of keys Moves to the next screen and the characters that are displayed change. Returns to the previous screen. a Used to move the cursor to the desired position when entering character. Up to 10 characters can be entered. Confirms the record of the batch number. Returns to the Set Up Mode screen. If the ESC key is pressed without pressing the ENT key to confirm the settings, each item will remain at their original settings and no change will take place. The Space Key overwrites or deletes any unwanted characters. To correct a character already entered, move the cursor to the position of the character to be changes and overwrite it. 25 MA18005202-1 9/5/2000 Data Edit Mode screen Advances to the Edit Measuring Data screen. Advances to the Display Conversion Data screen. Advances to the Select Conversion Scale screen. Advances to the Display Total Data screen. Advances to the Print Out Mode screen. Returns to the Main Menu screen. 26 MA18005202-1 9/5/2000 Edit Measuring Data screen Is used for displaying and editing data stored in the hardness tester. The keys are allocated in sequential numbers starting with 1 when data is entered. Hardness values can be viewed on this screen. 1 Press the key with the number of the data item to be edited to activate the cursor below the Hardness Value, enabling editing. Only the data items of the number set on the Set Up Measuring screen can be displayed and edited. . (256) (A maximum of 256 data items can be displayed.) Advances to the next screen. If data is not entered, the next screen is not accessible. Returns to the previous screen. Deletes data, The DEL key changes the hardness value display to 0.0. 27 MA18005202-1 9/5/2000 Measuring Data screen continued: Used to move the cursor to the desired position when entering a character. Increases the number. Decreases the number. Confirms the settings. Returns to the Data Edit Mode screen. If the ESC key is pressed without pressing the ENT key to confirm the settings, each item will remain at their original settings and no change will take place. 28 MA18005202-1 9/5/2000 Display Conversion Data screen The Macromet 31000 has a feature which converts Rockwell hardness or Rockwell superficial hardness values measured into Vickers hardness values or other hardness scales. The Display Conversion Data screen below displays the preset conversion scales and conversion data. Advances to the data on the next screen. If data is not available on other screens, this key will not be active. Returns to the previous page. Returns to the Data Edit Mode screen. 29 MA18005202-1 9/5/2000 Select Conversion Scale screen Is used for selecting a conversion scale between the Hardened steel and Soft steel conversion tables. Hard or Soft is indicated in the left-hand box in the Display Window. Hard screen Soft screen Keys used for selecting the required scale: Confirms the selected scale. Returns to the Data Edit Mode screen. If the ESC key is pressed without pressing the ENT key to confirm the settings, each item will remain at their original settings and no change will take place. 30 MA18005202-1 9/5/2000 Display Total Data screen Displays the Maximum Value, Minimum Value, Variance, Mean, and Standard Deviation of the measured and stored data. Returns to the Data Edit Mode screen. 31 MA18005202-1 9/5/2000 Print Out Mode screen Select the print format when sending stored measurement data to the printer. There are 8 different print data formats. Select a key 1 through 8 to determine the type of data to be printed. Press Key 9 when printing is not required. Advances to the next screen. Returns to the previous screen. Sends data to the printer. Returns to the Data Edit Mode screen. 32 MA18005202-1 9/5/2000 Printer Connection 1) Centronics type Centronics type printers can be connected in a normal manner and output is possible. Connection procedure a. Turn off the power supply to the Macromet 31000 and to the printer. b. Connect the printer connector cable to the PRINTER terminal on the rear panel of the Macromet 3100 and connect the other end to the printer. c. Turn on the power to the Macromet 3100 and to the printer. d. Select Centronics on the Printer Selection screen. e. Set the calendar and clock on the Time/Date Setting screen. (* The time/date are backed up once they have been set, so they do not have to be set again.) f. Enter the batch number on the Batch Number Setting screen. The batch number column will be left blank if this is not entered. g. Perform measurements as normal. Data will be printed out for each measurement. Stored data can also be printed all at once from the Print Output Mode screen. Connector cable Use an Amphenol 36-pin (DDK 57-30360 or equivalent) 1:1. 33 MA18005202-1 9/5/2000 2) Serial type The output for serial printers is via the D-sub25P on the rear panel and is interchangeable with RS232C transmission. Users who specified a serial printer at the time of purchase should follow the procedure below. Users who wish to convert to a serial printer after purchase should contact their sales agent. Connection procedure a. Turn off the power supply to the Macromet 3100 and to the printer. b. Connect the printer connector cable to the RS232C terminal on the rear panel of the Macromet 3100 and connect the other end to the printer. c. Turn on the power to the Macromet 3100 and to the printer. d. Select serial on the Printer Selection screen. e. Set the calendar and clock on the Time/Date Setting screen. (* The time/date are backed up once they have been set, so they do not have to be set again.) f. Enter the batch number on the Batch Number Setting screen. The batch number column will be left blank if this is not entered. g. Perform measurements as normal. Data will be printed out for each measurement. Stored data can also be printed all at once from the Print Output Mode screen. Connector Cable Connect as displayed below: HDBB-25P (Hirose) or equivalent. 34 MA18005202-1 9/5/2000 Transmission Format 1) RS232C specifications Synchronous system Start-stop system Start bit 1 bit Data bit 8 bits Stop bit 1 bit Transmission rate Error detection code 1,200/2,400/4,800/9,600 BPS even parity/no parity JIS 8-bit selectable selectable 2) Connection RS232C transmission is connected via the D-sub25P on the rear panel and this is interchangeable with serial printers. The setting is for RS232C, if specifications were not made at the time of purchase. Users who specified serial printers but who wish to convert to RS232C use after purchase should contact their sales agent. A. Connection procedure a. Turn off the power supply to the Macromet 3100 and to the interconnect equipment such as computer etc. b. Connect the printer connector cable securely to both units. c. Turn on the power to the Macromet 3100 and the interconnect equipment. d. Set the calendar and clock on the Time/Date Setting screen. (* The time/date are backed up once they have been set, so they do not have to be set again.) e. Enter the batch number on the Batch Number Setting screen. The batch number column will be left blank if this is not entered. B. Connector cable Connect as displayed below: HDBB-25P (Hirose) or equivalent. 35 MA18005202-1 9/5/2000 3) Data format A. Date, Batch Number The Date and Batch Number set in the Set Up Mode screen are set when outputting data. Date (10 characters) Batch number (10 characters) 4) Measurement data How the data output is sent once the Hardness Calculations are complete. Measurement scale Measured hardness value Converted hardness value Conversion scale Acceptance 1 = OK evaluation 0 = fail 36 MA18005202-1 9/5/2000 5) Max. value, min. value, variance, mean value, standard deviation Data output in print modes 3 or 6 after setting measurement data. Min. value (0000.1 to 9999.9) Max. value (0000.1 to 9999.9) Variance (0000.1 to 9999.9) Mean value (0000.1 to 9999.9) , Standard deviation (0000.1 to 9999.9) 6) Mean value and acceptance evaluation on mean value Data output in print mode 4 or 8 after setting measurement data. Mean value (0000.1 to 9999.9) Acceptance evaluation on mean value 1 = OK 0 = fail 37 MA18005202-1 9/5/2000 Test Precautions 1) At least two preliminary tests should be performed before beginning any measuring, in order to acclimatize the indenter, raising/lowering screw, and specimen platform. This is necessary at the start of work each day and after the raising/lowering screw has been substantially moved. Preliminary tests are performed with the same procedures as normal tests. 2) Ensure that contact surfaces such as the indenter attachment face, between the specimen and specimen platform, and between the specimen platform and raising/lowering screw are continually maintained in a clean state. Accurate hardness values may not be obtained if foreign matter such as dust, rust, or oil is included on contact surfaces. Wipe all contact surfaces thoroughly with a clean cloth before performing tests. 3) The specimen measurement location must be spaced at least 4d (where d is the indentation diameter) from the center of indentations already present. The measurement location must also be separated at least 2d from the edge of the specimen. 4) The surface (test face) and reverse face of the specimen must be kept as horizontal as possible. When measuring specimens which are not horizontal, maintained the test face perpendicular to the indenter axis using special jigs. Care is also needed in providing a satisfactory finish to the reverse face of the specimen, and not just the test face. Correct hardness values will not be obtained if the specimen surface is concave, as deformation will occur under the load. 5) If a minus is indicated on the data display, the hardness value of the specimen is less than 0. 6) The specimen thickness or hardened layer thickness must be at least 8 times the indenter penetration depth. Correct hardness values will not be obtained if below this and so either the test load must be reduced or else measurements must be performed using a different type of hardness tester. Otherwise, try measuring with a different scale having a large steel ball indenter. 38 MA18005202-1 9/5/2000 Test Precautions continued: 7) The condition of the indenter greatly affects the hardness value. Caution is recommended as long-term use or impacting the indenter due to operating errors may cause cracking, scratching, or defects. Problems such as indenter damage can be relatively easily detected using a 20 to 25 magnifying glass. Tip damage Side face damage Tip damage will normally gives higher hardness values. Side face damage will normally gives lower hardness values. 39 MA18005202-1 9/5/2000 Getting Started Test Method Determine an average hardness, hardenability profile or verifying that the tester is in calibration with a standardized block. All are accomplished in the same manner. It is necessary to adjust the tester for the application before starting a test, • First decide which scale is appropriate. In many cases, this has been predetermined for the operator by an engineering specification. Otherwise refer to Table 3-1 for a general guideline. Some of the limitations to consider are: 1. Size and depth of the indent in comparison to the feature of interest. 2. Spacing between indentations should be a minimum of 3 times the diameter of the indentation. • Select the proper test force with the load selector dial. If it is a twin tester, verify that the correct preliminary load has been selected by turning the collar to either the RRockwell position or S-Superficial position. Figure 3-5. The position of the collar (RRockwell or S-Superficial) determines the preliminary test force. • Verify that the correct indenter is in place. If necessary replace it with the appropriate indenter. The indenter neck surface is flat on one side, which faces the spring-lock screw. Fig 3-6. Indenter replacement. 40 MA18005202-1 9/5/2000 Test Method continued: • Verify that the correct indenter is selected in the Measurement Condition screen. Dia corresponds to the diamond or brale indenter. The diameter measurements are listed for the selection of the ball indenters. The selected indenter will be displayed in the top row of the Measurement Condition screen. This screen can be accessed from the test screen by selecting the Main Menu screen, followed by Utility and then Measurement Condition screens. • Select the correct anvil. Typically the shape of the test piece will determine which anvil to use. Figure 3-7 illustrates some of the options. The most important aspect is that the test piece is secured and can not shift during the course of the test and that it is perpendicular to the indenter. Figure 3-7. Anvils typically used for conducting tests, from left to right: a spot anvil, a small v-anvil, a large v-anvil, and a standard flat anvil. • Set the dwell time on the Load Time Setting screen located within the Set Up Mode screen. If a dwell time of longer than 3 seconds is required due to the material having excessive creep, the time should be recorded after the result. Below is an example of the routine typically followed by the operator. • The test piece or test block is placed on the anvil. • The preliminary test force is applied by bringing the test piece into contact with the indenter until the SET point is reached. If too much force has been applied, the OVER light will be on. Should the OVER light appear it is necessary to start the test on a new position of the test piece. • At this point, if the tester is semi-automated, the remainder of the test force will be applied. Otherwise it will be necessary to press START. The level of automation can be selected within the Utility and then Measurement Condition screens. Either Auto or Manual will appear in the top line of the touch screen depending on your selection. • The result is displayed by the testing machine. The larger the e-value (displacement), the smaller the HR value observed. In other words the hardness value will decrease as the specimen is more easily penetrated. 41 MA18005202-1 9/5/2000 Test Method continued: The values are based on depth measurements and are derived from the formulas listed below. 1) Rockwell test with brale indenter Hardness = 100 - e Where e = Permanent increase in depth of penetration under preliminary test force after removal of the additional force. The increase is expressed in units of 0.002 mm. 2) Rockwell test with ball indenter Hardness = 130 – e Where e = Permanent increase in depth of penetration under preliminary test force after removal of the additional force. The increase is expressed in units of 0.002 mm. 3) Superficial Rockwell test Hardness = 100 – e Where e = Permanent increase in depth of penetration under preliminary test force after removal of the additional force. The increase is expressed in units of 0.001 mm. • Report the hardness value, the scale used, and any unusual conditions encountered during the test. • Record the result. Note: If the indenter and/or anvil were recently inserted, it is good practice to ignore the first two readings and start recording with the third result. 42 MA18005202-1 9/5/2000 Calibration Verification It is important to verify your tester on a routine basis to ensure that it is in good working order and that your methodology is correct. When a tester is first manufactured, the test force, indenter(s), and depth indicator are all verified independently. However, on a day-to-day basis all of the components are examined at once with an indirect verification. The criteria for such an evaluation is outlined in ASTM E18, Standard Test Methods for Rockwell Hardness and Rockwell Superficial Hardness of Metallic Materials. A full verification checks the complete capabilities of a tester. In most cases this is more time and effort than required for a daily check, so a separate guideline has been developed. Periodic Check by the User: • Make at least one routine check each day that the testing machine is used. • Before making the check, make at least two preliminary indentations to ensure that the machine is working freely and that the standardized block, the indenter, and the anvil are seated correctly. The results of these preliminary indentations should be ignored. • Make at least three hardness readings on a standardized block on the scale and at the hardness level at which the machine is being used. If the mean of these values falls within the tolerances marked on the standardized hardness block, the machine may be regarded as satisfactory. 43 MA18005202-1 9/5/2000 Table 3-1. Rockwell test parameters and applications Test Abbreviation Indenter Test Force (kg) Application Rockwell A HRA brale 60 very hard materials, cemented carbides Rockwell B HRB 1/16 in. ball 100 low strength steel, copper alloys, aluminum alloys, malleable iron Rockwell C HRC brale 150 high strength steel, titanium, pearlitic malleable iron Rockwell D HRD brale 100 high strength steel, thin steel Rockwell E HRE 1/8 in. ball 100 cast iron, aluminum, and magnesium alloys Rockwell F HRF 1/16 in. ball 60 annealed copper alloys, thin soft metals Rockwell G HRG 1/16 in. ball 150 malleable irons, copper-nickel-zinc alloys Rockwell H HRH 1/8 in. ball 60 Bearing metals and other very soft or thin materials Rockwell K HRK 1/8 in. ball 150 Bearing metals and other very soft or thin materials Rockwell L HRL 1/4 in. ball 60 Bearing metals and other very soft or thin materials Rockwell M HRM 1/4 in. ball 100 Bearing metals and other very soft or thin materials Rockwell P HRP 1/4 in. ball 150 Bearing metals and other very soft or thin materials Rockwell R HRR 1/2 in. ball 60 Bearing metals and other very soft or thin materials Rockwell S HRS 1/2 in. ball 100 Bearing metals and other very soft or thin materials Rockwell V HRV 1/2 in. ball 150 Bearing metals and other very soft or thin materials Superficial Rockwell N 15N, 30N, 45N brale 15, 30, 45 materials similar to Rockwell A, C, and D, but of thinner gauge Superficial Rockwell T 15T, 30T, 45T 1/16 in. ball 15, 30, 45 materials similar to Rockwell B, F, and G, but of thinner gauge Superficial Rockwell W 15W, 30W, 45W 1/8 in. ball 15, 30, 45 materials similar to Rockwell E, H, and K, but of thinner gauge Superficial Rockwell X 15X, 30X, 45X 1/4 in. ball 15, 30, 45 materials similar to Rockwell L, M, and P, but of thinner gauge Superficial Rockwell Y 15Y, 30Y, 45Y 1/2 in. ball 15, 30, 45 materials similar to Rockwell R, S, and V, but of thinner gauge 44 MA18005202-1 9/5/2000 Appendix A Standard Accessories Name Quantity RMT-1 RMT-3 HRC 1 1 HRB 1 1 30T - 1 30T - 1 Diamond indenter (fitted to main unit) 1 1 Steel ball indenter (1/16) 1 1 Spare steel balls (1/16) 10 10 Flat type 60φ 1 1 V-type (large) 1 1 2 2 Power cable (3 pin and earthed, 2.5m) 1 1 Level adjusting feet 4 4 Anti-toppling fittings set 1 1 Accessory tools set 1 1 Machine unit cover 1 1 Operating instruction manual set 1 1 Accessory box 1 1 Standard test block Anvil Spare fuses 100 to 120V 3A 200 to 240V 2A The details and quantity of standard accessories described in this table or in brochures may be changed without notice, following changes due to improvements. 45 MA18005202-1 9/5/2000 Main Dimensions in millimeters Max (200 for RMT-3) 46 MA18005202-1 9/5/2000 Appendix B Reference Data 1) Cylindrical correction The hardness values will normally be lowered if the test surface is curved (cylindrical surface). The table below is the correction value table in accordance with ASTM E18-61. A value approximating to the true value will be obtained if the correction value is added to the measured hardness value. Correction values for HRC, HRA, HRD Indicated value Specimen diameter (inches) 47 MA18005202-1 9/5/2000 Cylindrical correction continued: Correction values for HRB, HRF, HRG Specimen diameter (inches) Indicated value 2) Test machine control Test machine control is normally carried out using hardness standard pieces. When necessary, take measurements at multiple locations on a standard piece in an appropriate hardness range and check the stability of the indicated values. The permissible deviations for general accuracy stipulated in ASTM E18 (1999) are displayed in the table below: Nominal Hardness of Standardized Test Block HRA HRB HRC HRF HR15N HR30N HR45N HR15T HR30T HR45T Tolerance ≥60.5 and <80 ≥80 ≥1.5 and <45 ≥45 <60 ≥60 ≥57 and ≤99.6 ±0.5 ±1.0 ±1.0 ±1.5 ±0.5 ±1.0 ±1.0 ≥69.4 and <90 ≥90 ≥41.5 and <77.5 ≥77.5 ≥19.6 and <66.5 ≥66.5 ≥60.5 and <75.3 ≥75.3 ≥15.0 and <46.2 ≥46.2 ≥1.0 and <17.6 ≥17.6 ±0.7 ±1.0 ±0.7 ±1.0 ±0.7 ±1.0 ±1.0 ±1.5 ±1.0 ±1.5 ±1.0 ±1.5 48 MA18005202-1 9/5/2000 (2) A Conversion Table - Hardened Steel 49 MA18005202-1 9/5/2000 (2) B Conversion Table - Soft Steel 50 MA18005202-1 9/5/2000
