Value & Shading
advertisement
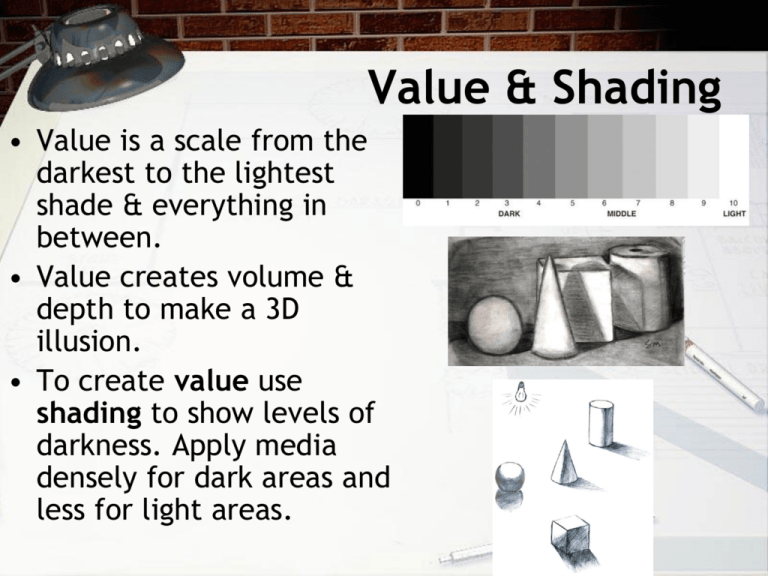
Value & Shading • Value is a scale from the darkest to the lightest shade & everything in between. • Value creates volume & depth to make a 3D illusion. • To create value use shading to show levels of darkness. Apply media densely for dark areas and less for light areas. Shading & Value Techniques • Techniques should be organized • Between each stroke pick-up your drawing tool * No Scribbling Shading & Value Techniques • Hatching – Straight parallel lines (do not cross) • Crosshatching – Crossing lines going in opposite directions Shading & Value Techniques • Curvilinear Hatching – Curving parallel lines • Curvilinear Crosshatching – Curving crossing lines • Blending – Rub the drawn medium (material) to merge values together • Stippling – Dots, more dots closer together create a darker value Shading & Value Techniques Review • Draw and label 6 value/shading techniques in a scale of value with at least 7 sections in each row. Use a ruler to center the row and evenly space the row and sections of the row on your page. Exercise 1 Value Scales 1. Create 6 rows with 7 boxes each to shade a value scale for each shading technique. 2. Line-up the“0” edge of the ruler with the edge of the top of the paper. 3. Measure & mark down 1” on the left & right sides of the top of the paper. 4.Using the ruler draw a line connecting the marks 5.1” down from the first line do the same thing. 6. Find the center of the width of the page: measure the width & divide it by 2, that is the center 7. Make a 7” centered box, divide 7 by 2 & line up that measurement on the ruler with the center of the page you marked in step 6 & close the ends of the box off at the 0 end of the ruler & the 7” point on the ruler. Value Scales 1” Hatching 8. Inside the 7” row make a box every 1” 1” 9. Make the other rows of boxes ½” apart 1” 1/2” Centered Example of Exercise 1 Exercise 2 1. Divide an 8 ½” x 11” page into 4 sections. 2. One per section, draw a: sphere, cone, cylinder, and cube, label it 3. Divide each form into 5-7 vertical sections 4. Shade each form using a different value technique, label it 5. Shade lighter in each section, with a range of value from black to white. Examples of Shaded Shapes Exercise 3: Shade an Eye STEP 1. Drawn the lines lightly, sketch shape of an eye. The top lid line thickens as your line gets to the back part of the eye. It will end up looking like a flat stroke. STEP 2. Lightly sketch the bottom of the brow. This shows the depth of the eye. Sketch in the bottom lid line also known as the water line. Sketch some creases under the eye. STEP 5. Lightly shade a boundary within the iris , inside the tear duct and the outside of the sclera (white of the eye). We're going to blend them in later. Shade the base shadows on the eye lids and the creases surrounding the lower lid. STEP 3. Draw in the iris and color in the pupil. Sketch in the vein lines in the eyeball STEP 6. Taking a blending stump or tissue, blend in the shadows so it creates a smooth even layer of shadow. STEP 4. Shade from 'light to dark'. Use 1. Hatching, 2. Crosshatching. The closer the base of the shadow, the darkest it will be. Do not to over shade. STEP 7. Add highlights, erase them in, use a white pencil or other whitening medium STEP 8. Continue to shade building up darkness & depth on the upper lid and far corner. Add eyelashes last. References • Hatching & Crosshatching: http://www.artyfactory.com/pen_and_ink_drawing/ink_drawing/pen _and_ink_drawing_6.htm • Stippling: http://www.wetcanvas.com/forums/showthread.php?t=302481 • Drawing in general: http://www.tpub.com/content/draftsman/14262/index.htm • Blending: http://www.explore-drawing-and-painting.com/shadingtechniques-1.html • Shading Techniques:https://www.geneva304.org/gmsn/mholt/8Drawing%20In tro.htm • Curvilinear hatching: http://www.drawspace.com/lessons/lesson.php?id=f11 • Curvilinear Crosshatching: http://designerssoul.blogspot.com/2007/10/shading.html • Shade an Eye: • http://www.dragoart.com/tuts/15167/1/1/how-to-shade-an-eye.htm
