Basic IOS - MyStudyLab.com
advertisement
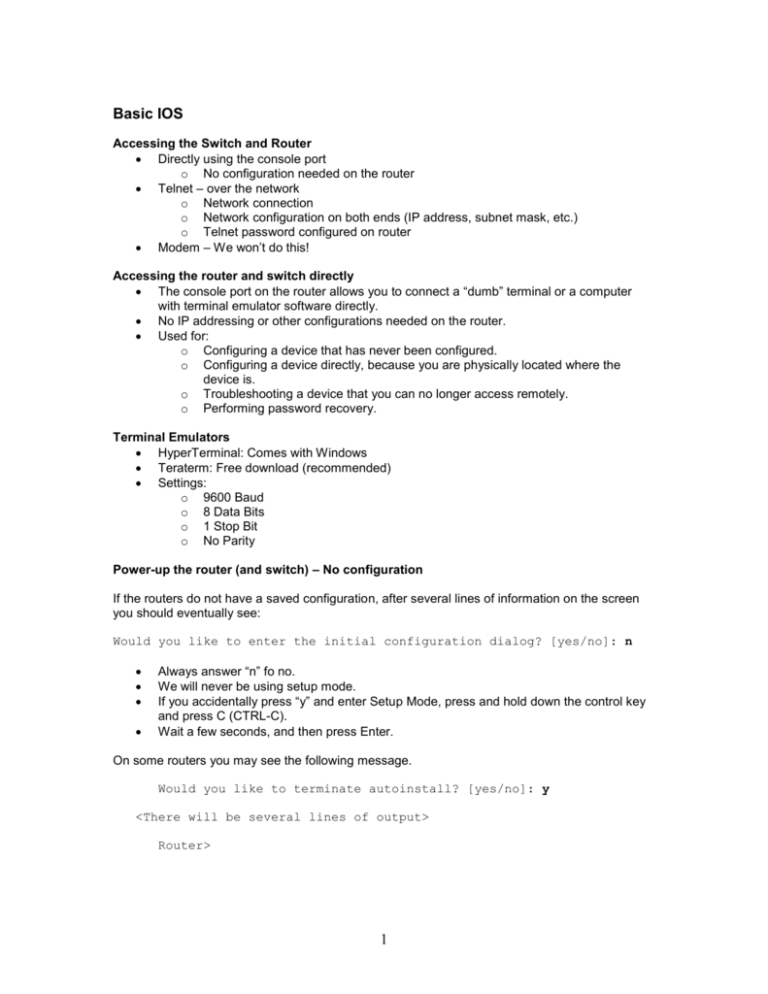
Basic IOS Accessing the Switch and Router Directly using the console port o No configuration needed on the router Telnet – over the network o Network connection o Network configuration on both ends (IP address, subnet mask, etc.) o Telnet password configured on router Modem – We won’t do this! Accessing the router and switch directly The console port on the router allows you to connect a “dumb” terminal or a computer with terminal emulator software directly. No IP addressing or other configurations needed on the router. Used for: o Configuring a device that has never been configured. o Configuring a device directly, because you are physically located where the device is. o Troubleshooting a device that you can no longer access remotely. o Performing password recovery. Terminal Emulators HyperTerminal: Comes with Windows Teraterm: Free download (recommended) Settings: o 9600 Baud o 8 Data Bits o 1 Stop Bit o No Parity Power-up the router (and switch) – No configuration If the routers do not have a saved configuration, after several lines of information on the screen you should eventually see: Would you like to enter the initial configuration dialog? [yes/no]: n Always answer “n” fo no. We will never be using setup mode. If you accidentally press “y” and enter Setup Mode, press and hold down the control key and press C (CTRL-C). Wait a few seconds, and then press Enter. On some routers you may see the following message. Would you like to terminate autoinstall? [yes/no]: y <There will be several lines of output> Router> 1 Power-up the router (and switch) – Has Configuration The router has a pre-existing configuration. If after you power-up the router, instead of getting the previous message, you get: Router> Someone has saved a configuration on the router (startup-config). Because it is always best to begin our labs without a previous router configuration, you will need to erase the startup-config and reboot the router. Router> enable If you are prompted for a password type: class or if that does not work, type cisco Router# erase startup-config Turn off the router and then turn it back on. User Mode and Privilege Mode, Getting Help, and Abbreviated Commands User Mode (Router and Switch) Router> Switch> User mode will allow you to view the state of the router, but will not allow you to modify its configuration. Don’t confuse “user” mode with users of the network. This is only for network techs, operators, engineers, etc. Privilege Mode (Router and Switch) Router> enable Router# <user mode> <privilege mode> Allows the administrator to modify the router configuration Router# disable <privilege mode> Router> enable Router# <user mode> <privilege mode> 2 Getting Help (Router and Switch) Router> ? Exec commands: access-enable access-profile clear <text omitted> ping ppp --More- Create a temporary Access-List entry Apply user-profile to interface Reset functions Send echo messages Start IETF Point-to-Point Protocol (PPP) Press the Space Bar to scroll a “screen’s worth” of more commands. Press the Enter or Return key to scroll down just one line of the list. Press any other key to halt the list output. Router> show ? alps backup c2600 call cca ccm-manager cdapi cef class-map clock <text omitted> --More— Router> show Alps information Backup status Show c2600 information Show call CCA information Call Manager Application information CDAPI information Cisco Express Forwarding Show QoS Class Map Display the system clock Router> show interfaces ? Async Async interface BRI ISDN Basic Rate Interface BVI Bridge-Group Virtual Interface <text omitted> Router> show interfaces Abbreviated commands (Router and Switch) Router# sh inter Same as Router# show interfaces 3 Global Configuration Mode and Passwords Using exit, end and Control-Z Router>ena Router#configure terminal <Must be in privileged mode> Enter configuration commands, one per line. End with CNTL/Z. Router(config)#? Configure commands: access-list Add an access list entry <text omitted> Router(config)#exit 00:03:20: %SYS-5-CONFIG_I: Configured from console by con Router#config t Enter configuration commands, one per line. End with CNTL/Z. Router(config)#exit 00:03:34: %SYS-5-CONFIG_I: Configured from console by console Router# Hostname Router#config t Router(config)#hostname R1 R1(config)# Passwords There are only two passwords we will use in our classes, they are cisco and class. (both lowercase). Of course this is something you would not do in a production network, but so we do not have to do password recovery on equipment and to make it easier for everyone, we will use only these two passwords. Console = cisco VTY = cisco Priviledge = class Console password = cisco The console password requires someone to enter a password before accessing the router using the console port. Router#conf t R1(config)#line console 0 R1(config-line)#password cisco R1(config-line)#login R1(config-line)#exit R1(config)# 4 VTY password = cisco The vty password requires someone to enter a password before accessing the router remotely using telnet. R1(config)#line vty 0 4 R1(config-line)#password cisco R1(config-line)#login R1(config-line)#exit R1(config)# Privilege password = class The privilege mode password requires someone to enter a password when entering privilege mode with the enable command. R1(config)#enable secret class R1(config)#end R1# Test it: R1#disable R1>enable Password:class R1# Viewing, Saving and Erasing the Configurations running-config The running-config file is the configuration in RAM memory. All changes are made to the running-config file. This is the configuration that the router is currently using. The running-config is lost when the router loses power or reloads. Privilege mode command. Router#show running-config Current configuration : 542 bytes ! version 12.2 ! interface FastEthernet0/0 no ip address shutdown duplex auto speed auto ! interface Serial0/0 no ip address shutdown ! line con 0 line aux 0 5 line vty 0 4 ! end Router# startup-config The startup-config file is the saved configuration in NVRAM. If there is a startup-config file in NVRAM when the router boots up, this file will be copied into running-config. The running-config is what the router will use. Privilege mode command. Router#show startup-config startup-config is not present Router# Copy running-config to startup-config The running-config should be periodically saved to startup-config when you are satisfied with your changes and you do not want to lose them. (Lab) Production network, startup-config should always match running-config in case of power failure, etc. Privilege mode command. Router#copy running-config startup-config Destination filename [startup-config]? <Press Enter> Building configuration... [OK] Router#show startup-config Current configuration : 542 bytes ! version 12.2 ! interface FastEthernet0/0 <text omitted> Erase startup-config When you are done with the routers in the lab, please be sure to erase the startup-config. If you are starting a lab, and you do not get the message: Would you like to enter the initial configuration dialog? [yes/no]: You will need to erase the startup-config and reboot. Privilege mode command. Router#erase startup-config Erasing the nvram filesystem will remove all files! Continue? [confirm] <Press Enter> [OK] Erase of nvram: complete Router# 6 copy running-config startup-config Router# copy running-config startup-config Or Router# copy running startup OR Router# copy run start OR Any usage of the command or parameters, so that they are still uniquely recognizable. reload Router#erase startup-config Router#reload Managing Console Input Router(config)#line console 0 Router(config-line)#logging synchronous Router(config-line)#exec-timeout 0 0 Router(config-line)#exit Router(config)#no ip domain-lookup The Router Interfaces Interfaces A quick look at the interfaces. Router#show ip interface brief Interface IP-Address FastEthernet0/0 unassigned Serial0/0 unassigned BRI0/0 unassigned BRI0/0:1 unassigned BRI0/0:2 unassigned Serial0/1 unassigned Router# OK? YES YES YES YES YES YES Method unset unset unset unset unset unset Status administratively administratively administratively administratively administratively administratively Protocol down down down down down down down down down down down down Configuring an Ethernet interface Your interfaces may differ! Adding an IP address and subnet mask no shutdown – turns on the interface. Router#conf t Enter configuration commands, one per line. End with CNTL/Z. Router(config)#inter fastethernet 0/0 Router(config-if)#ip add 172.30.1.1 255.255.255.0 Router(config-if)#no shutdown Router(config-if)#end Router# 7 Configuring a serial interface Your interfaces may differ! Adding an IP address and subnet mask no shutdown – turns on the interface R1(config)#inter serial 0/0 R1(config-if)#ip address 192.168.1.1 255.255.255.0 R1(config-if)#no shutdown R1(config-if)#exit Examining the show commands show interfaces – Displays all the statistics for all the interfaces on the router. To view the statistics for a specific interface, enter the show interfaces command followed by the specific interface and port number. show controllers serial – Displays information-specific to the interface hardware show clock – Shows the time set in the router show hosts – Displays a cached list of host names and addresses show users – Displays all users who are connected to the router show history – Displays a history of commands that have been entered show flash – Displays information about flash memory and what IOS files are stored there show version – Displays information about the router and the IOS that is running in RAM show ARP – Displays the ARP table of the router show protocol – Displays the global and interface specific status of any configured Layer 3 protocols show startup-configuration – Displays the saved configuration located in NVRAM show running-configuration – Displays the configuration currently running in RAM show interfaces <interface> command Router>show interface ethernet 0 Ethernet0 is administratively down, line protocol is down , using hub 0 Hardware is Lance, address is 0010.7b3a.cf84 (bia 0010.7b3a.cf84) MTU 1500 bytes, BW 10000 Kbit, DLY 1000 usec, rely 255/255, load 1/255 Encapsulation ARPA, loopback not set, keepalive set (10 sec) ARP type: ARPA, ARP Timeout 04:00:00 Last input never, output 01:05:35, output hang never Last clearing of "show interface" counters never Queueing strategy: fifo Output queue 0/40, 0 drops; input queue 0/75, 0 drops 5 minute input rate 0 bits/sec, 0 packets/sec 5 minute output rate 0 bits/sec, 0 packets/sec 0 packets input, 0 bytes, 0 no buffer Received 0 broadcasts, 0 runts, 0 giants, 0 throttles 0 input errors, 0 CRC, 0 frame, 0 overrun, 0 ignored, 0 abort 0 input packets with dribble condition detected 63 packets output, 11676 bytes, 0 underruns 0 output errors, 0 collisions, 1 interface resets 0 babbles, 0 late collision, 0 deferred 0 lost carrier, 0 no carrier 0 output buffer failures, 0 output buffers swapped out Router> 8 Where is the MAC Address? Router>show interface serial 0 Serial0 is administratively down, line protocol is down Hardware is HD64570 MTU 1500 bytes, BW 1544 Kbit, DLY 20000 usec, rely 255/255, load 1/255 Encapsulation HDLC, loopback not set, keepalive set (10 sec) Last input never, output never, output hang never Last clearing of "show interface" counters never Queueing strategy: fifo Output queue 0/40, 0 drops; input queue 0/75, 0 drops 5 minute input rate 0 bits/sec, 0 packets/sec 5 minute output rate 0 bits/sec, 0 packets/sec 0 packets input, 0 bytes, 0 no buffer Received 0 broadcasts, 0 runts, 0 giants, 0 throttles 0 input errors, 0 CRC, 0 frame, 0 overrun, 0 ignored, 0 abort 28 packets output, 9576 bytes, 0 underruns 0 output errors, 0 collisions, 17 interface resets 0 output buffer failures, 0 output buffers swapped out 0 carrier transitions DCD=down DSR=down DTR=down RTS=down CTS=down Router> Configuring a serial interface On serial links that are directly interconnected, as in a lab environment, one side must be considered a DCE and provide a clocking signal. The clock is enabled and speed is specified with the clock rate command. Router(config)#interface serial 0/0 Router(config-if)#clock rate 56000 Router(config-if)#no shutdown Configuring a serial interface RouterB(config)#inter serial 1 RouterB(config-if)#clock rate ? Speed (bits per second) 1200 2400 4800 9600 19200 38400 56000 64000 <text omitted> 2000000 4000000 <300-4000000> Choose clockrate from list above 9 RouterB(config-if)#clock rate 64000 RouterB(config-if)# Configuring a serial interface RouterA#show controllers serial 0 HD unit 0, idb = 0xECA4C, driver structure at 0xF1EC8 buffer size 1524 HD unit 0, V.35 DTE cable cpb = 0x62, eda = 0x403C, cda = 0x4050 RX ring with 16 entries at 0x624000 00 bd_ptr=0x4000 pak=0x0F5704 ds=0x62FFB8 status=80 pak_size=22 RouterB#show controllers serial 0 buffer size 1524 HD unit 0, V.35 DCE cable, clockrate 64000 cpb = 0x62, eda = 0x408C, cda = 0x40A0 RX ring with 16 entries at 0x624000 00 bd_ptr=0x4000 pak=0x0F2F04 ds=0x627908 status=80 pak_size=22 Switch Configuration Physical startup of the Catalyst switch Show running-config ALSwitch#show running-config Building configuration... Current configuration : 1300 bytes ! version 12.1 no service pad service timestamps debug uptime service timestamps log uptime no service password-encryption ! hostname ALSwitch ! ! ip subnet-zero ! ! spanning-tree mode pvst no spanning-tree optimize bpdu transmission spanning-tree extend system-id ! ! ! ! interface FastEthernet0/1 10 Set Port Speed and Duplex Settings The Fast Ethernet switch ports default to: o auto-speed o auto-duplex. This allows the interfaces to negotiate these settings. When a network administrator needs to ensure an interface has particular speed and duplex values, the values can be set manually. HTTP Service and Port A web browser can access this service using the IP address and port 80, the default port for http. The HTTP service can be turned on or off, and the port address for the service can be chosen. Managing the MAC address table Switches learn the MAC addresses of PCs or workstations that are connected to their switch ports by examining the source address of frames that are received on that port. Machines may have been removed from a port, turned off, or moved to another port on the same switch or a different switch. This could cause confusion in frame forwarding. The MAC address entry is automatically discarded or aged out after 300 seconds. Switch#show mac-address-table Managing the MAC address table Rather than wait for a dynamic entry to age out, the administrator has the option to use the privileged EXEC command clear mac-address-table. 11

