mason-mercer - Mason Industries Inc.
advertisement
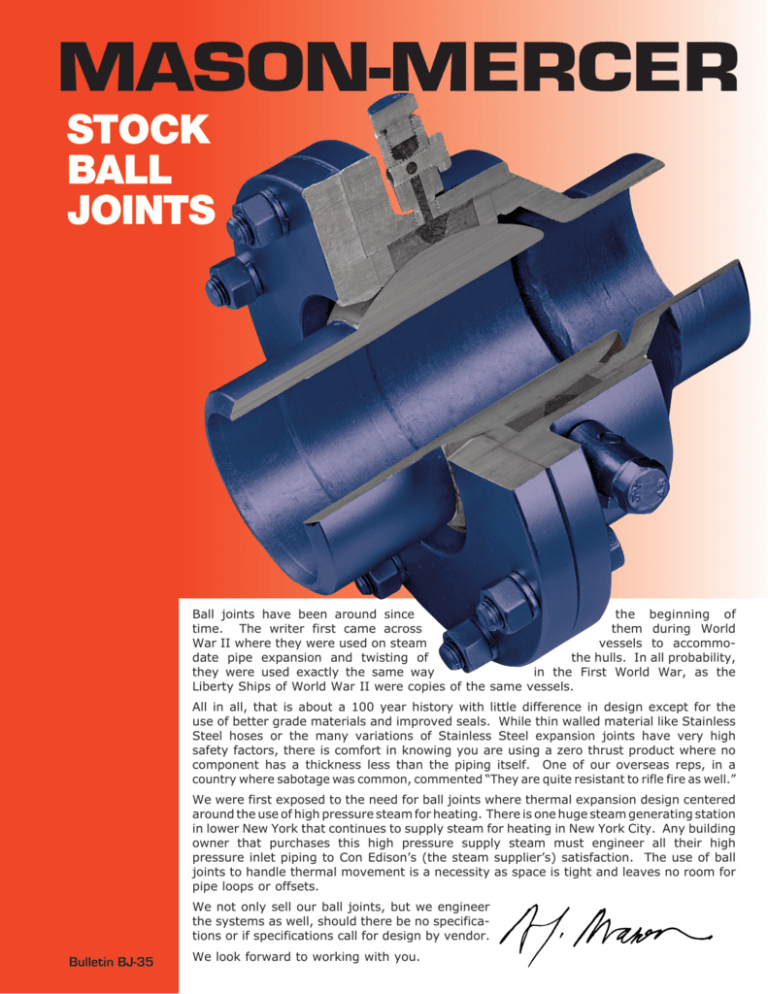
MASON-MERCER STOCK BALL JOINTS Ball joints have been around since the beginning of time. The writer first came across them during World War II where they were used on steam vessels to accommodate pipe expansion and twisting of the hulls. In all probability, they were used exactly the same way in the First World War, as the Liberty Ships of World War II were copies of the same vessels. All in all, that is about a 100 year history with little difference in design except for the use of better grade materials and improved seals. While thin walled material like Stainless Steel hoses or the many variations of Stainless Steel expansion joints have very high safety factors, there is comfort in knowing you are using a zero thrust product where no component has a thickness less than the piping itself. One of our overseas reps, in a country where sabotage was common, commented “They are quite resistant to rifle fire as well.” We were first exposed to the need for ball joints where thermal expansion design centered around the use of high pressure steam for heating. There is one huge steam generating station in lower New York that continues to supply steam for heating in New York City. Any building owner that purchases this high pressure supply steam must engineer all their high pressure inlet piping to Con Edison’s (the steam supplier’s) satisfaction. The use of ball joints to handle thermal movement is a necessity as space is tight and leaves no room for pipe loops or offsets. We not only sell our ball joints, but we engineer the systems as well, should there be no specifications or if specifications call for design by vendor. Bulletin BJ-35 We look forward to working with you. TWO BALL JOINTS FOUR BALL JOINTS When ball joints are installed at each end of a pipe offset (Fig. 1), the system can accommodate much larger movements with much lower anchorage requirements than solid pipe in the same configuration. In many cases any offset is undesirable, so four ball joints are used in a loop (Fig. 3A). Using the same dimension “CC” in both legs, you can accommodate twice the motion. Reducing the centers 50% would accommodate the same two joint motion (Fig. 1) with smaller offset and conserve space as well (Fig. 3B). Figure 1 Mason 30N Spring Hanger X Y Two Ball Joint Installation Figure 3 (A & B) Four Ball Joint Installation SP SP EE– End to End CC–Center to Center of Rotation Roller JL–Ball Joint Length CR CR–Ball Joint Center of Rotation Θ X–Pipe Movement CC Y– Drop in Elevation Θ-Angle of Rotation JL Gray indicates Starting Position Mason BJW250 Ball Joint Fig 3B Fig 3A SP– Spreader Pipe DROP IN ELEVATION “Y” Ball joint movement reduces distance between parallel piping as shown by “Y” (Figure 1). This dimension is significant because if the offset is vertical, the adjacent pipe support could pull out. Therefore a Mason 30N spring hanger with a minimum deflection of 4 times “Y” should be installed at the first support and the second and third locations studied. STARTING RESISTANCE COLD SETTING One way to increase allowable motion is to start out with the assembly pre-set all the way to the position when the pipe is cold (Fig. 2). Assuming the total expansion from Cold (Ambient Temperature) to Hot is 8 inches, you could set the pipe line 4 inches off center and design for a 4” rather than an 8” movement leg. The piping is preset 6° off center to 6° past center. Maximum rated movement is 7.5° off center, so 6° provides a safety factor. Figure 2 8” 4” Roller CC L– Intermediate Pipe Length L EE CC/2 4” Cold Two Ball Joint Installation with Cold Setting Ball joints do not generate any pressure thrust. However, there is an initial force required to start motion that controls anchorage. The force “F” applied to the pipe anchors is directly related to the distance between Ball Joint Centers “CC”. (Figure 4). Force “F” diminishes with longer lever arms needed for larger movements. Four joint loops have shorter levers for the same movement, so forces increase (Table 4). Figure 4 Force “F” on Anchor Starting Resistance Roller Thermal Expansion Hot CC (Lever Arm) A B C CC A–Cold Position -6° Off Center B– Hot Position +6° Off Center Force “F” on Anchor C– Total Movement 12° USING SELECTION TABLES 2 While the method is perfectly valid, steamfitters are accustomed to working “Plumb” and the “Cold Set” instruction can be missed. The method is excellent but supervision becomes essential and the designer must decide whether to take the risk. The following tables provide rounded values for easy selection. For the sake of simplicity, Ball Joint Centers “CC” are in 6” increments in Table 1 and 3” in Table 2. If space is tight, interpolate between columns. Calculations based on Table 5 may save even more space. The next page provides examples of how to use the tables with the installations previously discussed. TABLE 1 “CC”, “L”, and “Y” DIMENSIONS for TWO JOINT INSTALLATION WITHOUT COLD SETTING See Figure 1 Up to Pipe Movement “X” Pipe Size 4”5”6”7”8”9” 10”11”12” CR JL (inches) Ball Joint Centers “CC” (inches) Ball Joint Ball 2 2430364248 54 60 66 72 Center of Joint 2 1/2-14 4860728496108 120 132144 Rotation Length Size Intermittent Pipe Length “L” (inches) (inches) (inches) 2 1622283440 46 52 58 64 4 7 2 1/2 4052647688100112124136 4 1/8 7 7/8 3 3 3951637587 99111123135 4 /8 8 1/2 4 3850627486 98110122134 5 10 1/2 5 3850627486 98110122134 5 1/810 5/8 6 3749617385 97109121133 5 5/811 7/8 8 3446587082 94106118130 7 14 3/8 10 3345576981 93105117129 7 5/8 16 12 2941536577 89101113125 9 1/2 18 1/8 14 2739516375 87 99111123 10 1/2 19 1/4 Size Drop in Elevation “Y” (inches) 2 .34.42.50.59.67 .76 .84 .921.01 2 1/2-14 .17.21.25.29.33.38 .42 .46.50 TABLE 2 “CC”, “L”, and “Y” DIMENSIONS for TWO JOINT INSTALLATION WITH COLD SETTING See Figure 2 Up to Pipe Movement “X” Pipe 11” 12” Size 4”5”6”7” 8”9”10” CR JL (inches) Ball Joint Centers “CC” (inches) Ball Joint Ball 2 12 151821 2427303336 Center of Joint 2 1/2-1424303642 4854606672 Rotation Length Size Intermittent Pipe Length “L” (inches) (inches) (inches) 2 4 71013 1619222528 4 7 2 1/2 16222834 4046525864 4 1/8 7 7/8 3 3 15212733 3945515763 4 /8 8 1/2 4 14202632 3844505662 5 10 1/2 5 14202632 3844505662 5 1/810 5/8 6 13192531 3743495561 5 5/811 7/8 8 10162228 3440465258 7 14 3/8 10 9152127 3339455157 7 5/8 16 12 5111723 2935414753 9 1/2 18 1/8 14 3 91521 2733394551 10 1/2 19 1/4 Size Drop in Elevation “Y” (inches) 2 .17.21.25.29 .34.38.42 .46.50 2 1/2-14 .08.10.13.15 .17.19.21 .23.25 TABLE 3 MINIMUM SPREADER PIPE “SP” BETWEEN ELBOWS for FOUR JOINT INSTALLATION TO AVOID JOINT CLASHING See Figure 3 SP Up to Pipe Movement “X” Pipe Size 4”5”6” 7” 8” 9” 10”11”12” (inches) Spreader Pipe “SP” between Elbows (inches) 2 18 2124273030 303336 2 1/2 18 2124273030 303336 3 18 2124273030 303336 4 24 2424273030 303336 5 24 2424273030 303336 6 18 2124273030 303336 8 18 2124273030 303336 10 18 2124272427 303336 12 18 2124272427 303336 14 12 1518212424 242730 TABLE 4 STARTING RESISTANCE AT 250psi See Figure 4 Up to Up to Pipe Movement “X” Pipe Torque 4” 4”6” 6”8” 8”10” 10”12”12” Size “T” (in) (ft-lbs) Force “F”* (lbs) on Anchors Without & With Cold Setting 2 200 200 40013326710020080 16067 133 2 1/2230 115 23077 15358 11546923877 3 320 160 32010721380 16064 12853 107 4 600 300 600200400150300120240100200 5 1000 500 1000333667250500200400167333 6 2000 1000 2000667 1333500 1000400800333667 8 3300 1650 33001100 2200825 1650660 13205501100 10 6000 3000 60002000 40001500 30001200 240010002000 12 7500 375075002500 50001875 37501500300012502500 14 11000 550011000366773332750 55002200 440018333667 TABLE 5 BALL JOINT ANGULAR MOVEMENT Pipe Size Maximum Θ Recommended Angle (inches) Angle with 20% Safety Factor 2 30° 24° 21/2 - 14 15° 12° In all engineered systems, a safety factor is important. Two Ball Joint Installation without Cold Setting To size an 8” two ball joint offset for 6” movement at 250 psi, use Table 1. The recommended Center to Center “CC” is 72”, the Intermediate Pipe Length “L” is 58” and the Drop in Elevation “Y” is 0.25”. Table 4 shows the Force “F” on Anchor as 1100 lbs. A stainless expansion joint thrust is 12,000 lbs., 11 times the required anchorage for the ball joints. Two Ball Joint Installation with Cold Setting To size an 8” two ball joint offset for 6” movement at 250 psi with cold set, use Table 2. The recommended Center to Center “CC” is 36”, the Intermediate Pipe Length “L” is 22” and the Drop in Elevation “Y” is 0.13”. Table 4 shows the Force “F” on Anchor as 2200 lbs. This force is still much lower than the stainless expansion joint thrust of 12,000 lbs., which is 5.5 times the required anchorage for the ball joints. Four Ball Joint Installation without Cold Setting To size an 8” four ball joint loop for 6” movement, divide the 6” movement by two, as there are two 3” movement legs. Using Table 1, 4” column, “CC” is 48”, “L” is 34” and “Y” is 0.17”. To size the spreader pipe “SP” so the two legs of the loop do not clash, use Table 3 for a Minimum Spreader Length “SP” of 24”. “Cold Set” designs are the same as above, using Table 2. FRICTION FORCES Pipe Friction is usually taken as 30% of the pipe weight between anchors. Add this force to Table 4 or calculated numbers as an additional force on anchors. CALCULATIONS For engineers who prefer to do their own calcs. Refer to Figure 1 for definitions of “CC”, “L”, “CR”, “EE”, “JL” and “Y”; Table 4 for “F” and “T”; and Table 5 for “Θ”. Two Ball Joint Installation without Cold Setting Example: 10” steam line, thermal expansion 7”. CC = X / [Sin (Θ/2)] = 7” / [Sin (12°/2)] = 67” L = CC - (2 x CR) = 67” - (2 x 7.625”) = 51.75” EE = L + (2 x JL) = 51.75” + (2 x 16”) = 83.75” Y = CC – (CC2 – X2)1/2 = 67” – (672 – 72)1/2 = 0.37” For 0.37” movement, we recommend a spring hanger with a deflection 4 times “Y” or 1.48”, i.e. Mason 1.5” deflection 30N hanger. F = 2T / CC = 2 x 6000 ft-lbs / 5.58 ft = 2151 lbs. Two Ball Joint Installation with Cold Setting Example: 10” steam line, thermal expansion 9”. CC = [X/2] / [Sin(Θ/2)] = [9”/2] / [Sin (12°/2)] = 43” L = CC - (2 x CR) = 43” - (2 x 7.625”) = 27.75” EE = L + (2 x JL) = 27.75” + (2 x 16”) = 59.75” Y = CC – (CC2 – (X/2)2)1/2 = 43” – (432 – (9/2)2)1/2 = 0.24” For 0.24” movement, we recommend a spring hanger with a deflection 4 times “Y” or 0.96”, i.e. Mason 1” deflection 30N hanger. F = 2T / CC = 2 x 6000 ft-lbs/ 3.58 ft = 3352 lbs. 3 BJW250 BALL JOINT with WELD ENDS STEEL BALL RETAINER REMOVE PLUG TO INJECT PACKING JL PACKING INJECTION PORT (See Detail) PACKING INLET AND SEAL VALVE IN CLOSED POSITION– ROTATE 90° TO OPEN INJECTED FLAKE GRAFOIL PACKING (Filled at factory, may be repacked in field using hand pump) CR 1 MIL CHROMED STEEL SEAL RETENTION RINGS HD STEEL BALL WELD END– WELD INTERMEDIATE PIPE TO THIS END SOCKET ASSEMBLY MD HARD GRAPHITE CONTAINMENT SEAL SEAL AND PACKING DETAIL MAM FD FINISH: Blue Enamel Paint STEEL BALL 1 MIL HARD CHROME PLATING aintain 4” minimum clearance M around MD to allow for repacking. Packing can be injected under full line pressure when required. Packing to be Flake Grafoil. BJW250 DIMENSIONS AND PRESSURE RATINGS JL CR FD HD MD MAM MaximumStarting Type Pipe Joint Center of Flange Hub Max. Max. Angular PressureResistanceNumberShip & Size Length Rotation Diameter DiameterDiameter Movement @480°F Torque ofWeight Size (inches) (inches) (inches) (inches) (inches) (inches) (degrees) (psi) (ft-lbs) Ports(lbs) BJW250-2 2 7 4 – 5 1/4 9 1/2 30 250 200 216 BJW250-2 1/2 2 1/2 7 7/8 4 1/8 – 6 10 1/4 15 250 230 223 BJW250-3 3 8 1/2 4 3/8 – 6 1/2 10 3/4 15 250 320 226 BJW250-4 4 10 1/2 5 10 7/8 7 7/8 12 1/8 15 250 600 472 BJW250-5 5 10 5/8 5 1/8 12 9 13 1/4 15 250 1000 480 BJW250-6 6 11 7/8 5 5/8 13 1/410 1/2 14 3/4 15 250 2000 5113 BJW250-8 8 14 3/8 7 16 13 17 1/4 15 250 3300 6189 BJW250-10 10 16 7 5/8 19 3/816 20 1/4 15 250 6000 7280 3/4 BJW250-1212 18 1/8 9 1/2 22 18 1/222 15 250 7500 8361 1/2 1/4 BJW250-1414 19 1/410 23 5/8 2024 15 250 11000 9443 BALL JOINT SPECIFICATION: Steel Ball Joints shall have weld ends or fixed and floating flanges. The thrust free, ball and socket arrangement shall allow 360° of intermittent rotation and a minimum rocking motion of ± 7.5 degrees. Seals are guaranteed by the high pressure injection of graphite packing in a cavity between reinforced hard graphite and steel rings. The ball and steel seal retention rings shall be plated with a minimum 1 mil thickness of crack free hard chrome. The socket must incorporate an adequate number of packing cylinders for uniform distribution of the graphite seal. All cylinders must incorporate a valve to prevent blowback should pumping additional sealing material become necessary while under full line pressure. Minimum ratings are 250 psi (17 Bar) @ 480°F (250°C). Certifications must include: 1. Either manufacturer’s published information or calculations by a P.E. to verify length of spool pieces and the distance between centers of ball joints for the motion with a reasonable safety factor. 2. The friction force at the start of motion to be resisted by the anchors. Should the consulting firm prefer to indicate location of anchors and ball joints as preliminary and leave final selections to job site conditions, the manufacturer must have a P.E. on staff with a minimum of 5 years piping design experience to submit final details to allow motion as well as the force on the anchors to overcome starting friction. Ball Joints shall be weld end BJW or Flanged BJF as manufactured by Mason Industries, Inc. MASON – MERCER 4 350 Rabro Drive, Hauppauge, NY 11788 • FAX 631/348-0279 MASON– 631/348-0282 • Email info@Mason-Ind.com • Website www.Mason-Ind.com MERCER– 631/582-1524 • Email info@Mercer-Rubber.com • Website www.Mercer-Rubber.com Wu1301 01/13
