Jack`s Heater Mod
advertisement

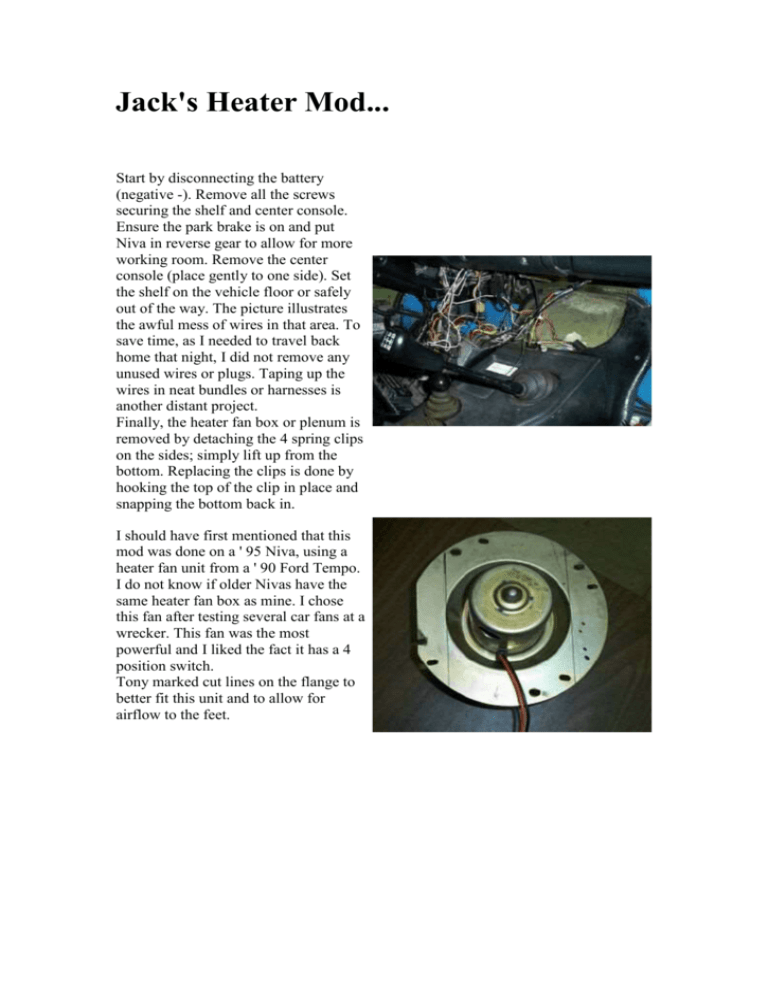
Jack's Heater Mod... Start by disconnecting the battery (negative -). Remove all the screws securing the shelf and center console. Ensure the park brake is on and put Niva in reverse gear to allow for more working room. Remove the center console (place gently to one side). Set the shelf on the vehicle floor or safely out of the way. The picture illustrates the awful mess of wires in that area. To save time, as I needed to travel back home that night, I did not remove any unused wires or plugs. Taping up the wires in neat bundles or harnesses is another distant project. Finally, the heater fan box or plenum is removed by detaching the 4 spring clips on the sides; simply lift up from the bottom. Replacing the clips is done by hooking the top of the clip in place and snapping the bottom back in. I should have first mentioned that this mod was done on a ' 95 Niva, using a heater fan unit from a ' 90 Ford Tempo. I do not know if older Nivas have the same heater fan box as mine. I chose this fan after testing several car fans at a wrecker. This fan was the most powerful and I liked the fact it has a 4 position switch. Tony marked cut lines on the flange to better fit this unit and to allow for airflow to the feet. The edges were left rough as they will not be exposed. Personal choice! This is the top of the box looking down to the hinged flap (closed). Normally you can't see this view because of the original fan unit and a plastic "floor" that helped support it. Cut this out and compare these pictures to your own heater box if you are using the same fan unit we used. This will save you a bit of time in figuring out what strengthening ribs or other bits will get in your way. The fan is now mounted and held in place by (unknown ga. and size metal brackets). We used a total of 6 rivets per side. You can just see the fan motor sticking out ever so slightly through the bottom of the heater plenum. This view shows the underside of the heater vent prior to filling the gaps around the holes that had to be made. If not done this way, the vent flap could not be closed and defrosting your windshield would be a far slower process. In this view, Tony place pieces of paper inside the box and closed the lid, taking care not to tear the paper. The clamps are keeping the vent tightly closed. Tony now uses a hot glue gun to place layers of hot glue over the paper; a very neat trick I thought! Be patient and allow some cooling time between layers as the heat will reconstitute the previous layers. This was really the longest part of this whole project; avoid moving it until it has cooled. The Master at work (Tony). Note the layers building up. I could not have done this w/ my wife's little craft glue gun. I think he used 3 extra long glue sticks. It's not pretty, but it worked! Tony advised not to put any glue on the underside as this may affect the closing of the vent. We could have sprayed some black paint on these spots but they will not be visible when it is reinstalled. We almost forgot to install the resistor for this fan and installed it in a slightly different location than the old one. As this resistor also has 2 required male connectors, Tony had to cut through the side of the box. Use caution of course when using an x-acto or utility knife! The visible wires and plug will be fed outside. You may be able to see in this pic that, Tony has put the hot glue along the edges of the brackets. This was done to reduce vibration. W/ this fan installed, on "high" or "4" setting, travelling at 100kph, there are no vibration sounds. Considering that I need a wheelalignment and a new rubber doughnut, this is outstanding as every other damn thing in my vehicle is loose and rattles. W/ the new fan being higher, it would have rubbed against the plastic fan shroud. Tony made a new fan shroud out of light sheet metal. Looking back, this piece could have been made more easily at the beginning, before installing the fan in the box. As such, it wasn't that difficult to make the outline of the shroud opening. The edges still touched the fan so I flared the hole edge w/ a ball peen hammer to replicate the original plastic shroud. This worked and then Tony hot glued the shroud in place (see pic). In closing, remember that this mod was done on a ' 95 Niva w/ a 100A alternator. If you use a stronger fan motor, this may draw a lot of Amps from your little Iskra alternator. This mod is also not completed as I hope to have it wired to the new 4 position switch and mounted on a little metal bracket in a different location. One problem I am currently having (temporary?), is that I believe this fan draws alot of amps because it actually makes my Niva "jump" a bit when I initially turn the fan switch on high. It's quite noticeable actually and I'll have to look into this. Other than that, it is great and I really believe I'll never have to worry about frosted windows again. Good luck and please pass on any comments or better tips to do this type of mod.


