Instruction Sheet
advertisement
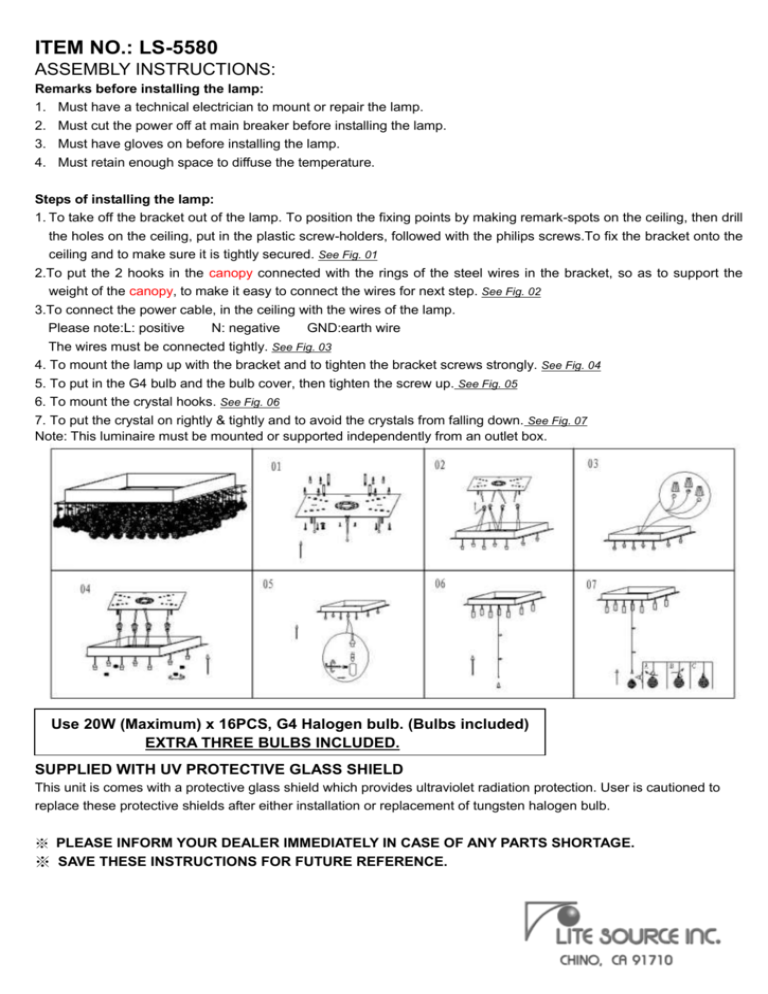
ITEM NO.: LS-5580 ASSEMBLY INSTRUCTIONS: Remarks before installing the lamp: 1. Must have a technical electrician to mount or repair the lamp. 2. Must cut the power off at main breaker before installing the lamp. 3. Must have gloves on before installing the lamp. 4. Must retain enough space to diffuse the temperature. Steps of installing the lamp: 1. To take off the bracket out of the lamp. To position the fixing points by making remark-spots on the ceiling, then drill the holes on the ceiling, put in the plastic screw-holders, followed with the philips screws.To fix the bracket onto the ceiling and to make sure it is tightly secured. See Fig. 01 2.To put the 2 hooks in the canopy connected with the rings of the steel wires in the bracket, so as to support the weight of the canopy, to make it easy to connect the wires for next step. See Fig. 02 3.To connect the power cable, in the ceiling with the wires of the lamp. Please note:L: positive N: negative GND:earth wire The wires must be connected tightly. See Fig. 03 4. To mount the lamp up with the bracket and to tighten the bracket screws strongly. See Fig. 04 5. To put in the G4 bulb and the bulb cover, then tighten the screw up. See Fig. 05 6. To mount the crystal hooks. See Fig. 06 7. To put the crystal on rightly & tightly and to avoid the crystals from falling down. See Fig. 07 Note: This luminaire must be mounted or supported independently from an outlet box. Use 20W (Maximum) x 16PCS, G4 Halogen bulb. (Bulbs included) EXTRA THREE BULBS INCLUDED. SUPPLIED WITH UV PROTECTIVE GLASS SHIELD This unit is comes with a protective glass shield which provides ultraviolet radiation protection. User is cautioned to replace these protective shields after either installation or replacement of tungsten halogen bulb. ※ PLEASE INFORM YOUR DEALER IMMEDIATELY IN CASE OF ANY PARTS SHORTAGE. ※ SAVE THESE INSTRUCTIONS FOR FUTURE REFERENCE.
