How do we input data into our database
advertisement
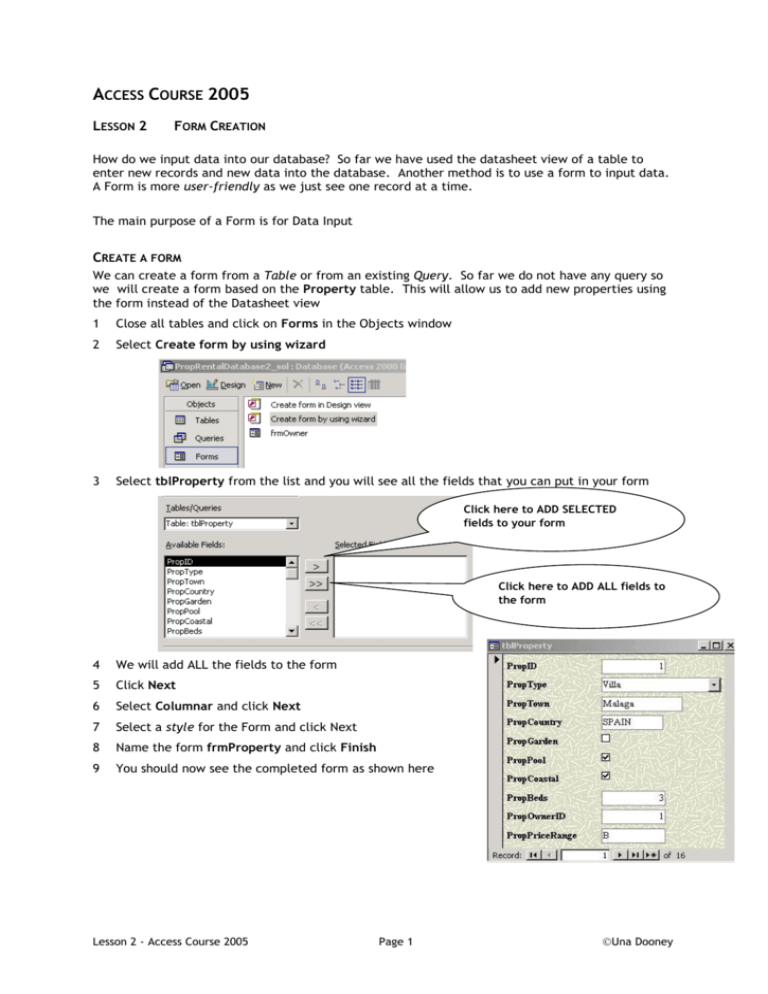
ACCESS COURSE 2005 LESSON 2 FORM CREATION How do we input data into our database? So far we have used the datasheet view of a table to enter new records and new data into the database. Another method is to use a form to input data. A Form is more user-friendly as we just see one record at a time. The main purpose of a Form is for Data Input CREATE A FORM We can create a form from a Table or from an existing Query. So far we do not have any query so we will create a form based on the Property table. This will allow us to add new properties using the form instead of the Datasheet view 1 Close all tables and click on Forms in the Objects window 2 Select Create form by using wizard 3 Select tblProperty from the list and you will see all the fields that you can put in your form Click here to ADD SELECTED fields to your form Click here to ADD ALL fields to the form 4 We will add ALL the fields to the form 5 Click Next 6 Select Columnar and click Next 7 Select a style for the Form and click Next 8 Name the form frmProperty and click Finish 9 You should now see the completed form as shown here Lesson 2 - Access Course 2005 Page 1 Una Dooney MODIFY THE FORM We can improve the appearance of the form by going into Design view 1 2 Go to the Form Design window by clicking on the Design tool A forms toolbox will appear on your screen and the form appearance will change Forms Toolbox 3 Drag your mouse down between the Form Header and Detail sections to open a space there (put the mouse on the left bar of the form and when the cursor changes to a cross click and drag down) Create this space here 4 5 6 7 Click on the Label tool in the toolbox Drag the mouse in the area you just created. This will create a text box for the heading Key in the heading Property Details Form as you see above We will format the heading so that it is font size 24 and bold. To do this: (i) Right-click on the bottom right-hand corner of the label box (ii) Select Properties and click on the All tab Notice all the different properties we can change about the text in the textbox we just created (iii) Scroll down until you find Font properties and change to size 24 and bold (iv) Close the Properties box Lesson 2 - Access Course 2005 Page 2 Una Dooney 8 To see the form again click on Form View button this now . The form should look something like In the Lab we will do a lot of other modifications of the Form Design INPUT DATA USING A FORM In Form view you will see the following at the bottom of the form where you will see the Record number currently being displayed. The diagram below shows us that there are 16 records in the table and we are currently looking at record 1 You can move through the records by clicking on the arrows to the right of the figure 1 goes to next record goes to last record allows you to enter a new record. It presents you with a blank form. Use the Property Details Form you just created to enter the remaining records from the Table shown below (you have already entered the first 3 records in Lesson 1). Please do not use Table view to enter the data. The purpose of this exercise is to use a Form for data input and not a table! (See the data table here) End of Lesson 2 Lesson 2 - Access Course 2005 Page 3 Una Dooney
