Submitting a Test Request
advertisement
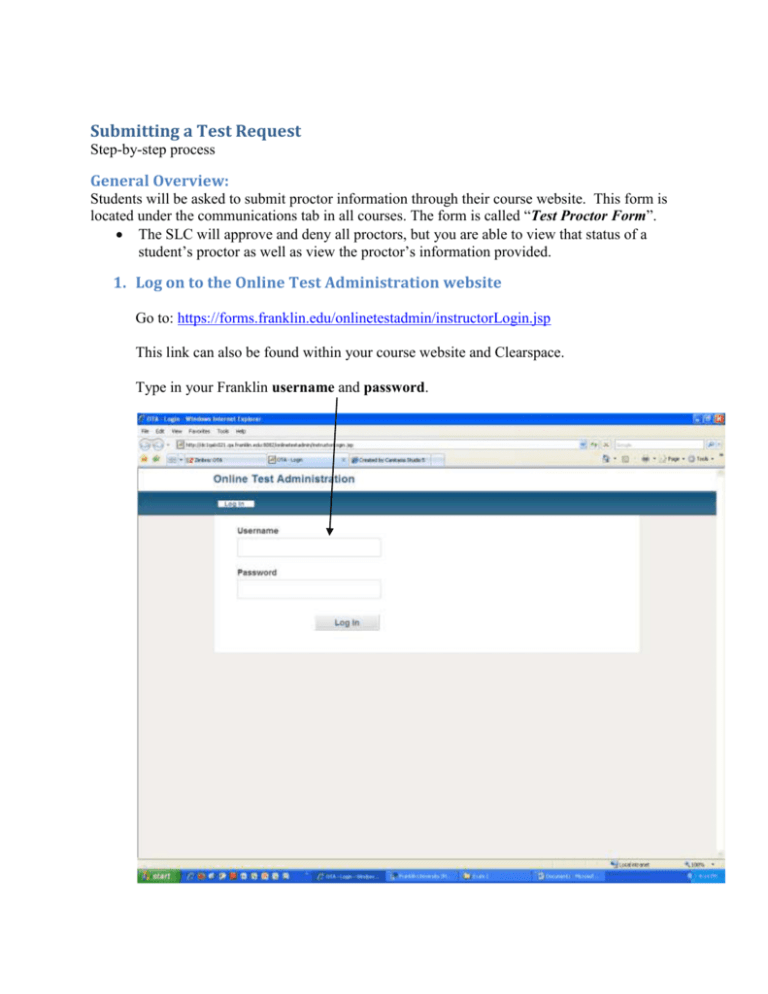
Submitting a Test Request Step-by-step process General Overview: Students will be asked to submit proctor information through their course website. This form is located under the communications tab in all courses. The form is called “Test Proctor Form”. The SLC will approve and deny all proctors, but you are able to view that status of a student’s proctor as well as view the proctor’s information provided. 1. Log on to the Online Test Administration website Go to: https://forms.franklin.edu/onlinetestadmin/instructorLogin.jsp This link can also be found within your course website and Clearspace. Type in your Franklin username and password. * This will take you to the home screen where you can toggle back and forth between submitting a new test request and looking at your test details 2. Viewing Proctor Information Before submitting a test request you can check the proctor statuses of all your students by clicking on the “Test Details” tab. Make sure that the course in which you wish to view the proctor status is highlighted in dark grey. This will allow you to view only the students enrolled in that particular course on the left. In the “Courses I Teach,” section you are able to view all of the test requests you have submitted by clicking the arrow on the drop down box. *NOTE - Status is color coded to show you where a student is in the process of selecting a proctor. Red- means a student hasn’t submitted proctor information Yellow- means the student is waiting for the SLC to approve Green- means that the proctor is approved By clicking on the details button next to a student’s name you can view the information the proctor provide on his/her survey. Here you can review the credentials of your students’ proctors. If there is ever a time when you feel there is a discrepancy with a proctor please contact the SLC so we can assist you and the student. Below is the screen that appears after clicking on the details button. The proctor’s contact information is on the left side of the screen. Proctor survey responses are on the right side. A green check means they answered yes to the question. A red check means they answered no to the question. 3. Submitting a New Test Request To submit a test request make sure you are in the “New Test Request” tab to begin the process. I. Instructor & Course Information The first screen asks for your contact information. Everything that has an asterisk beside it must be completed. Fill in the necessary information and click “Next.” You can view your progress on the left side bar. The dark blue highlighted section shows the stage you are in of the test request process. II. Exam Information Add in the start and end dates to administer your exam. o A calendar pops up for you to easily select the day you wish the exam to start and end. Also type in the testing time limit. o This is listed in hours both in the request and on the coversheet that is provided to our proctors. Decimal points and fractions are accepted III. Permitted Materials This is where you can specify all the materials you allow your students to use while testing. o There has to be a check mark in at least one box to continue through the test request process. o If there are no materials permitted check the last box on the list. If you selected no materials, after clicking next you will skip through a screen and be directed to the “Test Return Method.” o If you check calculator, textbook, or note sheet you will be directed to the “Permitted Materials Detail.” This allows you to be more specific on the type of calculator, note sheet and/or textbook the students are allowed. o Once you have checked the correct box (es) click “Next.” IV. Permitted Materials Detail Textbooks o Simply type in the title and edition in the box. o Only click “Add New Textbook” if you are permitting more than one textbook for your students. Calculator o Select from graphing, non-graphing and any. Note Sheet o Select the note sheet you wish to allow your students to bring with them for testing. Click “Next.” V. Test Return Method Select the method you would like your exams to be returned to you by checking the corresponding toggle button. Note: If your exam is online you need to select “other” and note in the text box that your exam is online via Testcraft. VI. Attach Files This section is only for paper based tests. (See above for online testing details). Here you can attach up to 5 documents. VII. Submit Request On this screen you can add additional comments and submit your request. In the Additional Comments text box add anything you think is necessary for the Testing Specialists to know when processing your test request. o Ex: an extension that was granted prior to the testing window opening. Once completed, click Submit. Once submitted a screen should pop-up to let you know that your request has been submitted successfully. You will receive a test request number for your reference if you need to contact the SLC with any discrepancies. As always, please contact either Kate Schultz (614-947-6815, testing@franklin.edu) or Sarah Christian (614-947-6813, testing@franklin.edu) with any questions or concerns regarding your test request.

