Protocol for Use of Ultrasonic Water Metering
advertisement
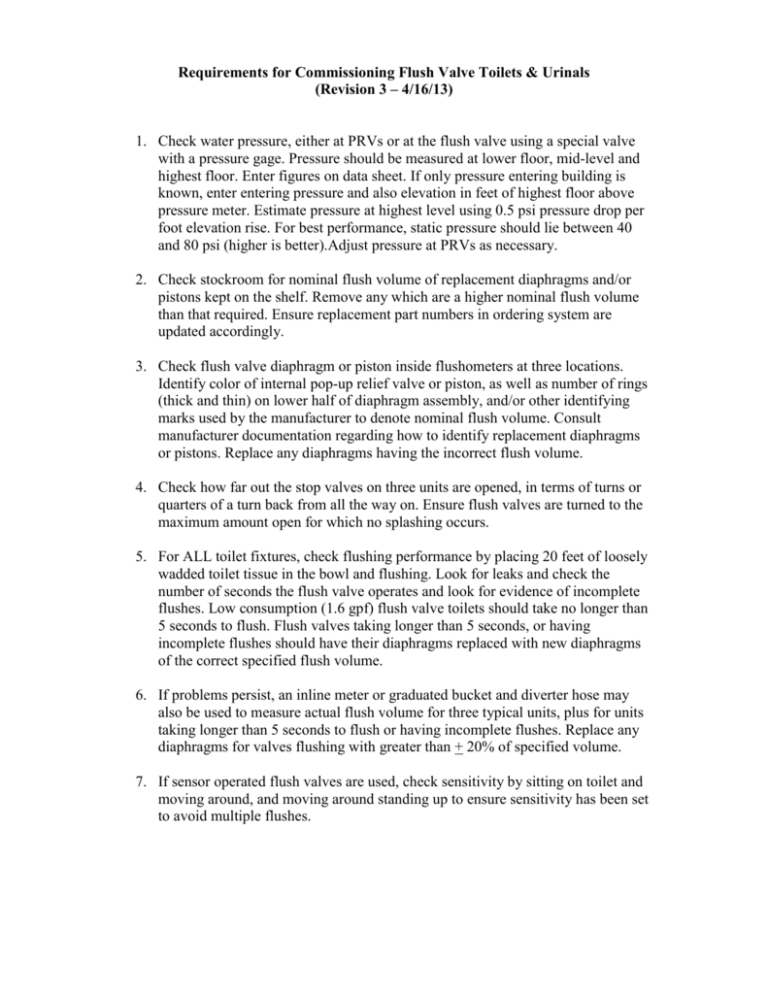
Requirements for Commissioning Flush Valve Toilets & Urinals (Revision 3 – 4/16/13) 1. Check water pressure, either at PRVs or at the flush valve using a special valve with a pressure gage. Pressure should be measured at lower floor, mid-level and highest floor. Enter figures on data sheet. If only pressure entering building is known, enter entering pressure and also elevation in feet of highest floor above pressure meter. Estimate pressure at highest level using 0.5 psi pressure drop per foot elevation rise. For best performance, static pressure should lie between 40 and 80 psi (higher is better).Adjust pressure at PRVs as necessary. 2. Check stockroom for nominal flush volume of replacement diaphragms and/or pistons kept on the shelf. Remove any which are a higher nominal flush volume than that required. Ensure replacement part numbers in ordering system are updated accordingly. 3. Check flush valve diaphragm or piston inside flushometers at three locations. Identify color of internal pop-up relief valve or piston, as well as number of rings (thick and thin) on lower half of diaphragm assembly, and/or other identifying marks used by the manufacturer to denote nominal flush volume. Consult manufacturer documentation regarding how to identify replacement diaphragms or pistons. Replace any diaphragms having the incorrect flush volume. 4. Check how far out the stop valves on three units are opened, in terms of turns or quarters of a turn back from all the way on. Ensure flush valves are turned to the maximum amount open for which no splashing occurs. 5. For ALL toilet fixtures, check flushing performance by placing 20 feet of loosely wadded toilet tissue in the bowl and flushing. Look for leaks and check the number of seconds the flush valve operates and look for evidence of incomplete flushes. Low consumption (1.6 gpf) flush valve toilets should take no longer than 5 seconds to flush. Flush valves taking longer than 5 seconds, or having incomplete flushes should have their diaphragms replaced with new diaphragms of the correct specified flush volume. 6. If problems persist, an inline meter or graduated bucket and diverter hose may also be used to measure actual flush volume for three typical units, plus for units taking longer than 5 seconds to flush or having incomplete flushes. Replace any diaphragms for valves flushing with greater than + 20% of specified volume. 7. If sensor operated flush valves are used, check sensitivity by sitting on toilet and moving around, and moving around standing up to ensure sensitivity has been set to avoid multiple flushes. Flush Valve Toilet Commissioning Data Sheet Date _________________ Job & Location ______________________________________ Commissioner:_________________ Toilet/Urinal Make & Model________________ Flush Valve Make & Model _____________________ China Fixture Nominal Flush Volume _______________ Flush Valve Nominal Flush Volume ____________________ Number of units Installed ___________________________ #1(Lower) #2 (Mid ) #3 (Upper) 1. Floor/Room of Tested Units _________ ________ _______ 2. Water Pressure (Static) _________ ________ _______ psi 3. Water Pressure (Flowing) _________ ________ _______ psi 4. Correct Diaphragm/Piston? _________ ________ _______Y/N 5. Stop Valve: # of Turns from Open _________ ________ _______Turns 6. Flush valve - seconds open _________ ________ _______ sec 7. Measured Flush _________ ________ _______ Gal 8. Sensor Sensitivity OK? _________ ________ _______Y/N 9. Flush 20 ft of Tissue? _________ ________ _______ Y/N 10. Leaks Observed? _________ ________ _______ Y/N 11. Stockroom Replacement Internal Parts: ____________________ (GPF & Part #) Notes:


