Math 242 * Week 1 Lab Assignment
advertisement
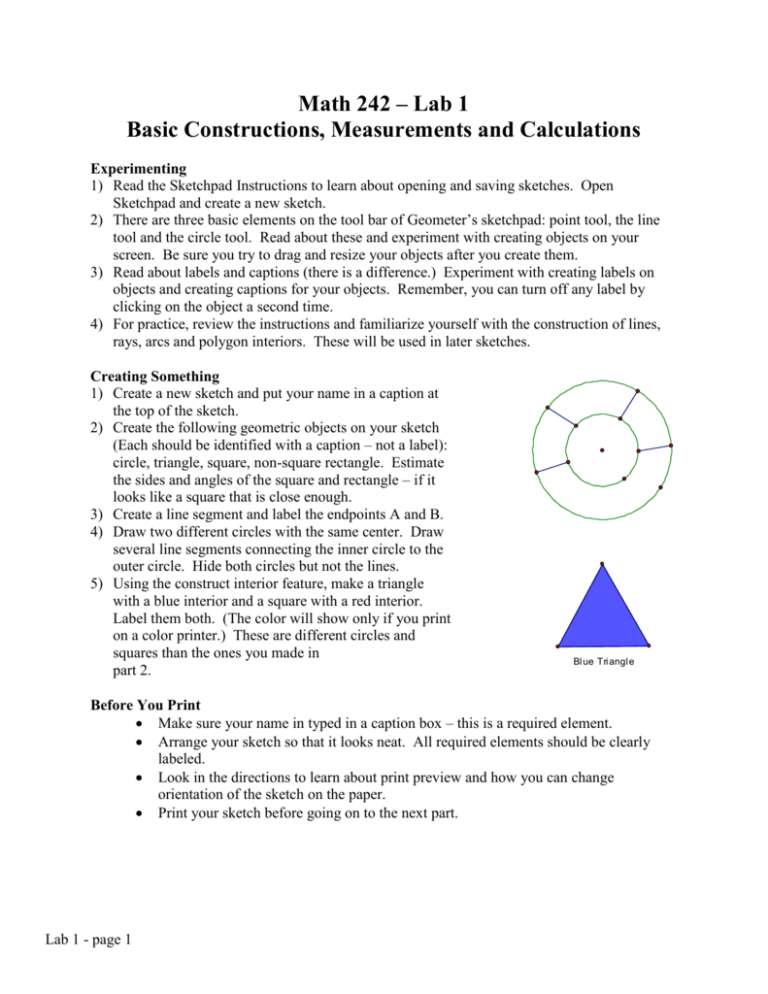
Math 242 – Lab 1 Basic Constructions, Measurements and Calculations Experimenting 1) Read the Sketchpad Instructions to learn about opening and saving sketches. Open Sketchpad and create a new sketch. 2) There are three basic elements on the tool bar of Geometer’s sketchpad: point tool, the line tool and the circle tool. Read about these and experiment with creating objects on your screen. Be sure you try to drag and resize your objects after you create them. 3) Read about labels and captions (there is a difference.) Experiment with creating labels on objects and creating captions for your objects. Remember, you can turn off any label by clicking on the object a second time. 4) For practice, review the instructions and familiarize yourself with the construction of lines, rays, arcs and polygon interiors. These will be used in later sketches. Creating Something 1) Create a new sketch and put your name in a caption at the top of the sketch. 2) Create the following geometric objects on your sketch (Each should be identified with a caption – not a label): circle, triangle, square, non-square rectangle. Estimate the sides and angles of the square and rectangle – if it looks like a square that is close enough. 3) Create a line segment and label the endpoints A and B. 4) Draw two different circles with the same center. Draw several line segments connecting the inner circle to the outer circle. Hide both circles but not the lines. 5) Using the construct interior feature, make a triangle with a blue interior and a square with a red interior. Label them both. (The color will show only if you print on a color printer.) These are different circles and squares than the ones you made in part 2. Bl ue Tri angl e Before You Print Make sure your name in typed in a caption box – this is a required element. Arrange your sketch so that it looks neat. All required elements should be clearly labeled. Look in the directions to learn about print preview and how you can change orientation of the sketch on the paper. Print your sketch before going on to the next part. Lab 1 - page 1 Measurements on Your Sketch 1) Measure the length of one side of the red square and measure the area of the square. 2) Use the calculator to square the length of the side. Note: When you open the calculator you can click on the measurement to enter it into the calculation. This will make your calculation dynamic. Don’t just copy the number by hand. Resize the square to see the effect. 3) Using the calculator divide the area of the square by the length of the side. Compare the area to the length of the side. What do you expect to see? More Construction and Calculation– Start a new page and type your name in a caption. 4) Construct a line segment label it AB. B 5) Construct one point on that segment and label it C. 6) Measure the lengths of AB, AC and CB. It is easier C to select both points and measure the distance. 7) Use the calculator to add AC and BC (make A dynamic calculations.) As you drag C along AB the calculation should change with the measurements. 8) Somewhere else on the screen construct an angle and label it DEF. Measure the angle. 9) Construct another segment GE that has one end at the vertex E and lies within the angle. 10) Measure DEG and GEF. Use the calculator to add these measures. 11) Write paragraph that summarizes what you D observed in steps 4 – 11. The observation should have something to do with measurements and addition. Use complete sentences and be as clear G and complete as possible. Try to make your E F observations general. Whatever you write should be easily verified by dragging points and observing what happens to the calculations. You may find it helpful to look at the postulates in Section 1.3 of the book. As you complete the calculations and type your observations print this second sketch. Lab 1 - page 2 A short test Open a new sketch. Give a definition for as many of the following terms as possible. Draw a sketch of the object near the definition. This is intended to show me how much you know. Don’t look up the answers. 1) Line segment 2) Ray 3) Angle 4) Acute Angle 5) Obtuse Angle 6) Right Angle 7) Circle 8) Square 9) Rectangle 10) Isosceles triangle 11) Equilateral triangle 12) Right Triangle 13) Obtuse triangle 14) Rhombus 15) Trapezoid 16) Parallelogram 17) Arc 18) Sector 19) Annulus 20) Sector of Circle What to turn in: Three sketches with your name typed on each page. 1) The sketch from the first page. 2) The sketch and comments from the 11 steps on page 2. 3) The definitions and sketches from this page. Lab 1 - page 3
