Normal & Crosswind Approach & Landings
advertisement
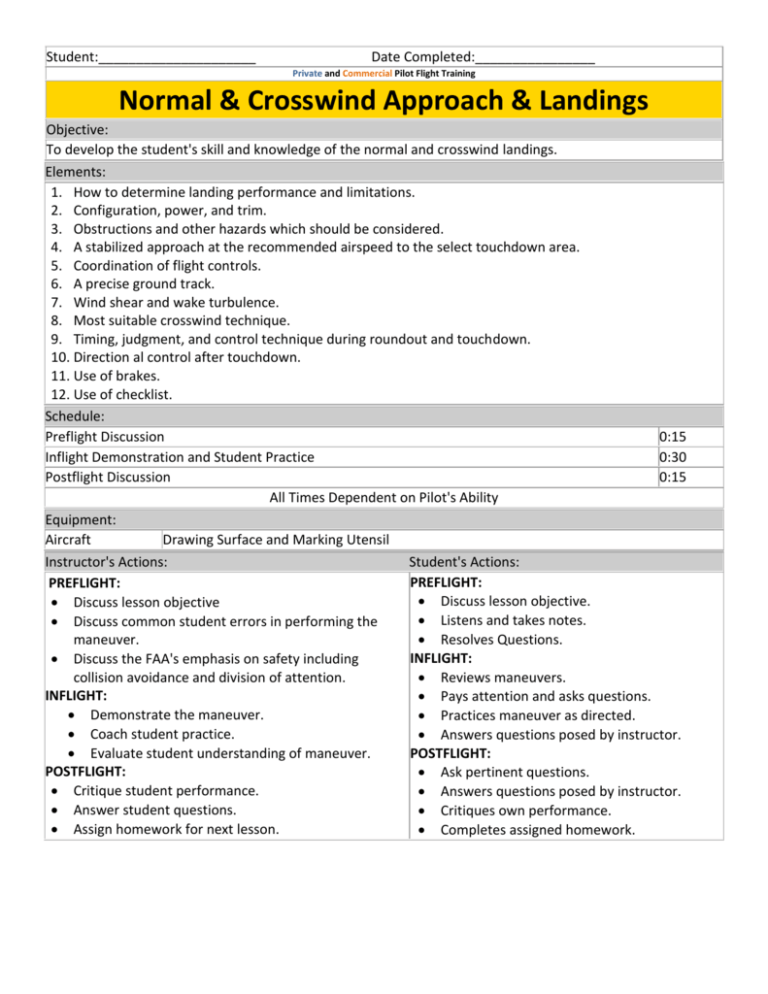
Student:_____________________ Date Completed:________________ Private and Commercial Pilot Flight Training Normal & Crosswind Approach & Landings Objective: To develop the student's skill and knowledge of the normal and crosswind landings. Elements: 1. How to determine landing performance and limitations. 2. Configuration, power, and trim. 3. Obstructions and other hazards which should be considered. 4. A stabilized approach at the recommended airspeed to the select touchdown area. 5. Coordination of flight controls. 6. A precise ground track. 7. Wind shear and wake turbulence. 8. Most suitable crosswind technique. 9. Timing, judgment, and control technique during roundout and touchdown. 10. Direction al control after touchdown. 11. Use of brakes. 12. Use of checklist. Schedule: Preflight Discussion 0:15 Inflight Demonstration and Student Practice 0:30 Postflight Discussion 0:15 All Times Dependent on Pilot's Ability Equipment: Aircraft Drawing Surface and Marking Utensil Instructor's Actions: Student's Actions: PREFLIGHT: PREFLIGHT: Discuss lesson objective. Discuss lesson objective Listens and takes notes. Discuss common student errors in performing the maneuver. Resolves Questions. INFLIGHT: Discuss the FAA's emphasis on safety including collision avoidance and division of attention. Reviews maneuvers. INFLIGHT: Pays attention and asks questions. Demonstrate the maneuver. Practices maneuver as directed. Coach student practice. Answers questions posed by instructor. Evaluate student understanding of maneuver. POSTFLIGHT: POSTFLIGHT: Ask pertinent questions. Critique student performance. Answers questions posed by instructor. Answer student questions. Critiques own performance. Assign homework for next lesson. Completes assigned homework. Private and Commercial Pilot Flight Training Private Pilot Completion Standards: FAA-H-8081-14AS (Private PTS, IV., B., 1-9) 1. Exhibits knowledge of the elements related to a normal and crosswind approach and landing. 2. Considers the wind conditions, landing surface, obstructions, and selects a suitable touchdown point. 3. Establishes the recommended approach and landing configuration and airspeed, and adjusts pitch attitude and power as required. 4. Maintains a stabilized approach and recommended airspeed, or in its absence, not more than 1.3 VSO, +10/-5 knots, with wind gust factor applied. 5. Makes smooth, timely, and correct control application during the roundout and touchdown. 6. Touches down smoothly at approximate stalling speed 7. Touches down at or within 400 feet beyond a specified point, with no drift, and with the airplane's longitudinal axis aligned with and over the runway center/landing path. 8. Maintains crosswind correction and directional control throughout the approach and landing sequence. 9. Completes the appropriate checklist. Commercial Pilot Completion Standards: FAA-H-8081-12B (Commercial PTS, IV., B., 1-9) 1. Exhibits knowledge of the elements related to a normal and crosswind approach and landing. 2. Considers the wind conditions, landing surface, obstructions, and selects a suitable touchdown point. 3. Establishes the recommended approach and landing configuration and airspeed, and adjusts pitch attitude and power as required. 4. Maintains a stabilized approach and recommended airspeed, or in its absence, not more than 1.3 VSO, +/-5 knots, with wind gust factor applied. 5. Makes smooth, timely, and correct control application during the roundout and touchdown. 6. Touches down smoothly at approximate stalling speed 7. Touches down at or within 200 feet beyond a specified point, with no drift, and with the airplane's longitudinal axis aligned with and over the runway center/landing path. 8. Maintains crosswind correction and directional control throughout the approach and landing sequence. 9. Completes the appropriate checklist. Common Errors: FAA-H-8083-3A (Chapter 8-10) 1. Inadequate wind drift correction on the base leg. 2. Overshooting or undershooting the turn onto final approach resulting in too steep or too shallow a turn onto final approach. 3. Flat or skidding turns from base leg to final approach as a result of overshooting / inadequate wind drift correction. 4. Poor coordination during turn from base to final approach. 5. Failure to complete the landing checklist in a timely manner. 6. Unstabilized approach. 7. Failure to adequately compensate for flap extension poor trim technique on final approach. 8. Attempting to maintain altitude or reach the runway using elevator alone. 9. Focusing too close to the airplane resulting in a too high roundout. 10. Focusing too far from the airplane resulting in a too low roundout. 11. Touching down prior to attaining proper landing attitude. 12. Failure to hold sufficient back-elevator pressure after touchdown. 13. Excessive braking after touchdown. References: FAA-H-8083-3A (Chapter 8-1) FAA-H-8081-14AS (Private PTS, IV., B., 1-9) POH / AFM FAA-H-8081-12B (Commercial PTS, IV., B., 1-9) Things to Remember: Hand on throttle unless trimming until safe altitude. Instructor Notes and Visual Aids Private & Commercial Pilot Flight Training Performing Normal Landings: INTRODUCTION A normal approach and landing involves the use of procedures for what is considered a normal situation; that is, when engine power is available, the wind is light or the final approach is made directly into the wind, the final approach path has no obstacles, and the landing surface is firm and of ample length to gradually bring the airplane to a stop. The selected landing point should be beyond the runway’s approach threshold but within the first one-third portion of the runway. The factors involved and the procedures described for the normal approach and landing also have applications to the other-than-normal approaches and landings which are discussed later in this chapter. This being the case, the principles of normal operations are explained first and must be understood before proceeding to the more complex operations. So that the pilot may better understand the factors that will influence judgment and procedures, that last part of the approach pattern and the actual landing will be divided into five phases: the base leg, the final approach, the roundout, the touchdown, and the after-landing roll. It must be remembered that the manufacturer’s recommended procedures, including airplane configuration and airspeeds, and other information relevant to approaches and landings in a specific make and model airplane are contained in the FAA-approved Airplane Flight Manual and/or Pilot’s Operating Handbook (AFM/POH) for that airplane. If any of the information in this chapter differs from the airplane manufacturer’s recommendations as contained in the AFM/POH, the airplane manufacturer’s recommendations take precedence. BASE LEG The placement of the base leg is one of the more important judgments made by the pilot in any landing approach. The pilot must accurately judge the altitude and distance from which a gradual descent will result in landing at the desired spot. The distance will depend on the altitude of the base leg, the effect of wind, and the amount of wing flaps used. When there is a strong wind on final approach or the flaps will be used to produce a steep angle of descent, the base leg must be positioned closer to the approach end of the runway than would be required with a light wind or no flaps. Normally, the landing gear is extended and before landing checks completed prior to reaching base leg. After turning onto the base leg, the pilot should start the descent with reduced power and airspeed of approximately 1.4 VSO. (VSO the stalling speed with power off, landing gears and flaps down.) For example, if VSO is 60 knots, the speed should be 1.4 times 60, or 84 knots. Landing flaps may be partially lowered, if desired, at this time. Full flaps are not recommended until the final approach is established. Drift correction should be established and maintained to follow a ground track perpendicular to the extension of the centerline of the runway on which the landing is to be made. Since the final approach and landing will normally be made into the wind, there will be somewhat of a crosswind during the base leg. This requires that the airplane be angled sufficiently into the wind to prevent drifting farther away from the intended landing spot. The base leg should be continued to the point where a medium to shallow-banked turn will align the airplane’s path directly with the centerline of the landing runway. This descending turn should be completed at a safe altitude that will be dependent upon the height of the terrain and any obstructions along the ground track. The turn to the final approach should also be sufficiently above the airport elevation to permit a final approach long enough for the pilot to accurately estimate the resultant point of touchdown, while maintaining the proper approach airspeed. This will require careful planning as to the starting point and the radius of the turn. Normally, it is recommended that the angle of bank not exceed a medium bank because the steeper the angle of bank, the higher the airspeed at which the airplane stalls. Since the base to final turn is made at a relatively low altitude, it is important that a stall not occur at this point. If an extremely steep bank is needed to prevent overshooting the proper final approach path, it is advisable to discontinue the approach, go around, and plan to start the turn earlier on the next approach rather than risk a hazardous situation. FINAL APPROACH After the base-to-final approach turn is completed, the longitudinal axis of the airplane should be aligned with the centerline of the runway or landing surface, so that drift (if any) will be recognized immediately. On a normal approach, with no wind drift, the longitudinal axis should be kept aligned with the runway centerline throughout the approach and landing. (The proper way to correct for a crosswind will be explained under the section, Crosswind Approach and Landing. For now, only an approach and landing where the wind is straight down the runway will be discussed.) After aligning the airplane with the runway centerline, the final flap setting should be completed and the pitch attitude adjusted as required for the desired rate of descent. Slight adjustments in pitch and power may be necessary to maintain the descent attitude and the desired approach airspeed. In the absence of the manufacturer’s recommended airspeed, a speed equal to 1.3 VSO should be used. If VSO is 60 knots, the speed should be 78 knots. When the pitch attitude and airspeed have been stabilized, the airplane should be re-trimmed to relieve the pressures being held on the controls. The descent angle should be controlled throughout the approach so that the airplane will land in the center of the first third of the runway. The descent angle is affected by all four fundamental forces that act on an airplane (lift, drag, thrust, and weight). If all the forces are constant, the descent angle will be constant in a no-wind condition. The pilot can control these forces by adjusting the airspeed, attitude, power, and drag (flaps or forward slip). The wind also plays a prominent part in the gliding distance over the ground ; naturally, the pilot does not have control over the wind but may correct for its effect on the airplane’s descent by appropriate pitch and power adjustments. Considering the factors that affect the descent angle on the final approach, for all practical purposes at a given pitch attitude there is only one power setting for one airspeed, one flap setting, and one wind condition. A change in any one of these variables will require an appropriate coordinated change in the other controllable variables. For example, if the pitch attitude is raised too high without an increase of power, the airplane will settle very rapidly and touchdown short of the desired spot. For this reason, the pilot should never try to stretch a glide by applying back elevator pressure alone to reach the desired landing spot. This will shorten the gliding distance if power is not added simultaneously. The proper angle of descent and airspeed should be maintained by coordinating pitch attitude changes and power changes. The objective of a good final approach is to descend at an angle and airspeed that will permit the airplane to reach the desired touchdown point at an airspeed which will result in minimum floating just before touchdown; in essence, a semi-stalled condition. To accomplish this, it is essential that both the descent angle and the airspeed be accurately controlled. During a normal approach the power setting is not fixed so power/pitch attitude is adjusted simultaneously, to control airspeed, and descent angle, or to attain the desired altitudes along the approach path. By lowering the nose and reducing power to keep approach airspeed constant, a descent at a higher rate can be made to correct for being too high in the approach. This is one reason for performing approaches with partial power; if the approach is too high, merely lower the nose and reduce the power. When the approach is too low, add power and raise the nose. USE OF FLAPS The lift/drag factors may also be varied by the pilot to adjust the descent through the use of landing flaps. Flap extension during landings provides several advantages by: Producing greater lift and permitting lower landing speed. Producing greater drag, permitting a steep descent angle without airspeed increase. Reducing the length of the landing roll. Flap extension has a definite effect on the airplane’s pitch behavior. The increased camber from flap deflection produces lift primarily on the rear portion of the wing. This produces a nose down pitching moment; however, the change in tail loads from the downwash deflected by the flaps over the horizontal tail has a significant influence on the pitching moment. Consequently, pitch behavior depends on the design features of the particular airplane. Flap deflection of up to 15° primarily produces lift with minimal drag. The airplane has a tendency to balloon up with initial flap deflection because of the lift increase. The nose down pitching moment, however, tends to offset the balloon. Flap deflection beyond 15° produces a large increase in drag. Also, deflection beyond 15° produces a significant nose up pitching moment in high-wing airplanes because the resulting downwash increases the airflow over the horizontal tail. The time of flap extension and the degree of deflection are related. Large flap deflections at one single point in the landing pattern produce large lift changes that require significant pitch and power changes in order to maintain airspeed and descent angle. Consequently, the deflection of flaps at certain positions in the landing pattern has definite advantages. Incremental deflection of flaps on downwind, base leg, and final approach allow smaller adjustment of pitch and power compared to extension of full flaps all at one time. When the flaps are lowered, the airspeed will decrease unless the power is increased or the pitch attitude lowered. On final approach, therefore, the pilot must estimate where the airplane will land through discerning judgment of the descent angle. If it appears that the airplane is going to overshoot the desired landing spot, more flaps may be used if not fully extended or the power reduced further, and the pitch attitude lowered. This will result in a steeper approach. If the desired landing spot is being undershot and a shallower approach is needed, both power and pitch attitude should be increased to readjust the descent angle. Never retract the flaps to correct for undershooting since that will suddenly decrease the lift and cause the airplane to sink even more rapidly. The airplane must be re-trimmed on final approach to compensate for the change in aerodynamic forces. With the reduced power and with a slower airspeed, the airflow produces less lift on the wings and less downward force on the horizontal stabilizer, resulting in a significant nose down tendency. The elevator must then be trimmed more nose up. It will be found that the roundout, touchdown, and landing roll are much easier to accomplish when they are preceded by a proper final approach with precise control of airspeed, attitude, power, and drag resulting in a stabilized descent angle. ESTIMATING HEIGHT AND MOVEMENT During the approach, roundout, and touchdown, vision is of prime importance. To provide a wide scope of vision and to foster good judgment of height and movement, the pilot’s head should assume a natural, straight-ahead position. The pilot’s visual focus should not be fixed on any one side or any one spot ahead of the airplane, but should be changing slowly from a point just over the airplane’s nose to the desired touchdown zone and back again, while maintaining a deliberate awareness of distance from either side of the runway within the pilot’s peripheral field of vision. Accurate estimation of distance is, besides being a matter of practice, dependent upon how clearly objects are seen; it requires that the vision be focused properly in order that the important objects stand out as clearly as possible. Speed blurs objects at close range. For example, most everyone has noted this in an automobile moving at high speed. Nearby objects seem to merge together in a blur, while objects farther away stand out clearly. The driver subconsciously focuses the eyes sufficiently far ahead of the automobile to see objects distinctly. The distance at which the pilot’s vision is focused should be proportionate to the speed at which the airplane is traveling over the ground. Thus, as speed is reduced during the roundout, the distance ahead of the airplane at which it is possible to focus should be brought closer accordingly. If the pilot attempts to focus on a reference that is too close or looks directly down, the reference will become blurred, and the reaction will be either too abrupt or too late. In this case, the pilot’s tendency will be to over control, round out high, and make full-stall, drop-in landings. When the pilot focuses too far ahead, accuracy in judging the closeness of the ground is lost and the consequent reaction will be too slow since there will not appear to be a necessity for action. This will result in the airplane flying into the ground nose first. The change of visual focus from a long distance to a short distance requires a definite time interval and even though the time is brief, the airplane’s speed during this interval is such that the airplane travels an appreciable distance, both forward and downward toward the ground. If the focus is changed gradually, being brought progressively closer as speed is reduced, the time interval and the pilot’s reaction will be reduced, and the whole landing process smoothed out. ROUNDOUT (FLARE) The roundout is a slow, smooth transition from a normal approach attitude to a landing attitude, gradually rounding out the flightpath to one that is parallel with, and within a very few inches above, the runway. When the airplane, in a normal descent, approaches within what appears to be 10 to 20 feet above the ground, the roundout or flare should be started, and once started should be a continuous process until the airplane touches down on the ground. As the airplane reaches a height above the ground where a timely change can be made into the proper landing attitude, back-elevator pressure should be gradually applied to slowly increase the pitch attitude and angle of attack. This will cause the airplane’s nose to gradually rise toward the desired landing attitude. The angle of attack should be increased at a rate that will allow the airplane to continue settling slowly as forward speed decreases. When the angle of attack is increased, the lift is momentarily increased, which decreases the rate of descent. Since power normally is reduced to idle during the roundout, the airspeed will also gradually decrease. This will cause lift to decrease again, and it must be controlled by raising the nose and further increasing the angle of attack. During the roundout, the airspeed is being decreased to touchdown speed while the lift is being controlled so the airplane will settle gently onto the landing surface. The roundout should be executed at a rate that the proper landing attitude and the proper touchdown airspeed are attained simultaneously just as the wheels contact the landing surface. The rate at which the roundout is executed depends on the airplane’s height above the ground, the rate of descent, and the pitch attitude. A roundout started excessively high must be executed more slowly than one from a lower height to allow the airplane to descend to the ground while the proper landing attitude is being established. The rate of rounding out must also be proportionate to the rate of closure with the ground. When the airplane appears to be descending very slowly, the increase in pitch attitude must be made at a correspondingly slow rate. Visual cues are important in flaring at the proper altitude and maintaining the wheels a few inches above the runway until eventual touchdown. Flare cues are primarily dependent on the angle at which the pilot’s central vision intersects the ground (or runway) ahead and slightly to the side. Proper depth perception is a factor in a successful flare, but the visual cues used most are those related to changes in runway or terrain perspective and to changes in the size of familiar objects near the landing area such as fences, bushes, trees, hangars, and even sod or runway texture. The pilot should direct central vision at a shallow downward angle of from 10° to 15° toward the runway as the roundout/flare is initiated. Maintaining the same viewing angle causes the point of visual interception with the runway to move progressively rearward toward the pilot as the airplane loses altitude. This is an important visual cue in assessing the rate of altitude loss. Conversely, forward movement of the visual interception point will indicate an increase in altitude, and would mean that the pitch angle was increased too rapidly, resulting in an over flare. Location of the visual interception point in conjunction with assessment of flow velocity of nearby offrunway terrain, as well as the similarity of appearance of height above the runway ahead of the airplane (in comparison to the way it looked when the airplane was taxied prior to takeoff) is also used to judge when the wheels are just a few inches above the runway. The pitch attitude of the airplane in a full-flap approach is considerably lower than in a no-flap approach. To attain the proper landing attitude before touching down, the nose must travel through a greater pitch change when flaps are fully extended. Since the roundout is usually started at approximately the same height above the ground regardless of the degree of flaps used, the pitch attitude must be increased at a faster rate when full flaps are used; however, the roundout should still be executed at a rate proportionate to the airplane’s downward motion. Once the actual process of rounding out is started, the elevator control should not be pushed forward. If too much back-elevator pressure has been exerted, this pressure should be either slightly relaxed or held constant, depending on the degree of the error. In some cases, it may be necessary to advance the throttle slightly to prevent an excessive rate of sink, or a stall, all of which would result in a hard, drop-in type landing. It is recommended that the student pilot form the habit of keeping one hand on the throttle throughout the approach and landing, should a sudden and unexpected hazardous situation require an immediate application of power. TOUCHDOWN The touchdown is the gentle settling of the airplane onto the landing surface. The roundout and touchdown should be made with the engine idling, and the airplane at minimum controllable airspeed, so that the airplane will touch down on the main gear at approximately stalling speed. As the airplane settles, the proper landing attitude is attained by application of whatever back-elevator pressure is necessary. Some pilots may try to force or fly the airplane onto the ground without establishing the proper landing attitude. The airplane should never be flown on the runway with excessive speed. It is paradoxical that the way to make an ideal landing is to try to hold the airplane’s wheels a few inches off the ground as long as possible with the elevators. In most cases, when the wheels are within 2 or 3 feet off the ground, the airplane will still be settling too fast for a gentle touchdown; therefore, this descent must be retarded by further back-elevator pressure. Since the airplane is already close to its stalling speed and is settling, this added back-elevator pressure will only slow up the settling instead of stopping it. At the same time, it will result in the airplane touching the ground in the proper landing attitude, and the main wheels touching down first so that little or no weight is on the nose wheel. After the main wheels make initial contact with the ground, back-elevator pressure should be held to maintain a positive angle of attack for aerodynamic braking, and to hold the nose wheel off the ground until the airplane decelerates. As the airplane’s momentum decreases, back-elevator pressure may be gradually relaxed to allow the nose wheel to gently settle onto the runway. This will permit steering with the nose wheel. At the same time, it will cause a low angle of attack and negative lift on the wings to prevent floating or skipping, and will allow the full weight of the airplane to rest on the wheels for better braking action. It is extremely important that the touchdown occur with the airplane’s longitudinal axis exactly parallel to the direction in which the airplane is moving along the runway. Failure to accomplish this imposes severe side loads on the landing gear. To avoid these side stresses, the pilot should not allow the airplane to touch down while turned into the wind or drifting. AFTER-LANDING ROLL The landing process must never be considered complete until the airplane decelerates to the normal taxi speed during the landing roll or has been brought to a complete stop when clear of the landing area. Many accidents have occurred as a result of pilots abandoning their vigilance and positive control after getting the airplane on the ground. The pilot must be alert for directional control difficulties immediately upon and after touchdown due to the ground friction on the wheels. The friction creates a pivot point on which a moment arm can act. Loss of directional control may lead to an aggravated, uncontrolled, tight turn on the ground, or a ground loop. The combination of centrifugal force acting on the center of gravity (CG) and ground friction of the main wheels resisting it during the ground loop may cause the airplane to tip or lean enough for the outside wingtip to contact the ground. This may even impose a sideward force, which could collapse the landing gear. The rudder serves the same purpose on the ground as it does in the air it controls the yawing of the airplane. The effectiveness of the rudder is dependent on the airflow, which depends on the speed of the airplane. As the speed decreases and the nose wheel has been lowered to the ground, the steerable nose provides more positive directional control. The brakes of an airplane serve the same primary purpose as the brakes of an automobile to reduce speed on the ground. In airplanes, they may also be used as an aid in directional control when more positive control is required than could be obtained with rudder or nose wheel steering alone. To use brakes, on an airplane equipped with toe brakes, the pilot should slide the toes or feet up from the rudder pedals to the brake pedals. If rudder pressure is being held at the time braking action is needed, that pressure should not be released as the feet or toes are being slid up to the brake pedals, because control may be lost before brakes can be applied. Putting maximum weight on the wheels after touchdown is an important factor in obtaining optimum braking performance. During the early part of rollout, some lift may continue to be generated by the wing. After touchdown, the nose wheel should be lowered to the runway to maintain directional control. During deceleration, the nose may be pitched down by braking and the weight transferred to the nose wheel from the main wheels. This does not aid in braking action, so back pressure should be applied to the controls without lifting the nose wheel off the runway. This will enable the pilot to maintain directional control while keeping weight on the main wheels. Careful application of the brakes can be initiated after the nose wheel is on the ground and directional control is established. Maximum brake effectiveness is just short of the point where skidding occurs. If the brakes are applied so hard that skidding takes place, braking becomes ineffective. Skidding can be stopped by releasing the brake pressure. Also, braking effectiveness is not enhanced by alternately applying and reapplying brake pressure. The brakes should be applied firmly and smoothly as necessary. During the ground roll, the airplane’s direction of movement can be changed by carefully applying pressure on one brake or uneven pressures on each brake in the desired direction. Caution must be exercised when applying brakes to avoid over controlling. The ailerons serve the same purpose on the ground as they do in the air they change the lift and drag components of the wings. During the after-landing roll, they should be used to keep the wings level in much the same way they were used in flight. If a wing starts to rise, aileron control should be applied toward that wing to lower it. The amount required will depend on speed because as the forward speed of the airplane decreases, the ailerons will become less effective. Procedures for using ailerons in crosswind conditions are explained further in this chapter, in the Crosswind Approach and Landing section. After the airplane is on the ground, back-elevator pressure may be gradually relaxed to place normal weight on the nose wheel to aid in better steering. If available runway permits, the speed of the airplane should be allowed to dissipate in a normal manner. Once the airplane has slowed sufficiently and has turned on to the taxiway and stopped, the pilot should retract the flaps and clean up the airplane. Many accidents have occurred as a result of the pilot unintentionally operating the landing gear control and retracting the gear instead of the flap control when the airplane was still rolling. The habit of positively identifying both of these controls, before actuating them, should be formed from the very beginning of flight training and continued in all future flying activities. STABILIZED APPROACH CONCEPT A stabilized approach is one in which the pilot establishes and maintains a constant angle glidepath towards a predetermined point on the landing runway. It is based on the pilot’s judgment of certain visual clues, and depends on the maintenance of a constant final descent airspeed and configuration. An airplane descending on final approach at a constant rate and airspeed will be traveling in a straight line toward a spot on the ground ahead. This spot will not be the spot on which the airplane will touch down, because some float will inevitably occur during the roundout (flare). Neither will it be the spot toward which the airplane’s nose is pointed, because the airplane is flying at a fairly high angle of attack, and the component of lift exerted parallel to the Earth’s surface by the wings tends to carry the airplane forward horizontally. The point toward which the airplane is progressing is termed the “aiming point.” It is the point on the ground at which, if the airplane maintains a constant glidepath, and was not flared for landing, it would strike the ground. To a pilot moving straight ahead toward an object, it appears to be stationary. It does not “move.” This is how the aiming point can be distinguished—it does not move. However, objects in front of and beyond the aiming point do appear to move as the distance is closed, and they appear to move in opposite directions. During instruction in landings, one of the most important skills a student pilot must acquire is how to use visual cues to accurately determine the true aiming point from any distance out on final approach. From this, the pilot will not only be able to determine if the glidepath will result in an undershoot or overshoot, but, taking into account float during roundout, the pilot will be able to predict the touchdown point to within a very few feet. For a constant angle glidepath, the distance between the horizon and the aiming point will remain constant. If a final approach descent has been established but the distance between the perceived aiming point and the horizon appears to increase (aiming point moving down away from the horizon), then the true aiming point, and subsequent touchdown point, is farther down the runway. If the distance between the perceived aiming point and the horizon decreases (aiming point moving up toward the horizon), the true aiming point is closer than perceived. When the airplane is established on final approach, the shape of the runway image also presents clues as to what must be done to maintain a stabilized approach to a safe landing. A runway, obviously, is normally shaped in the form of an elongated rectangle. When viewed from the air during the approach, the phenomenon known as perspective causes the runway to assume the shape of a trapezoid with the far end looking narrower than the approach end, and the edge lines converging ahead. If the airplane continues down the glidepath at a constant angle (stabilized), the image the pilot sees will still be trapezoidal but of proportionately larger dimensions. In other words, during a stabilized approach the runway shape does not change. If the approach becomes shallower, however, the runway will appear to shorten and become wider. Conversely, if the approach is steepened, the runway will appear to become longer and narrower. The objective of a stabilized approach is to select an appropriate touchdown point on the runway, and adjust the glidepath so that the true aiming point and the desired touchdown point basically coincide. Immediately after rolling out on final approach, the pilot should adjust the pitch attitude and power so that the airplane is descending directly toward the aiming point at the appropriate airspeed. The airplane should be in the landing configuration, and trimmed for “hands off” flight. With the approach set up in this manner, the pilot will be free to devote full attention toward outside references. The pilot should not stare at any one place, but rather scan from one point to another, such as from the aiming point to the horizon, to the trees and bushes along the runway, to an area well short of the runway, and back to the aiming point. In this way, the pilot will be more apt to perceive a deviation from the desired glidepath, and whether or not the airplane is proceeding directly toward the aiming point. If the pilot perceives any indication that the aiming point on the runway is not where desired, an adjustment must be made to the glidepath. This in turn will move the aiming point. For instance, if the pilot perceives that the aiming point is short of the desired touchdown point and will result in an undershoot, an increase in pitch attitude and engine power is warranted. A constant airspeed must be maintained. The pitch and power change, therefore, must be made smoothly and simultaneously. This will result in a shallowing of the glidepath with the resultant aiming point moving towards the desired touchdown point. Conversely, if the pilot perceives that the aiming point is farther down the runway than the desired touchdown point and will result in an overshoot, the glidepath should be steepened by a simultaneous decrease in pitch attitude and power. Once again, the airspeed must be held constant. It is essential that deviations from the desired glidepath be detected early, so that only slight and infrequent adjustments to glidepath are required. The closer the airplane gets to the runway, the larger (and possibly more frequent) the required corrections become, resulting in an un stabilized approach. Base leg and final approach Effect of headwind on the final approach Effect of flaps on the landing point Effect of flaps on the approach angle Focusing too close blurs the pilots vision Changing the angle of attack during the roundout The pilot should look toward the runway at a shallow angle to obtain visual cues Proper landing attitude from the roundout Stabilized approach Runway shape during a stabilized approach Change in the runway shape when the approach is too shallow or too steep Private & Commercial Pilot Flight Training Performing Crosswind Approach and Landings: DESCRIPTION Many runways or landing areas are such that landings must be made while the wind is blowing across rather than parallel to the landing direction. All pilots should be prepared to cope with these situations when they arise. The same basic principles and factors involved in a normal approach and landing apply to a crosswind approach and landing; therefore, only the additional procedures required for correcting for wind drift are discussed here. Crosswind landings are a little more difficult to perform than crosswind takeoffs, mainly due to different problems involved in maintaining accurate control of the airplane while its speed is decreasing rather than increasing as on takeoff. There are two usual methods of accomplishing a crosswind approach and landing— the crab method and the wing-low (sideslip) method. Although the crab method may be easier for the pilot to maintain during final approach, it requires a high degree of judgment and timing in removing the crab immediately prior to touchdown. The wing-low method is recommended in most cases, although a combination of both methods may be used. CROSSWIND FINAL APPROACH The crab method is executed by establishing a heading (crab) toward the wind with the wings level so that the airplane’s ground track remains aligned with the centerline of the runway. This crab angle is maintained until just prior to touchdown, when the longitudinal axis of the airplane must be aligned with the runway to avoid sideward contact of the wheels with the runway. If a long final approach is being flown, the pilot may use the crab method until just before the roundout is started and then smoothly change to the wing-low method for the remainder of the landing. The wing-low (sideslip) method will compensate for a crosswind from any angle, but more important, it enables the pilot to simultaneously keep the airplane’s ground track and longitudinal axis aligned with the runway centerline throughout the final approach, roundout, touchdown, and after-landing roll. This prevents the airplane from touching down in a sideward motion and imposing damaging side loads on the landing gear. To use the wing-low method, the pilot aligns the airplane’s heading with the centerline of the runway, notes the rate and direction of drift, and then promptly applies drift correction by lowering the upwind wing. The amount the wing must be lowered depends on the rate of drift. When the wing is lowered, the airplane will tend to turn in that direction. It is then necessary to simultaneously apply sufficient opposite rudder pressure to prevent the turn and keep the airplane’s longitudinal axis aligned with the runway. In other words, the drift is controlled with aileron, and the heading with rudder. The airplane will now be side slipping into the wind just enough that both the resultant flightpath and the ground track are aligned with the runway. If the crosswind diminishes, this crosswind correction is reduced accordingly, or the airplane will begin slipping away from the desired approach path. To correct for strong crosswind, the slip into the wind is increased by lowering the upwind wing a considerable amount. As a consequence, this will result in a greater tendency of the airplane to turn. Since turning is not desired, considerable opposite rudder must be applied to keep the airplane’s longitudinal axis aligned with the runway. In some airplanes, there may not be sufficient rudder travel available to compensate for the strong turning tendency caused by the steep bank. If the required bank is such that full opposite rudder will not prevent a turn, the wind is too strong to safely land the airplane in that direction in those conditions. Since the airplane’s capability will be exceeded, it is imperative that the landing be made on a more favorable runway either at that airport or at an alternate airport. Flaps can and should be used during most approaches since they tend to have a stabilizing effect on the airplane. The degree to which flaps should be extended will vary with the airplane’s handling characteristics, as well as the wind velocity. CROSSWIND ROUNDOUT (FLARE) Generally, the roundout can be made like a normal landing approach, but the application of a crosswind correction is continued as necessary to prevent drifting. Since the airspeed decreases as the roundout progresses, the flight controls gradually become less effective. As a result, the crosswind correction being held will become inadequate. When using the wing-low method, it is necessary to gradually increase the deflection of the rudder and ailerons to maintain the proper amount of drift correction. Do not level the wings; keep the upwind wing down throughout the roundout. If the wings are leveled, the airplane will begin drifting and the touchdown will occur while drifting. Remember, the primary objective is to land the airplane without subjecting it to any side loads that result from touching down while drifting. CROSSWIND TOUCHDOWN If the crab method of drift correction has been used throughout the final approach and roundout, the crab must be removed the instant before touchdown by applying rudder to align the airplane’s longitudinal axis with its direction of movement. This requires timely and accurate action. Failure to accomplish this will result in severe side loads being imposed on the landing gear. If the wing-low method is used, the crosswind correction (aileron into the wind and opposite rudder) should be maintained throughout the roundout, and the touchdown made on the upwind main wheel. During gusty or high wind conditions, prompt adjustments must be made in the crosswind correction to assure that the airplane does not drift as the airplane touches down. As the forward momentum decreases after initial contact, the weight of the airplane will cause the downwind main wheel to gradually settle onto the runway. In those airplanes having nose wheel steering interconnected with the rudder, the nose wheel may not be aligned with the runway as the wheels touch down because opposite rudder is being held in the crosswind correction. To prevent swerving in the direction the nose wheel is offset, the corrective rudder pressure must be promptly relaxed just as the nose wheel touches down. CROSSWIND AFTER-LANDING ROLL Particularly during the after-landing roll, special attention must be given to maintaining directional control by the use of rudder or nose wheel steering, while keeping the upwind wing from rising by the use of aileron. When an airplane is airborne, it moves with the air mass in which it is flying regardless of the airplane’s heading and speed. When an airplane is on the ground, it is unable to move with the air mass (crosswind) because of the resistance created by ground friction on the wheels. Characteristically, an airplane has a greater profile or side area, behind the main landing gear than forward of it does. With the main wheels acting as a pivot point and the greater surface area exposed to the crosswind behind that pivot point, the airplane will tend to turn or weathervane into the wind. Wind acting on an airplane during crosswind landings is the result of two factors. One is the natural wind, which acts in the direction the air mass is traveling, while the other is induced by the movement of the airplane and acts parallel to the direction of movement. Consequently, a crosswind has a headwind component acting along the airplane’s ground track and a crosswind component acting 90° to its track. The resultant or relative wind is somewhere between the two components. As the airplane’s forward speed decreases during the after landing roll, the headwind component decreases and the relative wind has more of a crosswind component. The greater the crosswind component, the more difficult it is to prevent weathervaning. Retaining control on the ground is a critical part of the after-landing roll, because of the weathervaning effect of the wind on the airplane. Additionally, tire side load from runway contact while drifting frequently generates roll-overs in tricycle geared airplanes. The basic factors involved are cornering angle and side load. Cornering angle is the angular difference between the heading of a tire and its path. Whenever a load bearing tire’s path and heading diverge, a side load is created. It is accompanied by tire distortion. Although side load differs in varying tires and air pressures, it is completely independent of speed, and through a considerable range, is directional proportional to the cornering angle and the weight supported by the tire. As little as 10° of cornering angle will create a side load equal to half the supported weight; after 20° the side load does not increase with increasing cornering angle. For each high-wing, tricycle geared airplane, there is a cornering angle at which roll-over is inevitable. The roll-over axis being the line linking the nose and main wheels. At lesser angles, the roll-over may be avoided by use of ailerons, rudder, or steerable nose wheel but not brakes. While the airplane is decelerating during the after landing roll, more and more aileron is applied to keep the upwind wing from rising. Since the airplane is slowing down, there is less airflow around the ailerons and they become less effective. At the same time, the relative wind is becoming more of a crosswind and exerting a greater lifting force on the upwind wing. When the airplane is coming to a stop, the aileron control must be held fully toward the wind. MAXIMUM SAFE CROSSWIND VELOCITIES Takeoffs and landings in certain crosswind conditions are inadvisable or even dangerous. If the crosswind is great enough to warrant an extreme drift correction, a hazardous landing condition may result. Therefore, the takeoff and landing capabilities with respect to the reported surface wind conditions and the available landing directions must be considered. Figure 8-18. Crosswind chart. Before an airplane is type certificated by the Federal Aviation Administration (FAA), it must be flight tested to meet certain requirements. Among these is the demonstration of being satisfactorily controllable with no exceptional degree of skill or alertness on the part of the pilot in 90° crosswinds up to a velocity equal to 0.2 VSO. This means a wind speed of two-tenths of the airplane’s stalling speed with power off and landing gear/flaps down. Regulations require that the demonstrated crosswind velocity be included on a placard in airplanes certificated after May 3, 1962. The headwind component and the crosswind component for a given situation can be determined by reference to a crosswind component chart. It is imperative that pilots determine the maximum crosswind component of each airplane they fly, and avoid operations in wind conditions that exceed the capability of the airplane. Crab method Sideslip method Crosswind approach and landing Maximum safe crosswind chart Crosswind component chart Private & Commercial Pilot Flight Training Performing Normal Landings: DESCRIPTION: 1. Ensure that the Before Landing Checklist has been completed. Complete the appropriate traffic pattern. 2. Prior to 300’ AGL on final approach, stabilize the airplane on the extended centerline with the final flap setting. Note: In the absence of a manufacturer’s recommended airspeed, speed equal to 1.3 Vso should be used. 3. Coordinate pitch and power so as to maintain final approach airspeed and the desired approach angle that will permit landing within the designated area. Note: If gust conditions are present, increase final approach airspeed by one half the gust factor. Gust factor = Wind gusts – Sustained Winds. 4. At the appropriated flare altitude, slow the descent by raising the pitch attitude and smoothly reducing power to idle so that the airplane settle onto the runway on the main gear. Maintain back pressure on the yoke throughout the landing roll to keep the nose wheel off of the runway as long as possible for maximum aerodynamic braking. 5. Slow the airplane to normal taxi speed before leaving the runway centerline. Once the airplane is clear of the active runway and stopped, perform the After Landing Checklist. Note: Keep hand on the throttle through, in the event immediate application of power is necessary. Private & Commercial Pilot Flight Training Performing Crosswind Landings: DESCRIPTION: 1. Ensure that the Before Landing Checklist has been completed. Complete the appropriate traffic pattern. 2. Prior to 300’ AGL on final approach, stabilize the airplane on the centerline with the final flap setting. Coordinate pitch and power so as to maintain final approach airspeed and the desired approach angle that will permit landing within the designated area. 3. Use the Wind Correction Angle (crab) method of crosswind correction on final to maintain the extended runway centerline. 4. Use the sideslip method of crosswind correction during transition from approach to roundout. Note: If the required bank is such that full opposite rudder will not prevent a turn, the wind is too strong to safely land on this runway. Use a more favorable runway. The proper technique will result in a touch-down on the upwind main wheel first followed by the downwind main wheel, and finally the nose wheel. The aircraft will be on the runway centerline with its longitudinal axis aligned with the centerline. Hold the nose wheel off of the runway as long as possible for maximum aerodynamic braking. Note: Keep a hand on the throttle through, in the event immediate application of power is necessary. 5. Maintain crosswind control corrections as necessary to maintain alignment with the runway centerline and prevent lifting of the upwind wing. Note: Keep a hand on the throttle throughout, in the event immediate application of power is necessary. Side Note on the Sideslip: 1. Enter by lowering the wing in the direction of the desired slip and applying just enough opposite rudder to prevent a turn. 2. The amount of slip is determined by the bank angle. 3. As bank angle is increase, additional opposite rudder is necessary to prevent a turn.
