Log In To WebEx - InterCall Europe
advertisement
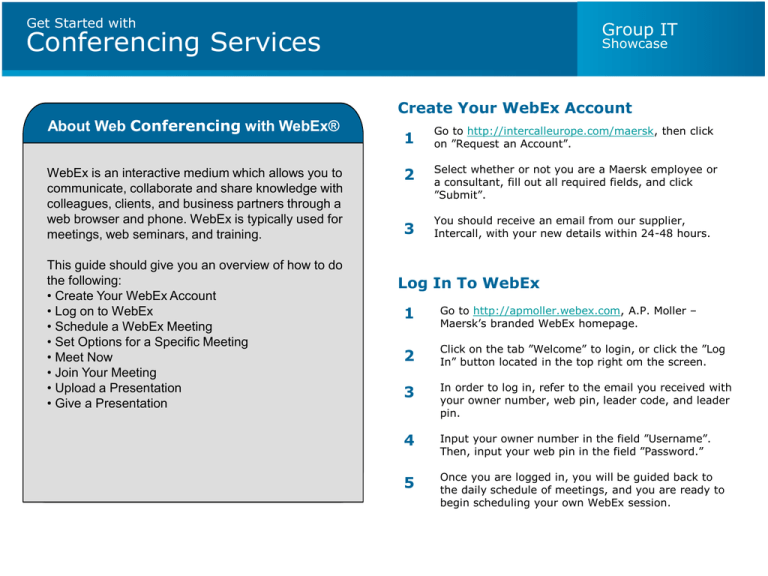
Get Started with Group IT Conferencing Services About Web Conferencing with WebEx® WebEx is an interactive medium which allows you to communicate, collaborate and share knowledge with colleagues, clients, and business partners through a web browser and phone. WebEx is typically used for meetings, web seminars, and training. This guide should give you an overview of how to do the following: • Create Your WebEx Account • Log on to WebEx • Schedule a WebEx Meeting • Set Options for a Specific Meeting • Meet Now • Join Your Meeting • Upload a Presentation • Give a Presentation Showcase Create Your WebEx Account 1 Go to http://intercalleurope.com/maersk, then click on ”Request an Account”. 2 Select whether or not you are a Maersk employee or a consultant, fill out all required fields, and click ”Submit”. 3 You should receive an email from our supplier, Intercall, with your new details within 24-48 hours. Log In To WebEx 1 Go to http://apmoller.webex.com, A.P. Moller – Maersk’s branded WebEx homepage. 2 Click on the tab ”Welcome” to login, or click the ”Log In” button located in the top right om the screen. 3 In order to log in, refer to the email you received with your owner number, web pin, leader code, and leader pin. 4 Input your owner number in the field ”Username”. Then, input your web pin in the field ”Password.” 5 Once you are logged in, you will be guided back to the daily schedule of meetings, and you are ready to begin scheduling your own WebEx session. Get Started with Conferencing Services Group IT Showcase Schedule a Meeting Once you are logged in, click on ”Schedule a Meeting” under the ”Host a Meeting” menu option. 1 You will be prompted to enter required information including the meeting topic and meeting password. The meeting topic should be something that participants will easily recognise if they must browse for a meeting. Click ”Next”. 2 Choose the date and time of your meeting by choosing from the drop down menus. You can also select whether or not this will be a recurring meeting or a one-time event. If this is a recurring event, this will appear on your meeting calendar per your specifications. Click ”Next”. Helpful Hints: • Ensure that the time zone is updated correctly. • Group IT’s recommendation is that attendees join 5 minutes prior to the meeting start time. Get Started with Group IT Conferencing Services 3a Showcase ”Internet Phone” and ”Reservationless-Plus from Intercall” are selected by default. (Internet Phone gives callers the option to call via their internet browser. This will not be used in most cases, but it is acceptable to have this as a default option.) Click on ”Reservationless-Plus by Intercall” so that it becomes bold. You will then be able to click on the button ”Add teleconference account.” 3b When you click on ”Add teleconference account,” a new window will appear. Refer to your email sent to you by Intercall with your conferencing details. Click on the blue Country/Region link to select the country where you are located, then input the following: Toll-free call-in number: The International Freephone Dial-in Number for the country in which you are located. Toll call-in number: The Local Dial-in number for the country in which you are located. Leader PIN: Provided in your welcome email and on your wallet card sent via post (Please allow 2-3 weeks for delivery of wallet card following registration. Conference Code: Provided in your welcome email and on your wallet card sent via post. See the next slide for hints on this step! Get Started with Group IT Conferencing Services 3c Showcase Helpful Hints: You must have at least three digits in both the ”area or city code” and ”number fields”. If your country does not have area or city codes, place the first three digits of the phone number in this field and the remainder in the ”number” field such as the example at left for Denmark. Go to www.intercalleurope.com/maersk for a complete list of access numbers by clicking on ”Access Numbers” on the left menu. You will be prompted to choose from colour groups which are specified on the wallet card you received in your welcome packet. If you have not yet received your welcome packet, choose the following based on your location: Blue: Europe, the Middle East, and Africa Red: The Americas Orange and Brown: Asia-Pacific These are also the lists you will use to provide the call-in numbers for your participants so they too can realise cost savings and benefit from the local dial-in numbers. Once this action is performed once, you will never need to update this information again. The system automatically saves this information for the next time you schedule a meeting. Click ”Next”. Get Started with Group IT Conferencing Services 4 Showcase You are asked to input the e-mail addresses of those attendees you are inviting to your meeting. More information is to come about how to integrate with Outlook. This will allow you to reference the Outlook address book, and schedule meetings through your Outlook calendar. There are additional security settings which you can select if you choose. Click ”Next”. 5 You must select whether or not your participants will register for a meeting. Select ”Require Attendee Registration” if you require that attendees register with an operator when they enter the call. This would only be necessary in cases where a meeting is manditory, or if attendance is restricted to a select group of participants. Click ”Next”. Get Started with Group IT Conferencing Services 6 Showcase Input the agenda for the meeting. This will be displayed when users click on the meeting through the WebEx main page. This should be a broad overview of the meeting topics to be discussed. You may choose to input relevant phone numbers for your participants. This is an optional field. You can choose to leave this blank. The default information tab gives the general information about the meeting: date, time, topic, and teleconference details. You will also upload your PowerPoint presentation here if you have the WebEx plug-in and are able to convert your file to UCF format. Otherwise, you can wait until before the meeting starts to upload your presentation by sharing the document. For details on uploading your presentation, see ”Starting Your Meeting.” Helpful Hint: Send a separate email to your participants with teleconferencing details. You can copy relevant numbers from your introductory email, or you can send the PDF (see website Access Numbers) relevant to your region/colour. Click ”Next”. 7 Select the meeting options you wish to have during the conference call. These include the ability to have chat, record sessions, and other advanced functionality. It is acceptable to leave the default setting as-is, even if you do not intend to use all of the settings. We do not currently offer a video option, but do plan to implement this is the future for interested business units which have the required equipment. Video conferencing was not in scope for this project. Click ”Next”. Get Started with Group IT Conferencing Services 8 Showcase You must select the privileges you wish your attendees to have. For more information on what each of these privileges mean for participants, please see ”Assistance” and click on Help. Helpful Hint: Group IT recommends the automatic defaults for your attendee privileges. Click ”Next”. 9 You will be able to verify your information prior to confirming your meeting. Check the details in the window provided. If you need to make any changes, you are able to make them at this time by clicking on the button that corresponds with the step you need to revisit. Click ”Schedule”. This will schedule your meeting in your WebEx calendar, and trigger the messages to notify your attendees of this meeting. Get Started with Conferencing Services 10 After you have scheduled your meeting, emails will be sent to you and your participants. These include: Host E-mail: This email confirms your registration and serves as a reminder for you. Host Reminder E-mail: An e-mail reminder will be sent to you 15 minutes prior to your scheduled meeting. Attendee E-mail: This e-mail is sent to attendees notifying them of the scheduled meeting. Attendee Reminder E-mail: An e-mail reminder will be sent to your attendees 15 minutes prior to the scheduled meeting. Links to join the meeting are listed in all e-mails listed above. Helpful Hint: Send an e-mail to your participants giving them their toll-free, local or international dial-in numbers that are relevant to them. This should be based on the colour allocated to you in your introductory e-mail and your welcome packet. These numbers are also viewable on the website, www.intercalleurope.com/maersk. Click on ”Access numbers on the left menu, then choose your relevant colour. You can download the PDF file available on the site and send this to participants. Group IT Showcase Get Started with Group IT Conferencing Services Showcase Starting Your Meeting 1 Go to http://apmoller.webex.com and click on ”My WebEx” on the top menu bar, or click the link that was provided in your e-mail reminders. 2 Select the meeting in your list of meetings you wish to begin. Helpful Hint: If you have chosen to ”Meet Now” by scheduling a meeting you plan to begin immediately, you will be prompted to ”Join Now.” 3 Click ”Start” listed under the column Status, and wait while the meeting loads in the presentation window. 4 A new window will open. You are then ready to select what you wish to do within this presentation: • Share a document – show a presentation or collaborate on a document. • Share an application – demonstrate how to use a program • Share your desktop – allow other users to view how you are manuevering on your desktop. 5 To share a document or Power Point presentation, click on ”Share a Document,” and wait for a folder window to open on your desktop. Get Started with Group IT Conferencing Services Showcase 7 Your computer’s list of folders will then appear. Find your presentation and select it. 8 You will also be prompted with a ”Join Teleconference” dialogue box which will list the dial-in numbers you listed when you planned the meeting. Helpful Hint: Remember that the number displayed for both you and your participants will be the phone number you entered for your location. Participants should refer to the e-mail you sent with local dial-in numbers or the international dial-in numbers for those countries where a local number is not available. Once participants enter the call, they will still be prompted to enter your conference code which was provided in the WebEx email. 9 Your presentation should now be uploaded to your meeting. Click through your presentation by using the arrow buttons located at the top right corner of your presentation. If you have chosen to use the chat feature, this will also be enabled at this time. You are now ready to begin your meeting!
