PPT: Common Core 104 First Aid
advertisement
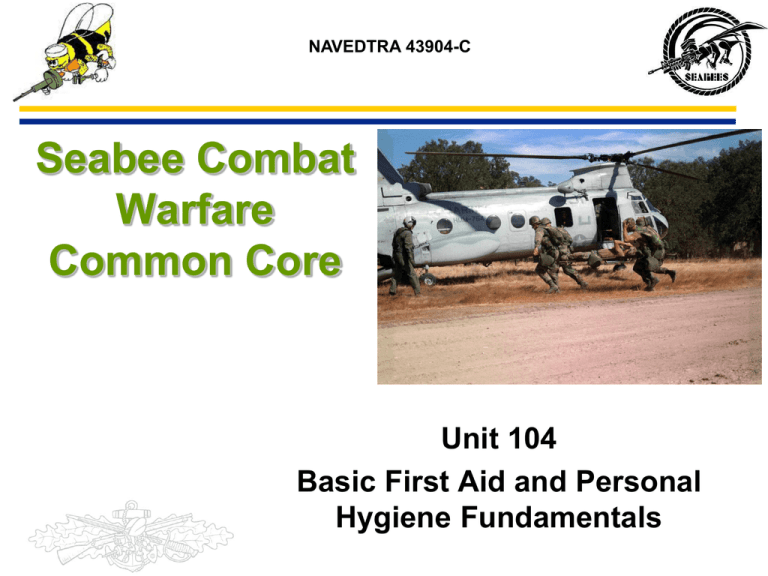
NAVEDTRA 43904-C Seabee Combat Warfare Common Core Unit 104 Basic First Aid and Personal Hygiene Fundamentals Basic First Aid and Personal Hygiene • Reference: - NAVEDTRA 14295, Hospital Corpsman - NAVEDTRA 14234, Seabee Combat Handbook Vol 1 Examining an Injured Person • PQS Question 104.1 State the sequence to examine an injured person • Reference: NAVEDTRA 14234 [ch 10., p. 10-1] Examining an Injured Person • Check for breathing: lack of oxygen intake can lead to brain damage or death in a very few minutes • Check for bleeding: life cannot continue without an adequate volume of blood to carry oxygen to tissues • Check for shock: unless shock is prevented or treated, death may result even though the injury would not otherwise be fatal Examining an Injured Person • Examination warnings – If there are any signs of chemical or biological agent poisoning, you should immediately mask the casualty. – If it is nerve agent poisoning, administer the antidote, using the casualty’s injector/ampules – In a chemically contaminated area, do not expose the wounds – Leg fractures must be splinted before elevating the legs as a treatment for shock Moving an Injured Person • PQS Question 104.2 State the reason for not moving an injured person unless absolutely necessary • Reference: NAVEDTRA 14234 [ch. 10., pp. 10-1, 10-8] Moving an Injured Person • As a general rule, make your preliminary examination in the position and place you find the victim. • Moving the victim before this check could gravely endanger life, especially if there are fractures, skull or spine injuries. • If the situation is such that you or the victim is in danger, you must weigh this threat against the potential damage caused by premature transportation. • If you decide to move the victim, do it quickly and gently to a safe location where proper first aid can be administered Shock • PQS Question 104.3 Describe the signs, symptoms, and treatment of shock • Reference: NAVEDTRA 14234 [ch 10, pp. 10-23 thru 10-26] Shock • Shock is a condition in which the circulation of the blood is seriously disturbed. This can cause lack of oxygen to body systems. • Shock creates a vicious cycle; the worse it is, the worse it will become. A person going into shock may display quite a few signs and symptoms Shock • Signs/symptoms • The signs of shock do not always appear at the onset of the injury. The following is a list of some of those signs: – Sweaty but cool skin (clammy skin) – Paleness of skin Restlessness or nervousness – Thirst Shock – Pulse is weak and rapid – Enlarged pupils – Breathing is shallow and irregular – Blotchy or bluish skin, especially around the mouth – Nausea and/or vomiting Shock • Treatment – Keep the victim calm – Try to prevent the victim from seeing the injury – If victim is conscience and not internal injuries are evident, you should give the victim small amounts of warm water • If it is possible, place the injured person on the back on a bed, cot, or stretcher, and raise the lower end of the support about 12 inches so that the victim's feet will be higher than the head Unconscious Victims • PQS Question 104.4 Explain why you should not give an unconscious person anything by mouth • Reference: NAVEDTRA 14234 [ch. 10, p. 10-1] Unconscious Victims • Giving an unconscious person any food or drink by mouth can cause vomiting. • If the victim vomits, the vomited material may enter the lungs. • Victim could choke to death Types of Bleeding • PQS Question 104.5 Describe the three types of bleeding • Reference: NAVEDTRA 14234 [ch. 10, p. 18] Bleeding • Capillary bleeding. Bleeding is slow, the blood "oozes" from the (wound) cut • Venous bleeding. The blood is dark red or maroon, and flows in a steady stream • Arterial bleeding. The blood bright red and “spurts” from the Arterial bleeding is life threatening and difficult to control wound. Controlling Bleeding • PQS Question 104.6 Explain the four methods for controlling bleeding • Reference: NAVEDTRA 14234 [ch. 10, p. 19] Controlling Bleeding • Direct pressure: – First method to use when controlling bleeding. In almost every case bleeding can be stopped by direct pressure on the wound – Use a sterile dressing when available and tie a knot directly over the wound. Do not tie the knot too tight and cut off circulation Controlling Bleeding • Elevation: – Raising an injured limb above the level of the heart helps to control the bleeding. Elevation should be used together with direct pressure – Caution! – Do not elevate a limb when you suspect a fracture Controlling Bleeding • Indirect pressure: – In instances of severe bleeding where direct pressure and elevation are not controlling the bleeding, indirect pressure may be used. Controlling Bleeding • Bleeding from a cut artery or vein can often be controlled by applying pressure to the appropriate pressure point • The object of the pressure is to compress the artery against the bone, thus shutting off the flow of blood from the heart to the wound Controlling Bleeding • Tourniquet • Should only be used as a last resort for severe, life threatening bleeding that cannot be controlled by any other method. • When using this method, be thoroughly familiar with the dangers and limitations of it’s use. Pressure Points • PQS Question 104.7 Describe the major pressure points of the body. • Reference: NAVEDTRA 14234 [ch. 10., pp. 10-20 thru 10-22] Pressure Points • Pressure points: Is a point where a main artery lies near the skin surface and over a bone or firm tissue. • The objective of applying pressure is to compress the artery against the bone, thus shutting off the flow of blood from the heart to a wound. • There are 11 principal pressure points on each side of the body. Pressure Points • Facial artery • Apply pressure on this point when bleeding is on the face below the level of the eyes Pressure Points • Subclavian artery • Used for bleeding in the shoulder or in the upper part of the arm. • Apply pressure with the fingers behind the clavicle Pressure Points • Brachial artery • Used to control bleeding between the middle of the upper arm and the elbow Pressure Points • Radial and ulnar arteries • Used to control bleeding from the hand. • If possible hold the arm up in the air Pressure Points • Iliac artery • Used to control bleeding from the thigh. • Pressure with your fingers should be sufficient to stop the bleeding Pressure Points • Femoral artery • Controls bleeding in the upper thigh. • A great deal of pressure must be exerted to compress the artery against the bone Pressure Points • Anterior and posterior tibial arteries • Used to control bleeding from the foot. • As with the hand, elevation is helpful in controlling the bleeding Pressure Points • Superficial temporal • Used to control bleeding from the region of the temple or scalp Pressure Points • Popliteal artery • Controls bleeding between the knee and the foot Sucking Chest Wound • PQS Question 104.8 Describe the first aid treatment for a sucking chest wound • Reference: NAVEDTRA 14295 [ch. 4, p. 4-38] Sucking Chest Wound • Requires immediate first aid treatment • A penetrating injury to the chest that produces a hole in the chest cavity, causing the lung to collapse, which prevents normal breathing functions • It is imperative the wound be sealed with an airtight dressing to prevent air from entering the chest cavity through the wound. • Any material that will form an airtight barrier, can be used if they are large enough to cover the wound • If the victim’s condition suddenly deteriorates when you apply the seal, IMMEDIATELY remove it. • After the wound is sealed and dressed, the victim should be placed on the wounded side unless there are back injuries • Watch the victim closely for shock and treat accordingly • Do not give victim anything to drink. Transport to treatment facility IMMEDIATELY. Spinal Injuries • PQS Question 104.9 Describe the first aid treatment for a person with a suspected spinal injury • Reference: NAVEDTRA 14234 [ch. 10, p. 10-39] Spinal Injuries • Do not move the victim unless it is absolutely essential • Do not bend or twist the victim’s body, do not move the head forward, backward, or sideways and do not under any circumstances allow the victim to sit up • First aid procedures – Minimize shock – Prevent further injury to the spinal cord – Keep the victim comfortably warm Burns • PQS Question 104.10 degrees of burns. Describe the three • Reference: (b) NAVEDTRA 12003, Seabee Combat Handbook, Volume 1 Burns • Most commonly result from exposure to fire, chemicals, or electricity. • The severity of burns depends on the depth, size, and location • Burns are most serious when they are located on the face, neck, hands, and feet First Degree Burns • Characterized by redness, mild swelling, and pain • Usually the result of spending too much time in the sun, short contact with chemicals, or minor scalding with hot water or steam Second Degree Burns • Are much deeper than first-degree burns and appear very red with blisters • Usually results from deep sunburns or flash burns from gasoline fires • Most painful type of burns because the nerve endings are still intact even though the skin is severely damaged Third Degree Burns • The most serious burn because the burn is so deep, it requires a long time to heal and scars will form over the burn area • Skin may look white or charred black • Extends through all layers of the skin and into the flesh below the skin Special Burns • PQS Question 104.11 Describe the first aid treatment for the following types of burns: (a) White phosphorous burn (b) Chemical burn (c) Flash burn to eyes (d) Chemical burn to eyes • Reference: NAVEDTRA 14234 [ch. 10, p. 10-31 thru 10-32] NAVEDTRA 14295 [ch. 8, p. 8-2] White Phosphorous Burns – A special category of burn is that caused by contact with white phosphorus – First aid for this type of burn is complicated by the fact that white phosphorus particles ignite upon contact with air TREATMENT • Partially embedded particles must be continuously flushed with water while the first aid provider removes them with whatever tools are available • Deeply embedded particles that cannot be removed must be covered with a saline soaked dressing Chemical Burns • Alkali burns caused by dry lime: – Mixing water and lime creates a very corrosive substance. Dry lime should be removed by brushing the material from the skin and clothing unless massive amounts of water are available for rapid and complete flushing Chemical Burns • Acid burns caused by carbolic acid – Wash the affected area with alcohol because carbolic acid is not water soluble. – Then wash the area with large quantities of water – If alcohol is not available, flushing with water is better than no treatment at all Chemical Burns Treatment: Flush the area immediately with a lot of cool running water for 5 to 10 minutes to wash away any chemicals. Remove clothing and jewelry from the victim on which chemicals have spilled Flush again with water and gently pat it dry with a sterile gauze. Do not rub the area. Transport the victim to a medical facility • Warning! Do not attempt to neutralize any chemical unless it is known exactly what it is and what substance will effectively neutralize it Flash Burns to the Eyes • Flash burn to eyes • Burns caused by a nuclear explosion are divided into two classes: direct and indirect burns • Direct burns, usually called flash burns, are the result of thermal, infrared radiation emitted by a nuclear explosion • Indirect burns are the result of fires caused by the explosion Flash Burns to the Eyes • Symptoms: – Blindness may persist for 20 to 30 minutes – Eyes are irritated, like having sand in the eyes • Treatment: – Apply cold compresses to the affected area. Transport victim to the nearest medical treatment facility Chemical Burns Chemical burns to eyes TREATMENT The one and only emergency treatment for a chemical burn to the eyes is to flush the eye(s) immediately with large amounts of water or sterile saline solution Acid burns to the eyes should be irrigated for at least 5 to 10 minutes with at least 200 milliliters of water Alkali burns should be irrigated for at least 20 minutes Do not allow water to fall directly on the eye. Hold the victim’s head in a position that allows water to flow from inside the corner of the eye toward the outside Never use any chemical antidotes such as baking soda or alcohol when treating burns of the eye Do not try to neutralize chemical agents Heat Casualties • PQS Question 104.12 Describe the symptoms and treatment of the following – Heat cramps – Heat exhaustion – Heat stroke • Reference: NAVEDTRA 14234 [ch. 10, p. 25] Heat Cramps • Heat cramps usually affect people who work in hot environments or who engage in strenuous exercise without acclimating themselves to the conditions • May result from drinking ice water or other cold drinks too quickly or in too large a quantity after exercise Heat Cramps • Symptoms – Excessive sweating which can result in painful cramps in the muscles of the abdomen, legs, and arms – Muscle spasms caused by heat cramps usually last only a few minutes Heat Cramps • Treatment – Move to a cool place – Give plenty of water to drink – Gently massage muscles to relieve the spasms – If symptoms do not improve treat for heat exhaustion and transport to a medical facility Heat Exhaustion • The most common heat related condition resulting from prolonged exposure to hot conditions • Heat exhaustion involves a serious disturbance of blood flow to the brain, heart, and lungs Heat Exhaustion • Symptoms: – Victim may appear ashen gray; skin will be cold, moist, clammy, normal or subnormal temperature – Pupils may be enlarged – Victim may experience symptoms such as weakness, fatigue, headache, loss of appetite, and nausea. Heat Exhaustion – Loosen clothing and apply cool wet cloths to the head, armpits, groin,, and ankles. – Do not chill the victim – If the victim is conscious, a solution of oneteaspoon of salt dissolved in a quart of cool water should be given. – Transport the victim to a medical facility as soon as possible. Heat Exhaustion • Treatment – Care for the victim as if in shock. – Move the victim to an air conditioned space if possible. Heat Stroke • Sunstroke is more accurately called heat stroke since it is not necessary to be exposed to the sun for this condition to develop. • Heat stroke is less common but far more serious than heat exhaustion. • The most important factor of heat stroke is the extremely high body temperature, 105 F or higher, that accompanies it 20% mortality rate Heat Stroke • Symptoms – Headache, nausea, dizziness, or weakness – Breathing may be deep and rapid and change to shallow and almost absent – Flushed, very dry and hot skin, constricted pupils and a fast, strong pulse Heat Stroke • Treatment – Heat stroke is a true life or death emergency – The longer the victim remains overheated, the more likely the victim is to suffer irreversible body and brain damage or death – The main objective is to get the body temperature down as quickly as possible Heat Stroke • Get victim to a medical treatment facility as soon as possible • Cooling measures must be continued during transport Heat Casualties Symptoms Heat Stroke Heat Exhaustion Heat Casualty Prevention • PQS Question 104.13 Explain how heat casualties in the field may be prevented • Reference: NAVEDTRA 14295 [ch. 4, p. 4-61] Heat Casualty Prevention • Command responsibility • Prevention centers on water and salt replacement • Do not consume alcoholic beverages Frostbite and Immersion Foot • PQS Question 104.14 immersion foot Describe frostbite and • Reference: NAVEDTRA 14234 [ch. 10, pp. 10-27 thru 10-29] Frostbite • Frostbite occurs when ice crystals form in the skin or deeper tissues after sustained exposure to a temperature of 32 degrees F or lower • Depending upon the temperature, altitude, and wind speed, the exposure time necessary to produce frostbite varies from a few minutes to several hours. • The areas most commonly affected are the face and extremities Frostbite • Symptoms are progressive. – Affected skin reddens and there is an uncomfortable coldness – Area becomes numb due to reduced circulation Frostbite As ice crystals form, the frozen extremity appears white, yellow-white, or blotchy blue and white The surface of the skin feels hard, but the underlying tissue is soft Frostbite • Warning! • Never rub a frostbitten area! • Never heat a frostbitten area with open fire Immersion Foot and Hands • Immersion foot, which may also occur in the hands, is a cold injury resulting from prolonged exposure to wet, cold temperatures just above freezing • It is often associated with limited motion of the extremities and water-soaked clothing • The temperature does not need to be below 32 degrees F to cause injury Immersion Foot and Hands • Symptoms – Early stages, the feet and toes turn pale and feel cold, numb, and stiff – Walking becomes difficult – The feet will swell and become painful – If not treated the flesh dies and amputation of the extremity may be necessary Immersion Foot and Hands • Treatment: – Do not rub or massage the injured part – Remove wet clothing – Do not rupture blisters or apply salves or ointments – Clean with soap and water, dry thoroughly, elevate and keep extremity exposed to dry air – Evacuate by litter Hypothermia • PQS Question 104.15 Describe signs and symptoms when general loss of body heat occurs to a person exposed to extreme cold (hypothermia) • Reference: NAVEDTRA 14234 [ch. 10, pp. 10-27 thru 10-28] Hypothermia • Hypothermia is cooling of the entire body. • It can be caused by continued exposure to low or rapidly dropping temperatures, cold moisture, snow, and/or ice • Symptoms – Several stages of progressive shivering – Feelings of sluggishness, drowsiness and confusion – Victim may become unconscious – Victim may go into shock – The lower extremities may freeze Hypothermia • Treatment – Victim must be warmed quickly – Move victim to warmth • In the field – Place nude victim in a sleeping bag with two volunteers stripped to their underwear to provide body-to-body heat transfer – This WILL SAVE LIVES in the field • Hypothermia is a medical emergency! • The victim needs heat Now! Cold Injury Prevention • PQS Question 104.16 Explain how cold injuries can be prevented. • Reference: NAVEDTRA 14295 [ch. 4, p. 4-62] Cold Injury Prevention • Cold weather injuries can be prevented by becoming accustomed to a cold climate, by wearing warm layered clothing, and by maintaining good discipline and training • Wearing dry gloves, stocking cap, well insulated boots, and keeping the body well hydrated will help the body maintain its normal temperature Joint Dislocation • PQS Question 104.17 Describe the symptoms and first aid treatment for a joint dislocation • Reference: NAVEDTRA 14295 [ch. 4, p. 4-54] Joint Dislocation • A bone that has been forcibly displaced from its joint is dislocated • Dislocations are usually caused by falls or blows but are occasionally caused by muscle exertion. The joints that are most frequently dislocated are the shoulder, hip, finger, and jaw Joint Dislocation • Symptoms – Rapid swelling and discoloration – Loss of ability to use the joint – Severe pain and muscle spasms – Possible numbness – Possible loss of pulse below the joint – Shock Joint Dislocation • Treatment – Loosen the clothing around the injured part – Place the victim in the most comfortable position possible – Support the injured part by means of a sling, pillow, bandages, splints, or any other device that will make the victim comfortable – Treat the victim for shock – Get medical help as soon as possible Sprains • PQS Question 104.18 Explain when and why a cold pack or heat pad would be used on a sprain • Reference: NAVEDTRA 14295 [ch. 4, p. 4-56] Sprains • Treat all sprains as fractures until ruled out by x-rays • Apply cold packs for the first 24 to 48 hours to reduce swelling and to control internal hemorrhage • Apply a snug, smooth, figure eight bandage to control swelling and to provide immobilization • After the swelling stops moist heat can be applied for short periods (15 to 30 minutes) to promote healing and reduce swelling Insect Bites • PQS Question 104.19 Describe the procedure for treating insect bites • Reference: NAVEDTRA 14295 [ch. 5, p. 5-9] Insect Bites • Stings from bees, wasps, and ants account for more poisonings than stings from any other insect group. Fortunately, they rarely result in death. The vast majority of stings cause a minor local reaction at the injection site, with pain, redness, itching, and swelling. These symptoms usually fade after a short time. A small percentage of these stings can cause an allergic victim severe anaphylactic reactions, presenting with itching, swelling, weakness, headache, difficulty breathing, and abdominal cramps. Shock may follow quickly, and death may occur. The following first aid measures are recommended for all but minor, local reactions to bites or stings: 1. Closely monitor vital signs (and the whole patient), and remove all rings, bracelets, and watches. 2. Remove stingers without squeezing additional venom (remaining in poison sacs attached to stingers) into the victim. To do this, scrape along the skin with a dull knife (as if you were shaving the person). The dull blade will catch the stinger and pull it out. Insect Bites 3. Place an ice cube or analgesic-corticosteroid cream or lotion over the wound site to relieve pain. Do NOT use .tobacco juice,. saliva, or other concoctions. 4. For severe allergic reactions (generalized itching or swelling, breathing difficulty, feeling faint or clammy, unstable pulse or blood pressure), immediately give the victim a subcutaneous injection of 1:1000 aqueous solution of epinephrine. Dosage is 0.5 cc for adults and ranges from 0.1 to 0.3 cc for children. 5. Patients with severe allergic reactions should be evacuated immediately to a medical facility. Snake Bites • PQS Question 105.20 Describe the first aid treatment for snake bites • Reference: NAVEDTRA 14295 [ch. 5, p. 5-11] Snake Bites • The most important first aid treatment for venomous snakebites is reducing the circulation of blood through the bite area • This will delay absorption of the venom, prevent aggravation of the local wound, and maintain the victim’s vital signs Snake Bites • Wrap a constricting band 2 to 3 inches above the fang marks, or above the nearest joint, but away from the swelling • A second constricting band should be placed 2 to 3 inches below the wound. • Feel the victim’s pulse below the constricting bands to keep ahead of the swelling • If the victim can not reach a medical facility within 30 minutes, and if there are definite signs of poisoning, use a sterile knife blade to make an incision about 1/2 inch long and 1/4 inch deep lengthwise over each fang mark. • Apply suction cups to help remove injected venom. • Suction by mouth is recommended only as a last resort. Snake Bites • The human mouth contains so many bacteria that the bite could become infected. • Incision and suction more than 30 minutes after the bite is not recommended. • Treat for shock • Use a splint to immobilize the victim’s affected extremity, keeping the involved area at or below the level of the heart • Cover the wound to prevent further contamination. • Telephone the nearest medical facility so proper anti-venom can be made available. • Transport the victim (and the dead snake) to a medical facility as soon as possible Treating Fractures • PQS Question 104.21 Explain the first aid treatment for fractures • Reference: NAVEDTRA 14295 [ch. 10, p. 10-33] Treating Fractures • If there is any possibility that a fracture has been sustained, treat the injury as a fracture until an x-ray can be made • Rough handling of the victim may convert a closed fracture into an open fracture, increase the severity of shock, or cause extensive damage to the blood vessels, nerves, muscles, and other tissues around the broken bone • Do not move the victim until the injured part has been splinted • Treat for shock • When a long bone in the arm or leg is fractured, the limb should be carefully straightened so that splints can be applied unless it appears that further damage will be caused. • Never apply force or traction Treating Fractures • Apply splints. If the victim is to be transported a short distance, or treatment by a medical officer will not be delayed, it is best to leave the clothing on and place emergency splinting over it • If the fracture is an open fracture you must take care of the wound before you can deal with the fracture Reinforcing a Battle Dressing • PQS Question 104.22 Describe how to reinforce a compress dressing • Reference: NAVEDTRA 14295 [ch. 4, p. 4-33] Reinforcing a Compress Dressing • Compress dressings may be reinforced by applying additional sterile dressings over the battle dressing and covering the entire dressing with an elastic bandage Casualty Carries • PQS Question 104.23 Explain the following methods for carrying a casualty: – Fireman’s carry – One and two man supporting carry – One and two man arms carry – One and two man saddle back carry – Pack-strap carry Casualty Carries – – – – – Back lift and carry Pistol-belt carry Neck drag Four-hand (packsaddle) carry Four-hand arms carry • Reference: NAVEDTRA 14234 [ch. 10, pp. 10-12 thru 10.18] Casualty Carries • A casualty may be transported by using one-man or two-man carries • The two-man carries should be used whenever possible, as they provide more comfort to the casualty, are less likely to aggravate the injury, and are less tiring to the carriers • The particular carry selected should be the one less likely to aggravate the casualty’s injury Two Man Carry Two Man Carry One Person Carry One Person Carry One Person Carry Stretcher • PQS Question 104.24 State the four general rules that apply when using a stretcher • Reference: NAVEDTRA 14234 [ch. 3, p. 3-18] General Rules for using a stretcher – Use standard stretchers when available, but be ready to improvise safe alternatives. – When possible, bring the stretcher to the casualty. – Always fasten the victim securely to the stretcher. – Always move the victim FEET FIRST so the rear bearer can watch for signs of breathing difficulty. – Be sure to use proper lifting techniques so as not to become a victim yourself. When raising or lowering the patient, the litter bearer at the patient’s head calls the lift. Personal Hygiene • PQS Question 104.25 Explain the importance of personal hygiene and cite examples • Reference: NAVEDTRA 14234 [ch. 10, p. 10-40 thru 10-43] Personal Hygiene • Because of close living accommodations in the field, personal hygiene is extremely important • Disease and sickness can spread rapidly and affect an entire battalion in a short period Good practices – Daily bath or shower prevents body odor and is absolutely necessary for maintaining cleanliness and preventing common skin diseases Personal Hygiene – Using medicated powders and deodorants helps keep the skin dry – Socks and underwear should be changed daily – The importance of washing your hands at appropriate times can not be overemphasized Water Purification • PQS Question 104.26 Describe the three methods of water purification in the field Reference: NAVEDTRA 14234 [ch. 10, p. 10-43] Water Purification • Boiling is used when disinfecting compounds are not available. To purify a canteen of water by boiling, follow the steps listed below: – Boil the water at a rolling boil for at least 1520 seconds – Let the water cool before drinking it. Once the water has cooled, it must be consumed Water Purification Iodine tablets • Check tablets for physical change. If the tablets are stuck together, crumbled, or have a color other than steel gray, do not use them. • Fill canteen with the cleanest, clearest water available • Add one iodine per 1 quart canteen of clear water, 2 tablets if the water is cloudy. • Place cap loosely and wait 5 minutes • Shake canteen, allowing leakage to rinse the threads around the neck of the canteen • Tighten the cap and wait an additional 20 minutes before using the water for any purpose Water Purification Calcium hypochlorite ampules • Fill the canteen with the clearest, cleanest water available, leaving an air space of at least 1 inch below the neck of the canteen • Add one ampule of calcium hypochlorite to a canteen cup half full of water; stir with a clean stick until the powder has dissolved. • Fill the canteen cap half full of the solution in the cup, and add it to the water in the canteen, place the cap on the canteen and shake it thoroughly • Loosen the cap slightly; invert the canteen to allow the treated water to leak onto the threads around the canteen neck • Tighten the cap and wait at least 30 minutes before using the water
