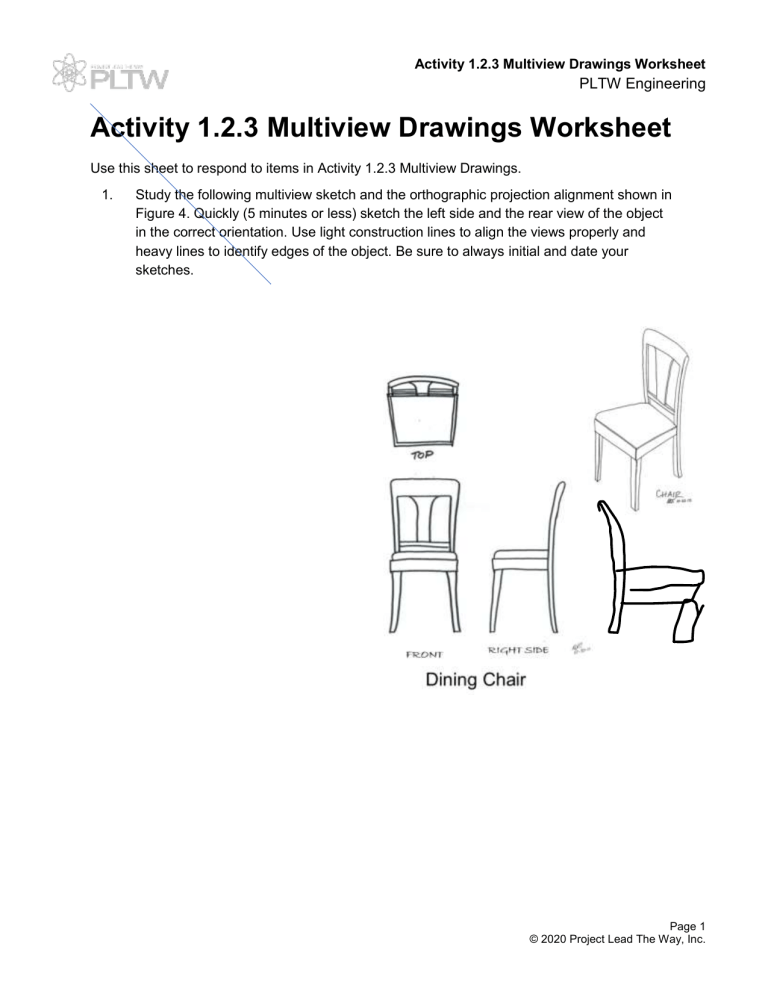
Activity 1.2.3 Multiview Drawings Worksheet PLTW Engineering Activity 1.2.3 Multiview Drawings Worksheet Use this sheet to respond to items in Activity 1.2.3 Multiview Drawings. 1. Study the following multiview sketch and the orthographic projection alignment shown in Figure 4. Quickly (5 minutes or less) sketch the left side and the rear view of the object in the correct orientation. Use light construction lines to align the views properly and heavy lines to identify edges of the object. Be sure to always initial and date your sketches. Page 1 © 2020 Project Lead The Way, Inc. He 2. Quickly (5 minutes or less) sketch the missing orthographic projection to represent the front view of the part. Use construction lines to properly align features. Draw the missing orthographic projection to represent the front view of the part. Page 2 © 2020 Project Lead The Way, Inc. He 3. Quickly (5 minutes or less) complete the multiview drawing. Sketch the missing view. Label each view with FRONT, RIGHT, or TOP. Add missing hidden lines and center lines. Compare your sketch with a peer’s. Revise your sketch as appropriate. Page 3 © 2020 Project Lead The Way, Inc.
