How to replace Your Legacy Guide Slug and Worm.
advertisement

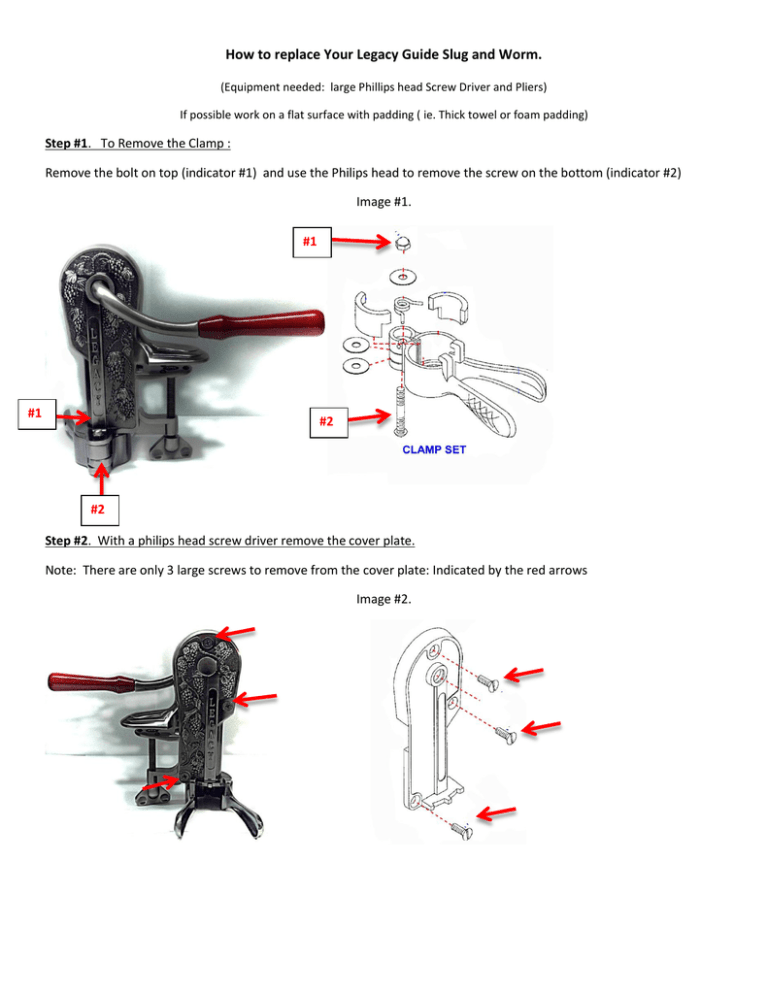
How to replace Your Legacy Guide Slug and Worm. (Equipment needed: large Phillips head Screw Driver and Pliers) If possible work on a flat surface with padding ( ie. Thick towel or foam padding) Step #1. To Remove the Clamp : Remove the bolt on top (indicator #1) and use the Philips head to remove the screw on the bottom (indicator #2) Image #1. #1 #1 #2 #2 Step #2. With a philips head screw driver remove the cover plate. Note: There are only 3 large screws to remove from the cover plate: Indicated by the red arrows Image #2. Step #3. Replacing the Worm and Guide Slug. Image #3. Drive Slug Worm Drive Slug Dog Worm Dog Guide Slug Guide Slug Please Note the following before replacing: #1. The end piece of the the Dog slides into the Guide Slug and will have to be removed. #2. The Worm goes through both the Guide Slug and Drive Slug. To remove from Guide Slug, twist the Guide Slug to remove. After the Guide Slug is removed angle the Worm 30 Degrees to the left and then twist. This will bring the top of the Worm up and through the Drive Slug. Please do not force the worm up and through the Drive Slug. Step #4. Assembly. #1. Start with inserting the new Worm in throught The Drive Slug. Twisting the Worm through , Please do no force through the Drive Slug #2. Insert the Worm into the Guide Slug, then re attach the Guide Slug to the Dog. #3. Replace cover, add the 3 screws. Tighten the screws with the philips head Screw Driver. (refer to image #2.) #4. Attach the Clamp set and screw back into the base plate. (refer to picture #1.) Then replace and tighten the Cap Nut.


