The Other Side of Crystal Radio: Basics
advertisement

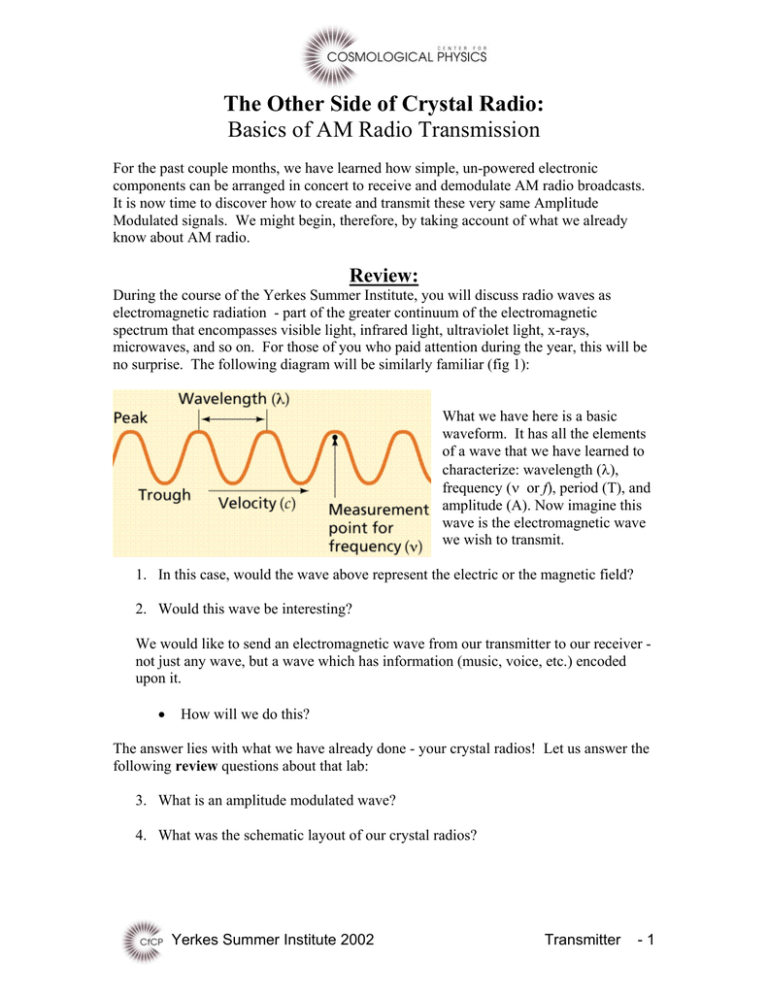
The Other Side of Crystal Radio: Basics of AM Radio Transmission For the past couple months, we have learned how simple, un-powered electronic components can be arranged in concert to receive and demodulate AM radio broadcasts. It is now time to discover how to create and transmit these very same Amplitude Modulated signals. We might begin, therefore, by taking account of what we already know about AM radio. Review: During the course of the Yerkes Summer Institute, you will discuss radio waves as electromagnetic radiation - part of the greater continuum of the electromagnetic spectrum that encompasses visible light, infrared light, ultraviolet light, x-rays, microwaves, and so on. For those of you who paid attention during the year, this will be no surprise. The following diagram will be similarly familiar (fig 1): What we have here is a basic waveform. It has all the elements of a wave that we have learned to characterize: wavelength (λ), frequency (ν or f), period (T), and amplitude (A). Now imagine this wave is the electromagnetic wave we wish to transmit. 1. In this case, would the wave above represent the electric or the magnetic field? 2. Would this wave be interesting? We would like to send an electromagnetic wave from our transmitter to our receiver not just any wave, but a wave which has information (music, voice, etc.) encoded upon it. • How will we do this? The answer lies with what we have already done - your crystal radios! Let us answer the following review questions about that lab: 3. What is an amplitude modulated wave? 4. What was the schematic layout of our crystal radios? Yerkes Summer Institute 2002 Transmitter -1 In this design, what is the function of: 5. the antenna? 6. the ground wire? 7. the inductor/capacitor? 8. the diode? 9. Why did we need a special earphone, and what was special about it? Take a moment now to record responses to the questions above in your lab notebook. Be sure to ask questions about anything that is unclear. We have described the operation of the crystal set. We have seen how it takes a "raw" AM signal and turns it into a signal that your ear can recognize as music or voice, or whatever. To build a transmitter, we must design a device that is capable of the reverse process. Consider dehydrated food. You "receive" the food after adding water, which you did after removing the food from the bag it came in, which you did after opening the bag, which you did after getting the bag at the store. However, so that you could do any of this, the dehydrated food company had to dehydrate the food, put it in a bag, seal the bag, and then send it to the store. What's more, both of you had to do everything in the right order. Substitute electromagnetic radiation and tunes for powdered milk and sealable bags, and our task is basically the same. What are the essential elements of an AM radio transmitter? Record your thoughts in your lab book. Yerkes Summer Institute 2002 Transmitter -2 Transmission Theory It seems, therefore, that the central elements of our transmitter must be: -A way to generate a carrier wave -A way to "add" a signal wave to the carrier wave -An antenna to radiate the combined waveform -A "ground" connection to reference the antenna -A voltage source to drive the transmission That's it - now get to work! Well, owing to the fact that we're currently in rural Wisconsin and you've got only a few hours to complete your transmitter, I've provided you with a plan and a few components. A schematic of what you will build will be provided on a separate hand out. Moving from left to right, we begin with the phone plug. This is simply a 1/8 inch headphone plug that will fit into our music source, a Walkman. As we discussed during the winter institute, it is the job of a Walkman, or a stereo, or any sound source to pass on to a loudspeaker or headphone a waveform of changing voltages to drive the speaker. This is our signal wave. We are not driving a speaker yet, however. First we must combine our signal wave with our carrier wave. The crystal oscillator generates our carrier wave, whereas our signal wave comes from the Walkman. The Walkman expects to drive a speaker, so it operates at high current, low impedance (8 Ohms). The crystal, however, is designed to operate at low current, high impedance (approximately 1000 Ohms). It seems what we need is a way to "change gears" just like a car or bicycle, which changes gears to trade Rpm's for torque, depending on whether you're going at high speed or low speed, going up a hill, or traveling on flat ground. This "gear change" is exactly what the audio transformer is designed to do. Much as the diagram suggests, it is as simple as two coils of wire, each one just like the coil that you made when building the inductor for your crystal radio. The two coils are separated by an insulator, which is what you call any non-conducting material. This way, no current goes directly from one coil to the other. Instead, the coils interact via their magnetic fields. When we built our simple coil inductor, the idea was that the current going through the coiled wire would create a magnetic field through the middle of our solenoid. The inductor takes advantage of the fact that the current we put through is an AC current, or Yerkes Summer Institute 2002 Transmitter -3 Alternating Current, (just like the one that comes out of a wall socket). Each time the current changes direction, the magnetic field opposes the change, and sets up a "back current" - a current in the opposite direction as the change. This can get a little confusing, so think of what it would be like to be chest deep in a vat of corn syrup. Sitting still, you would feel no force, but the moment you try to move, you would feel a strong resistive force pushing things the direction opposite to your motion. This is why we say the inductor has an impedance. The important thing to remember is that the current in the coil creates a magnetic field, which then creates another current in the coil, the back current that characterizes the impedance. In the case of the transformer, the two coils are close enough that the magnetic field of one coil creates a current in the other coil. However, just as in the inductor, this current is changing, (AC signal from Walkman), and so in each coil there is an impedance. Here comes the trick: we now "change gears". In the transformer, the two coils have a different number of wire loops. As we learned in the crystal radio project, more loops means a greater the magnetic field produced, and a larger impedance for the coil. Therefore we go from a small coil (8 Ohm) and induce a current in a larger coil (1000 Ohm). This is called a step-up transformer. In any transformer, a step up in voltage will be a step down in current, whereas a step down in voltage will be a step up in current. If the ratio of loops is n then, the change in voltage is found by multiplying the input voltage by n, whereas the impedance is found by multiplying by n2. Now that we have matched the impedance of our source to that of our transmitter, we are ready for the crystal oscillator. The oscillator is the heart of the transmitter. It has four leads, but we only use three of them. When the power is connected to two of the leads, the voltage on third lead starts jumping between 0 volts and 5 volts, one million times each second. This is our carrier wave, the wave that you tune to on your AM dial. The crystal is powered through the connection to the 9-volt battery, our third component. The oscillator is built into a metal can. The corners of the can are rounded, except for the lower left corner, which is sharp. This indicates the where the unused lead is. The lead is there to help hold the can down firmly on the printed circuit board, but it is not connected to anything inside the can. By connecting the output of the transformer to the input lead of the crystal oscillator, we have added the signal wave to the carrier wave. This combined wave is our Amplitude Modulated signal that emerges on the third lead (top right). The top of the oscillator gives you the crystal's natural oscillation frequency - either 1.000 MHz or 1.8432 MHz. Which of these two frequencies will you be able to detect on your crystal radio? What do you think the differences will be between transmitting at 1.000 MHz versus 1.8432 MHz? Yerkes Summer Institute 2002 Transmitter -4 Finally, we have the antenna and ground connections. These operate in essentially the same way as in your crystal radio, only now the acceleration of electrons in the antenna due to a changing voltage (from the oscillator) creates electromagnetic radiation, rather than the other way around. As the electrons move up and down in the antenna wire, they create changing electric and magnetic fields. This is the case for both transmitting and receiving antennas. An electrostatic field is generated from one end of the antenna to the other by the voltage applied to it, and a magnetic field is created around the antenna due to the current through it. A good ground connection has a variety of benefits, perhaps the most important being a conduit for the dissipation of charge. By shoving a long copper rod into the ground, we are basically connecting our circuit to an "infinite" conductor (the Earth) for which the little bit of charge we send to it is far less than even a "drop in the bucket". Were this not the case, static charge would be able to accumulate in our antenna, and if you were to touch such a charged wire your body would suddenly ground the circuit, inviting all the static charge to flow through you. This is exactly what happens when you touch a doorknob after dragging your feet around on certain dry carpets - in this case you have built up the static charge and the doorknob acts as the ground. In any case, it's no fun. Construction Break up into pairs. If possible, group yourselves such that either you or your partner has a working crystal radio on hand. The Board 1. Each group should obtain 1 component bag. These are located at the front of the room. 2. Examine the printed circuit board. In each bag, there are two boards, because you and your partner will each produce your own transmitter. Snap the circuit boards apart and turn them to their bottom (copper-laden) side. The boards are called "printed" because they have a pattern of copper lines printed upon them at the factory. These copper lines connect little holes and act just like the wires in your crystal radio - if you want to connect two components, simply solder them to the same copper line. This will make our transmitters nice and neat, without a bunch of unnecessary wires hanging about. 3. The board is essentially symmetric, but let's decide on an orientation so that the instructions are clear. Choose either the side that says "Radio Shack" or "276159B" as the left side or the board and the other as the right. Now turn the board over to the top (no copper) side. This is the side where you will insert the components of your transmitter, allowing their wires to make contact with the copper below. Yerkes Summer Institute 2002 Transmitter -5 Transformer hole 4. On the left side of your circuit board, there are four sets of two holes. Use your flathead screwdriver to punch through the silicon that divides the outer two sets of two holes. This is where you will put the tabs of your audio transformer, so make sure it will fit but don't insert the transformer yet. Crystal 5. You have two crystal oscillators: one that operates at 1.000 MHz and one that operates at 1.8432 MHz. Decide with your lab partner who will use which. Insert the leads of the oscillator into the holes at the far right of the circuit board's central rows. This will leave space for the transformer on the left. The copper side of the board should be down, with the oscillator on the side without copper. Make sure that the sharp end of the oscillator is on the bottom left as you look down on the side without copper. 6. Once you are sure that the oscillator is in the correct place, gently bend it's leads over so that it makes contact with the copper it is sticking through, but does not touch adjacent copper. 7. Solder the pins of the oscillator to the copper foil of the printed circuit board. Have your partner help you by having her hold the board as you solder. Don't burn your partner. Don't burn yourself. Don't burn anything - carefully, purposefully liquify the solder as instructed. Be careful not to use too much solder, or it may form bridges of solder between copper traces that are not supposed to be connected together. Phone to transformer 8. Now look at the back of the package that contained the audio transformer. Here you will find a diagram of the transformer. Use this diagram and the transmitter schematic above to decide which wires from the transformer should be connected to the phone plug and which should be connected to the oscillator. You can Yerkes Summer Institute 2002 Transmitter -6 ignore the central black wire, which is called the "center tap" because it connects to the halfway point of one of the transformer's coils. 9. Once you have decided which way to orient the transformer, open the phone plug and insert the correct wires of the transformer into the plastic handle. The metal part of the plug has two pieces, each with a small hole. Put one of the transformer wires into one hole and solder it, then put the other wire into the other hole and solder it. Again, have your partner hold the components you are soldering, using pliers to hold the plug, which will get very hot. When the metal has cooled, screw the plastic handle back onto the metal phone plug. Transformer in 10. Insert the transformer in to the left side of the board, fitting the small metal tabs on its base into the holes you bored previously with your screwdriver. Remember that the plug must hang off the left side of the board. Once the tabs are through the board, gently bend them inward to hold the transformer securely to the board. Wires 11. Now connect the output wires of the transformer to the oscillator and the battery clip. Insert the top wire into a hole whose copper foil is connected to the upper left pin of the oscillator. Solder this wire to its copper foil. 12. Insert the stripped end of the bottom wire into a convenient unused hole in the printed circuit board (such as the bottom left hole). Insert the red wire from the battery clip into a nearby hole that is connected by copper foil to the first hole, so that the bottom output transformer wire and the red battery wire are electrically connected. Twist the two wires together and bend them down onto the copper surface. Solder the two wires to the copper foil. Antenna, ground connections 13. Locate the wire with an alligator clip at each end. Each transmitter will require 1 such wire. Cut one of these wires in half and strip the last ¼ inch of insulation from the cut end of each piece. Yerkes Summer Institute 2002 Transmitter -7 14. Insert the black wire of the battery clip into a hole whose copper foil connects to the lower right pin of the oscillator. Insert the stripped end of one of the alligator clip leads into a hole that is also connected to the lower right pin of the oscillator. Solder the two wires to the copper foil. The alligator clip will be the ground connection, just like in the crystal radio. 15. Insert the stripped end of the other alligator clip into a hole that is connected to the top right pin of the oscillator. Solder the wire to the copper foil. This will be the antenna connector. Mounting 16. The transmitter is complete electrically, but still requires some structural work. Find the small metal clip designed to hold a 9-volt battery and the two, tiny wood screws (#4 screws, ½ inch long) that fit into the base of the battery holder. You may need to find a smaller screwdriver for this job. Find also a wood base for the transmitter (these are slightly narrower than those used for the receivers you built before). Secure the battery holder onto one side of the wood base with the screws such that the battery would sit perpendicular to the length of the wood base. 17. Now find your assembled transmitter board, four cylindrical standoffs, and four 1 inch, #6 screws. 18. Position the transmitter on the wood base, just inside the battery holder with the alligator wires facing outward from the wood base and over the battery holder, and the phone plug facing inwards. Screw the transmitter down by putting the screws through the large holes at the corners of the circuit board and then through the standoffs, which finally contact the wood base. Battery 19. With everything in place, all you need to do is flip the switch and turn your transmitter on. You will do this by hooking a 9-volt battery up to the battery clip. Applying a voltage to the crystal oscillator will cause the top right lead of the oscillator to jump from +5 to -5 volts at a frequency of 1.000 MHz or 1.8432 MHz, depending on the oscillator you decided to use. This is the source of your carrier wave. Congratulations! You have now built your very own AM radio station! All you need now is an audio source, (something for the phone plug to plug into), and a good antenna/ground system. We will use a Walkman as our audio source, and I have already built an antenna, so it's time to test your work! Yerkes Summer Institute 2002 Transmitter -8 Where the Rubber Meets the Road Preliminary Testing The first thing we would like to do is make sure your transmitter works at all. This we can do inside. First create a good "ground" connection by securing a wire to the central screw of an electrical outlet as we did during the first tests of our radios. Then clip your transmitter's ground lead alligator clip to this wire, clip in a battery, and plug a Walkman in. At this point you should be broadcasting! Use our digital/short-wave receiver as a detector. Experiment with the position of the antenna clip on the transmitter. Can you find your signal? Primary Testing It is impressive that our little apparatus works at all, but perhaps we can get our signal really cooking. In addition, it would be great if the crystal radios you built could detect your pirate radio signal. The key to making this happen is a better antenna and for this, we head outside. Our antenna system consists of two antennas: one for transmitting, one for receiving. Hook up the antenna leads of your transmitter and receiver to the antenna wires. Similarly, clip their ground wires to the wires attached to the ground rod. See the antenna setup diagram handout. The purpose of this sliding antenna system is to determine how the signal strength falls off as we separate the receiving antenna from the transmission antenna. Begin with the antennas separated by a distance of 5 cm, at one end of the crossbars. The transmitting antenna should be on the outside. Connect your transmitter to a Walkman and begin transmission. Can you hear the transmission on your crystal set? Now move the receiving antenna halfway across the crossbars and listen. Does the signal fade? Now move the receiving antenna all the way to the other end of the crossbars. How does the signal sound. Make sure both you and your partner have an opportunity to listen. We need a more sensitive way of measuring the signal strength at the receiver's antenna. Use a multimeter to measure the voltage drop across the earphone terminals of your receiver as you move the receiving antenna along the crossbar. Make sure your radio is tuned as well as you can get it. The voltage that you measure here is a measure of the voltage received at your antenna. Remember, the black lead of the multimeter is the negative (ground) side, and the red lead is the positive side - connect to your radio accordingly. Make measurements at 5 or more distances. Note your results in your lab book. Yerkes Summer Institute 2002 Transmitter -9 Secondary Testing The test you have just performed was very controlled in the sense that the receiver and transmitter were pitted against each other under fairly uniform conditions. We will now perform three additional secondary tests of your transmitter/receiver system. These can be done in any order. Distance Test The goal of this activity is to see how far you are able to transmit to your crystal radio. This will require a slightly more portable grounding mechanism - the 4 ft. ground rod. You are free to proceed as you see fit. However, you must try to use an antenna the same length as that used in the primary test. Make your antenna out of the black 18 gauge stranded wire, and hold it parallel to the transmitting antenna. Try to find the point where you first begin to hear coherent sound. Mark this spot with one of our handy CfCP ground markers. Next, bring your receiver a little closer to the transmitter and use the multimeter to make a voltage reading at the receiver. Mark the location of this reading. Resist the temptation to measure your distance from the transmitter! Using the previous voltage readings at known distances, can you use this faint voltage reading to estimate the distance to your remote location? Record all data and calculations in your lab book. Selectivity test We have built transmitters that employ two different carrier wave frequencies - let's explore this. Connect both transmitters to separate antennas and listen to the transmissions with your receiver on a third antenna. Is one signal stronger than the other? Try tuning your radio to one frequency or the other - are you able to filter out one signal from the other? Do you find that the proximity of your receiver's antenna to one or the other transmitters is more or less important than the effect of tuning? Whereas previous tests have explored the sensitivity of your receiver, this is a test of your it's selectivity the ability to distinguish and filter one signal from another. Record all your observations in your lab book. Polarization test Finally, let's explore the operation of the antennas. Previous tests have sought to find clear, strong signals - let's try to find interesting ways to make the signal bad. Transmitting from an antenna of fixed location and orientation, (the PVC assembly, for instance), experiment with the orientation and position of your receiver's antenna. In what locations and orientations does the signal fade? Supplement your lab book observations with diagrams. Transmitter design adapted from: http://www.scitoys.com/scitoys/scitoys/radio/am_transmitter.html Yerkes Summer Institute 2002 Transmitter - 10


