Document 13581714
advertisement

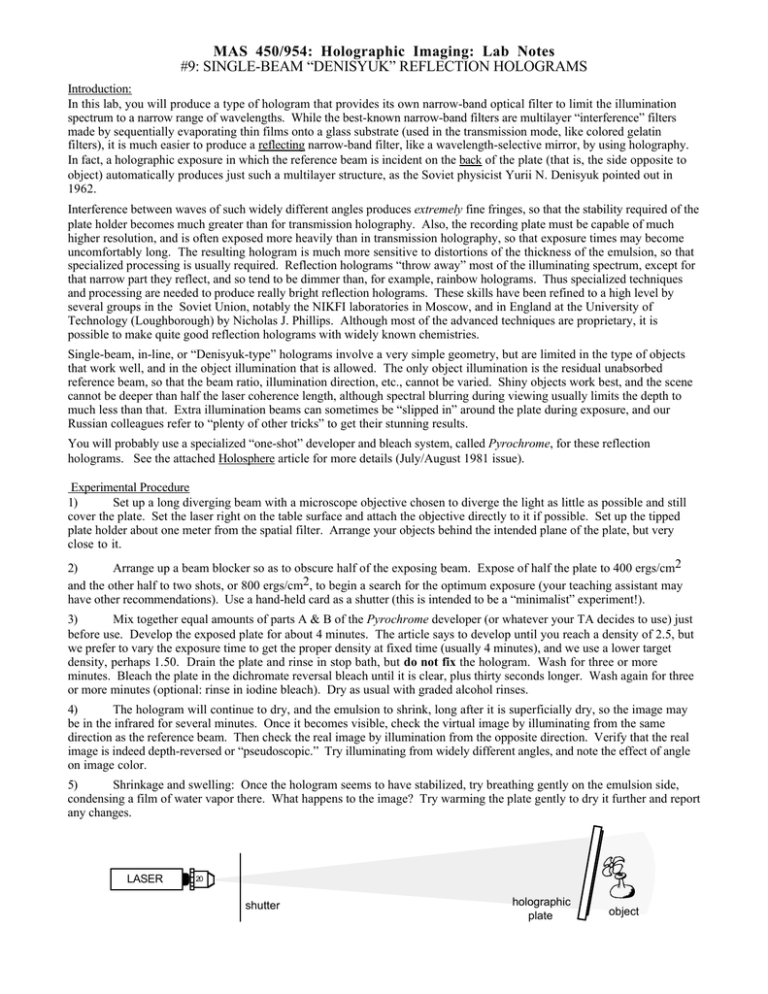
MAS 450/954: Holographic Imaging: Lab Notes #9: SINGLE-BEAM “DENISYUK” REFLECTION HOLOGRAMS Introduction: In this lab, you will produce a type of hologram that provides its own narrow-band optical filter to limit the illumination spectrum to a narrow range of wavelengths. While the best-known narrow-band filters are multilayer “interference” filters made by sequentially evaporating thin films onto a glass substrate (used in the transmission mode, like colored gelatin filters), it is much easier to produce a reflecting narrow-band filter, like a wavelength-selective mirror, by using holography. In fact, a holographic exposure in which the reference beam is incident on the back of the plate (that is, the side opposite to object) automatically produces just such a multilayer structure, as the Soviet physicist Yurii N. Denisyuk pointed out in 1962. Interference between waves of such widely different angles produces extremely fine fringes, so that the stability required of the plate holder becomes much greater than for transmission holography. Also, the recording plate must be capable of much higher resolution, and is often exposed more heavily than in transmission holography, so that exposure times may become uncomfortably long. The resulting hologram is much more sensitive to distortions of the thickness of the emulsion, so that specialized processing is usually required. Reflection holograms “throw away” most of the illuminating spectrum, except for that narrow part they reflect, and so tend to be dimmer than, for example, rainbow holograms. Thus specialized techniques and processing are needed to produce really bright reflection holograms. These skills have been refined to a high level by several groups in the Soviet Union, notably the NIKFI laboratories in Moscow, and in England at the University of Technology (Loughborough) by Nicholas J. Phillips. Although most of the advanced techniques are proprietary, it is possible to make quite good reflection holograms with widely known chemistries. Single-beam, in-line, or “Denisyuk-type” holograms involve a very simple geometry, but are limited in the type of objects that work well, and in the object illumination that is allowed. The only object illumination is the residual unabsorbed reference beam, so that the beam ratio, illumination direction, etc., cannot be varied. Shiny objects work best, and the scene cannot be deeper than half the laser coherence length, although spectral blurring during viewing usually limits the depth to much less than that. Extra illumination beams can sometimes be “slipped in” around the plate during exposure, and our Russian colleagues refer to “plenty of other tricks” to get their stunning results. You will probably use a specialized “one-shot” developer and bleach system, called Pyrochrome, for these reflection holograms. See the attached Holosphere article for more details (July/August 1981 issue). Experimental Procedure 1) Set up a long diverging beam with a microscope objective chosen to diverge the light as little as possible and still cover the plate. Set the laser right on the table surface and attach the objective directly to it if possible. Set up the tipped plate holder about one meter from the spatial filter. Arrange your objects behind the intended plane of the plate, but very close to it. 2) Arrange up a beam blocker so as to obscure half of the exposing beam. Expose of half the plate to 400 ergs/cm2 and the other half to two shots, or 800 ergs/cm2, to begin a search for the optimum exposure (your teaching assistant may have other recommendations). Use a hand-held card as a shutter (this is intended to be a “minimalist” experiment!). 3) Mix together equal amounts of parts A & B of the Pyrochrome developer (or whatever your TA decides to use) just before use. Develop the exposed plate for about 4 minutes. The article says to develop until you reach a density of 2.5, but we prefer to vary the exposure time to get the proper density at fixed time (usually 4 minutes), and we use a lower target density, perhaps 1.50. Drain the plate and rinse in stop bath, but do not fix the hologram. Wash for three or more minutes. Bleach the plate in the dichromate reversal bleach until it is clear, plus thirty seconds longer. Wash again for three or more minutes (optional: rinse in iodine bleach). Dry as usual with graded alcohol rinses. 4) The hologram will continue to dry, and the emulsion to shrink, long after it is superficially dry, so the image may be in the infrared for several minutes. Once it becomes visible, check the virtual image by illuminating from the same direction as the reference beam. Then check the real image by illumination from the opposite direction. Verify that the real image is indeed depth-reversed or “pseudoscopic.” Try illuminating from widely different angles, and note the effect of angle on image color. 5) Shrinkage and swelling: Once the hologram seems to have stabilized, try breathing gently on the emulsion side, condensing a film of water vapor there. What happens to the image? Try warming the plate gently to dry it further and report any changes. LASER 20 shutter holographic plate object


