How to Create a Table
advertisement

How to Create a Table
1. Either create a new article or edit an existing one.
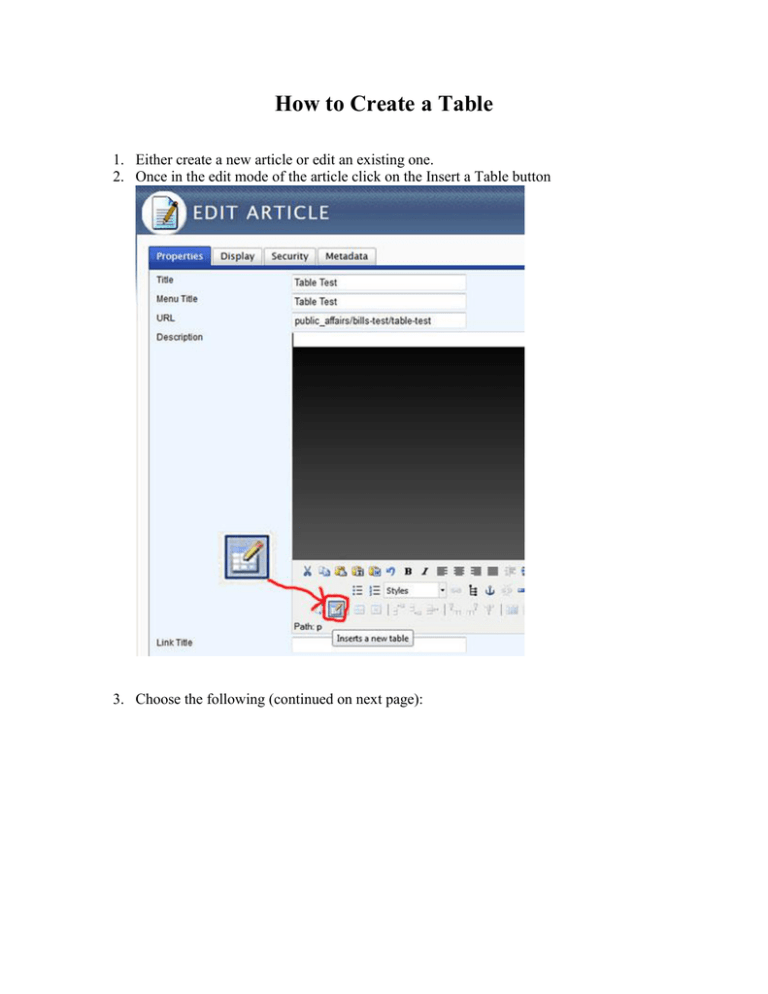
2. Once in the edit mode of the article click on the Insert a Table button
3. Choose the following (continued on next page):
1. How many Columns
2. How many Rows
3. Delete the 0 in the Border field. If you leave the 0, it generates bad code which
we do not want. Also, do not use the alignment option, it also generates bad code.
4. In the Class drop-down option, choose datatable (this will make the top row & left
column have a gold background and bold text if you use table headers (see table styling
below)):
5. If you want the whole table centered (by default, the table will be left aligned), click on
the Advanced tab. If not, skip to step 6.
1. Enter the following in the Style field: margin: auto;
6. Once you are done setting up the table, click on the Insert button to insert the table into
your article.
Table Styling – Column and Row Headers
Column and Row headers improve the accessibility of the table.
1. Click in a cell that you would like to be a column header or a row header, then click on
the Table Cell Properties button. (In my example, Column 1 will be a column header)
2. In the Cell Type, choose Header.
3. In the Scope choose Column or Row (in my example it is a column).
4. Continue to do this for each column and row header.
5. Click the Update button.
6. If you do not want to highlight the rows on mouseover, then click on the Save button to
save the article.
7. Commit your Version Tag.
Table Styling – Row Highlighting
Row highlighting is nice because when a user puts their mouse over the row, the row will light
up which helps on large tables to see what line you are on. You can see an example at:
http://www.cameron.edu/public_affairs/table-test2
1. While still in edit mode of the table article, click on the Metadata tab.
2. In the Extra <head> elements (tags) field enter the following (this will affect all tables on
the page):
<style> tr:hover td {
background-color:#FFE172;
}</style>
3. Click Save
4. Commit your Version Tag


