5c) Editing, Deleting and Copying a Journal Voucher in... 1. Editing a Journal Voucher (JV) in UniFi Plus
advertisement
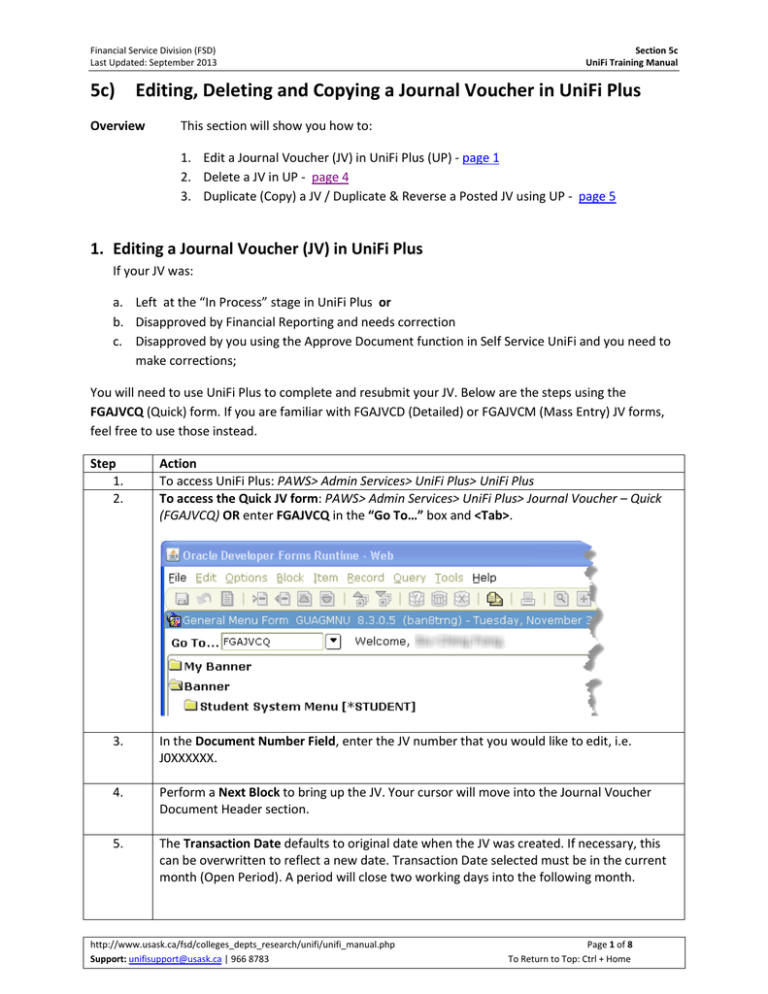
Financial Service Division (FSD) Last Updated: September 2013 5c) Section 5c UniFi Training Manual Editing, Deleting and Copying a Journal Voucher in UniFi Plus Overview This section will show you how to: 1. Edit a Journal Voucher (JV) in UniFi Plus (UP) - page 1 2. Delete a JV in UP - page 4 3. Duplicate (Copy) a JV / Duplicate & Reverse a Posted JV using UP - page 5 1. Editing a Journal Voucher (JV) in UniFi Plus If your JV was: a. Left at the “In Process” stage in UniFi Plus or b. Disapproved by Financial Reporting and needs correction c. Disapproved by you using the Approve Document function in Self Service UniFi and you need to make corrections; You will need to use UniFi Plus to complete and resubmit your JV. Below are the steps using the FGAJVCQ (Quick) form. If you are familiar with FGAJVCD (Detailed) or FGAJVCM (Mass Entry) JV forms, feel free to use those instead. Step 1. 2. Action To access UniFi Plus: PAWS> Admin Services> UniFi Plus> UniFi Plus To access the Quick JV form: PAWS> Admin Services> UniFi Plus> Journal Voucher – Quick (FGAJVCQ) OR enter FGAJVCQ in the “Go To…” box and <Tab>. 3. In the Document Number Field, enter the JV number that you would like to edit, i.e. J0XXXXXX. 4. Perform a Next Block to bring up the JV. Your cursor will move into the Journal Voucher Document Header section. 5. The Transaction Date defaults to original date when the JV was created. If necessary, this can be overwritten to reflect a new date. Transaction Date selected must be in the current month (Open Period). A period will close two working days into the following month. http://www.usask.ca/fsd/colleges_depts_research/unifi/unifi_manual.php Support: unifisupport@usask.ca | 966 8783 Page 1 of 8 To Return to Top: Ctrl + Home Financial Service Division (FSD) Last Updated: September 2013 Section 5c UniFi Training Manual 6. If necessary, <tab> over to edit the Document Total ( = sum of all your credits and debits lines) 7. Note: You can ignore the “NSF Checking” and “Defer Edit” check boxes. 8. To edit/ add Document Text; from the Options drop-down menu select Document Text [FOATEXT] to enter descriptive text for the voucher. When finished Save and Exit the form. 9. To move to your sequences (CFOAPAL information part); perform a Next Block (or Ctrl + Page Down). You should now be looking at Sequence 1. 10. Use the <Tab> key to move to the field that requires editing. Make your changes and tab out of the field each time. Amount, Debit / Credit and Description are the last 3 required fields. All other fields can be left blank. 11. To move to the next Sequence, use Next Record (or <Down Arrow> key or Record> Next). Make all the necessary changes for each sequence Note: To move between the sequences, use the Next Record or Previous Record function. 12. To remove/ delete a sequence, you need to move to the sequence and hit Remove Record (or Record> Remove) 13. Optional, but highly recommended: When you are at your last sequence and you are ready to post, use Options> Access Transaction Summary Info (FGIJSUM) to view the status of all your sequences. If all lines show a Postable status, you can now submit your JV. Proceed to the next step. If you see an Error status, note the sequence number so that you can return to that sequence and make corrections. http://www.usask.ca/fsd/colleges_depts_research/unifi/unifi_manual.php Support: unifisupport@usask.ca | 966 8783 Page 2 of 8 To Return to Top: Ctrl + Home Financial Service Division (FSD) Last Updated: September 2013 Section 5c UniFi Training Manual To return to your JV, hit the Exit button to exit FGIJSUM. For corrections, use the Next Record or Previous Record to move to sequence that needs correcting. If you cannot see an error, a common fix is to tab through all the fields in that sequence. Tabbing allows the system to revalidate your fields and this may resolve your Error status. Repeat Step 12 to recheck the statuses. If you are unable to resolve your error, contact unifisupport@usask.ca or call 966-8783 with your JV number for help. 14. To submit your JV, perform a Next Block (or <Ctrl + Page Down>) to bring up the Complete / In Process screen. Click on the Complete icon to submit your JV. Note: You must click on the Complete icon to submit your JV. 15. If successful, the JV form will refresh to a new blank form and you should see this message at the bottom of the page in the message bar: 16. If you wish to print this JV: a. Go to FAST Queries PAWS> Admin Services> Financial Service> Self Service UniFi> FAST Queries b. In FAST, under “Desired Option” click on Unposted Journal Entries c. Locate the JV number you want and click on the amount to see your JV lines. d. You can now print this 17. If you wish to make changes to a JV that you have completed/ submitted: a. Go to Approve Document in Self Service UniFi PAWS> Admin Services> Financial Service> Self Service UniFi>Approve Document b. Follow the instructions on the page to disapprove your JV c. Once disapproved, repeat from step 1 to make changes and resubmit your JV. You can also delete the JV using UniFi Plus if you no longer need it http://www.usask.ca/fsd/colleges_depts_research/unifi/unifi_manual.php Support: unifisupport@usask.ca | 966 8783 Page 3 of 8 To Return to Top: Ctrl + Home Financial Service Division (FSD) Last Updated: September 2013 Section 5c UniFi Training Manual 2. Delete a JV in UniFi Plus If you no longer need a JV that you have started / disapproved, you can delete it. This function is available for all the JV forms – FGAVJCQ, FGJAVCD and FGAJVCM. The following example is for FGAJVCQ (Quick) form. Step 1. Action To access UniFi Plus: PAWS> Admin Services> UniFi Plus> UniFi Plus 2. To access the Quick JV form: PAWS> Admin Services> UniFi Plus> Journal Voucher – Quick (FGAJVCQ) OR enter FGAJVCQ in the “Go To…” box and <Tab>. 3. In the Document Number Field, enter an existing journal entry number, i.e. J0XXXXXX 4. Perform a Next Block (or <Ctrl + Page Down>) to move into the Journal Voucher Document Header section. 5. Click on Record and select Remove You will then see this message at the bottom of the screen: 6. Repeat the step above and you will receive the following message: http://www.usask.ca/fsd/colleges_depts_research/unifi/unifi_manual.php Support: unifisupport@usask.ca | 966 8783 Page 4 of 8 To Return to Top: Ctrl + Home Financial Service Division (FSD) Last Updated: September 2013 7. Section 5c UniFi Training Manual Click OK and your JV will be deleted 3. Duplicate a JV using UniFi Plus / Reversing a Posted JV To quickly create a new Journal Voucher similar to one that you have started / completed previously, use the Copy function. This is available for all UniFi Plus JV forms – FGAJVCQ, FGAJVCD and FGAJVCM. You can duplicate / copy a JV that has been completed or not yet completed. If you have posted a JV that now needs to be canceled, you can also use UniFi Plus to quickly copy and reverse the order of debit and credit for the posted JV. The following example is for FGAJVCQ (Quick) form. Step 1. Action To access UniFi Plus: PAWS> Admin Services> UniFi Plus> UniFi Plus 2. To access the Quick JV form: PAWS> Admin Services> UniFi Plus> Journal Voucher – Quick (FGAJVCQ) OR enter FGAJVCQ in the “Go To…” box and <Tab>. 3. Click on the Copy button. 4. You will be presented with the following box: http://www.usask.ca/fsd/colleges_depts_research/unifi/unifi_manual.php Support: unifisupport@usask.ca | 966 8783 Page 5 of 8 To Return to Top: Ctrl + Home Financial Service Division (FSD) Last Updated: September 2013 Section 5c UniFi Training Manual 5. If you want to use the copy and reverse function, check off the Reverse JV box (see image in previous step). This will copy the JV you previously posted, with the debit and credit sign reversed, effectively cancelling out the JV that was posted. You cannot undo a posted transaction but this reversed JV will cancel out the transaction made using the original JV. 6. It is not recommended that you use the Copy Text function. You should always enter new text associated with this JV. If you do Copy Text, please review text and update before submitting. 7. Click OK and you will be presented with header information copied from the JV document that you have specified. 8. To create / review Document Text, select Options> Document Text: Add or make changes, if necessary, to Document Text. Close the form when done. You will be prompted to save your changes. 9. Next, you should review the copied sequences. To move to the sequence section, hit the Next Block icon (or Ctrl-Page Down). You should now be looking at Sequence 1. 10. Use the <Tab> key to tab through the all the fields in the sequence and make changes where necessary. To move to the next sequence, use Next Record (or <Down Arrow> key). Note: To move between the sequences, use the Next Record or Previous Record function. To delete a sequence, hit Remove Record. To create a new sequence, move to the last sequence and hit Next Record (or Down Arrow key) http://www.usask.ca/fsd/colleges_depts_research/unifi/unifi_manual.php Support: unifisupport@usask.ca | 966 8783 Page 6 of 8 To Return to Top: Ctrl + Home Financial Service Division (FSD) Last Updated: September 2013 11. Section 5c UniFi Training Manual Optional, but highly recommended: When you are at your last sequence and you are ready to post, use Options> Access Transaction Summary Info (FGIJSUM) to view the status of all your sequences. If all lines show a Postable status, you can now submit your JV. Proceed to the next step. If you see an Error status, note the sequence number so that you can return to that sequence and make corrections. To return to your JV, hit the Exit button to exit FGIJSUM. For corrections, use the Next Record or Previous Record to move to sequence that needs correcting. If you cannot see an error, a common fix is to tab through all the fields in that sequence. Tabbing allows the system to revalidate your fields and this may resolve your Error status. Repeat this step to recheck the statuses. If you are unable to resolve your error, contact unifisupport@usask.ca or call 966-8783 with your JV number for help. 12. Once all you have reviewed all sequences and you are ready to submit your JV, perform a Next Block (or <Ctrl + Page Down>) to bring up the Complete / In Process screen. Click on the Complete icon to submit your JV. Note: You must click on the Complete icon to submit your JV. 13. If successful, the JV form will refresh to a new blank form and you should see this message at the bottom of the page in the message bar: 14. If you wish to print this JV: a. Go to FAST Queries PAWS> Admin Services> Financial Service> Self Service UniFi> FAST Queries b. In FAST, under “Desired Option” click on Unposted Journal Entries c. Locate the JV number you want and click on the amount to see your JV lines. d. You can now print this http://www.usask.ca/fsd/colleges_depts_research/unifi/unifi_manual.php Support: unifisupport@usask.ca | 966 8783 Page 7 of 8 To Return to Top: Ctrl + Home Financial Service Division (FSD) Last Updated: September 2013 15. Section 5c UniFi Training Manual If you wish to make changes to a JV that you have completed/ submitted: a. Go to Approve Document in Self Service UniFi PAWS> Admin Services> Financial Service> Self Service UniFi>Approve Document b. Follow the instructions on the Approve Document page to disapprove your JV c. Once disapproved, follow the instructions in this document for “Editing a JV in UniFi Plus” to make edit to your JV or “Delete a JV in UniFi Plus” for a JV that you no longer need. http://www.usask.ca/fsd/colleges_depts_research/unifi/unifi_manual.php Support: unifisupport@usask.ca | 966 8783 Page 8 of 8 To Return to Top: Ctrl + Home
