Instructions for Archiving Your Web Materials syllabus FILE
Instructions for Archiving Your Web Materials
1. Open the page you want to archive (for example’s sake, let’s say it’s called syllabus ).
2. In the grey bar at the top left, click FILE and slide down to the option SAVE AS .
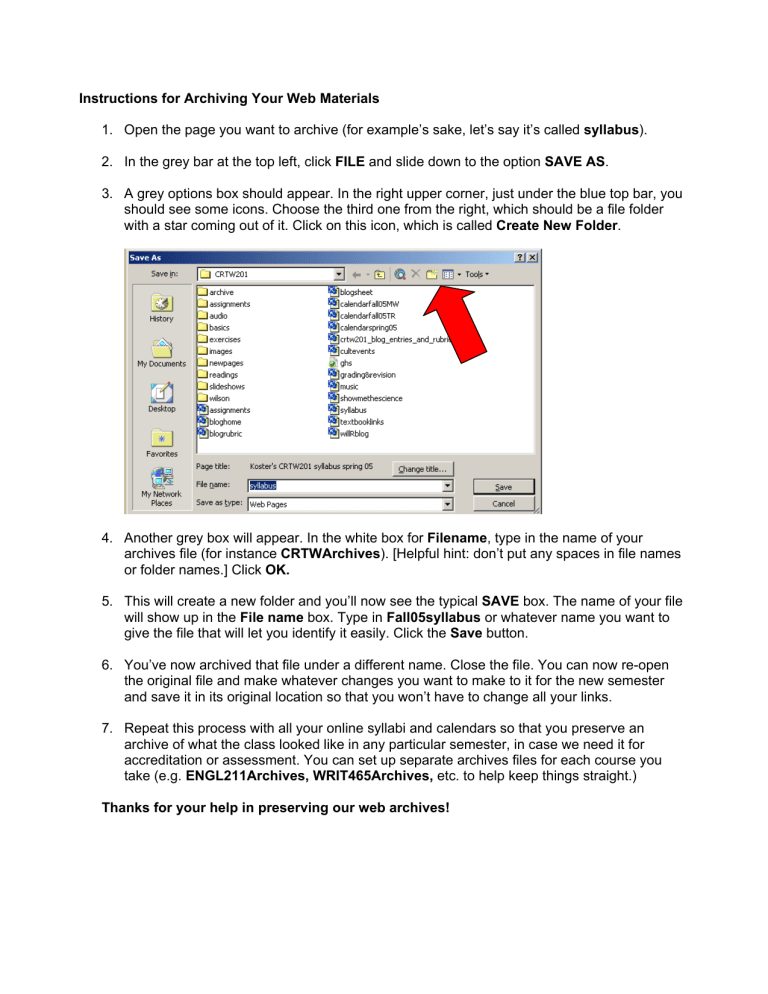
3. A grey options box should appear. In the right upper corner, just under the blue top bar, you should see some icons. Choose the third one from the right, which should be a file folder with a star coming out of it. Click on this icon, which is called Create New Folder .
4. Another grey box will appear. In the white box for Filename , type in the name of your archives file (for instance CRTWArchives ). [Helpful hint: don’t put any spaces in file names or folder names.] Click OK.
5. This will create a new folder and you’ll now see the typical SAVE box. The name of your file will show up in the File name box. Type in Fall05syllabus or whatever name you want to give the file that will let you identify it easily. Click the Save button.
6. You’ve now archived that file under a different name. Close the file. You can now re-open the original file and make whatever changes you want to make to it for the new semester and save it in its original location so that you won’t have to change all your links.
7. Repeat this process with all your online syllabi and calendars so that you preserve an archive of what the class looked like in any particular semester, in case we need it for accreditation or assessment. You can set up separate archives files for each course you take (e.g. ENGL211Archives, WRIT465Archives, etc. to help keep things straight.)
Thanks for your help in preserving our web archives!

