5100-360F April 6, 2009
advertisement
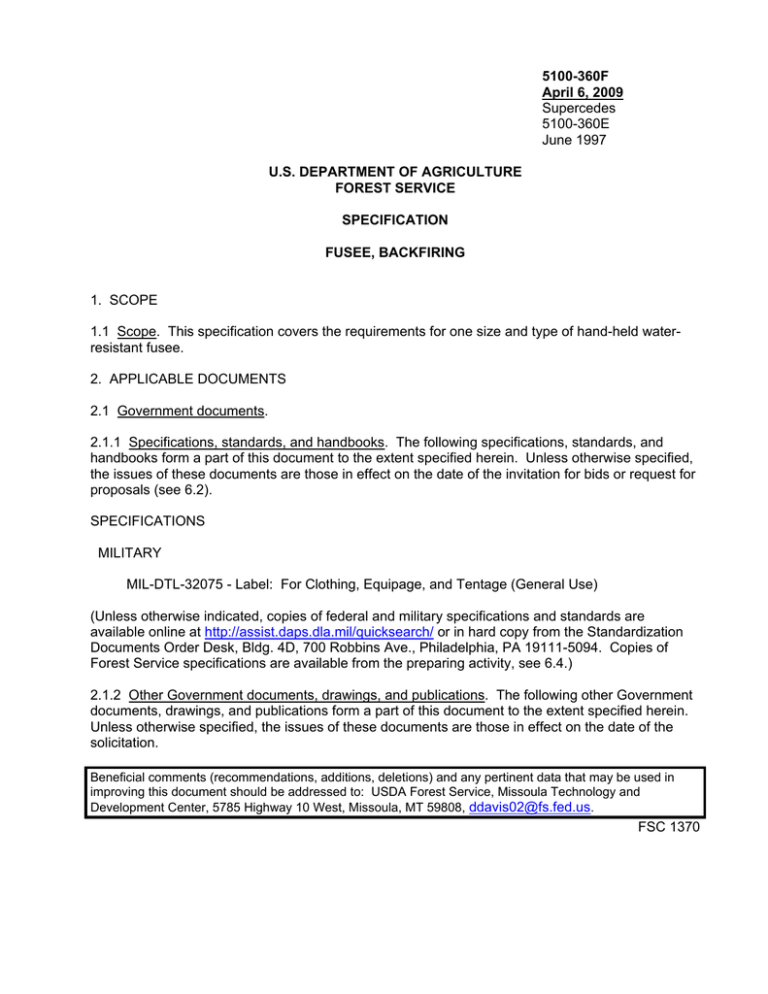
5100-360F April 6, 2009 Supercedes 5100-360E June 1997 U.S. DEPARTMENT OF AGRICULTURE FOREST SERVICE SPECIFICATION FUSEE, BACKFIRING 1. SCOPE 1.1 Scope. This specification covers the requirements for one size and type of hand-held waterresistant fusee. 2. APPLICABLE DOCUMENTS 2.1 Government documents. 2.1.1 Specifications, standards, and handbooks. The following specifications, standards, and handbooks form a part of this document to the extent specified herein. Unless otherwise specified, the issues of these documents are those in effect on the date of the invitation for bids or request for proposals (see 6.2). SPECIFICATIONS MILITARY MIL-DTL-32075 - Label: For Clothing, Equipage, and Tentage (General Use) (Unless otherwise indicated, copies of federal and military specifications and standards are available online at http://assist.daps.dla.mil/quicksearch/ or in hard copy from the Standardization Documents Order Desk, Bldg. 4D, 700 Robbins Ave., Philadelphia, PA 19111-5094. Copies of Forest Service specifications are available from the preparing activity, see 6.4.) 2.1.2 Other Government documents, drawings, and publications. The following other Government documents, drawings, and publications form a part of this document to the extent specified herein. Unless otherwise specified, the issues of these documents are those in effect on the date of the solicitation. Beneficial comments (recommendations, additions, deletions) and any pertinent data that may be used in improving this document should be addressed to: USDA Forest Service, Missoula Technology and Development Center, 5785 Highway 10 West, Missoula, MT 59808, ddavis02@fs.fed.us. FSC 1370 5100-360F DOCUMENTS U.S. DEPARTMENT OF TRANSPORTATION 49 CFR 172.420 49 CFR 178.516 - FLAMMABLE SOLIDS label - Standards for fiberboard boxes (The Code of Federal Regulations is for sale from the Superintendent of Documents, U.S. Government Printing Office, Washington, DC 20402-9325. Reprints of certain regulations may be obtained from the Federal agency responsible for issuing them.) 2.2 Non-Government publications. The following documents form a part of this document to the extent specified herein. Unless otherwise specified, the issues of these documents are those in effect on the date of the solicitation. AMERICAN SOCIETY FOR QUALITY (ASQ) Z1.4 - Sampling Procedures and Tables for Inspection by Attributes (Copies are available from the American Society for Quality, PO Box 3005, Milwaukee, WI 532013005.) ASTM D 1974 - Standard Practice for Methods of Closing, Sealing, and Reinforcing Fiberboard Boxes D 3951 - Standard Practice for Commercial Packaging D 5118 - Standard Practice for Fabrication of Fiberboard Shipping Boxes SI-10 - Standard For Use of the International System of Units (SI): The Modern Metric System (IEEE/ASTM Standard available from ASTM) (Copies are available from ASTM International, 100 Barr Harbor Dr., West Conshohocken, PA 19428-2959, www.astm.org.) NATIONAL MOTOR FREIGHT TRAFFIC ASSOCIATION, INC., AGENT National Motor Freight Classification (Copies are available from American Trucking Associations, Inc., 2200 Mill Rd., Alexandria, VA 22314.) (Non-Government standards and other publications normally are available from the organizations that prepare and distribute the documents. These documents also may be available in or through libraries or other informational services.) 2.3 Order of precedence. In the event of conflict between the text of this document and the references cited herein, the text of this document takes precedence. Nothing in this document, however, supersedes applicable laws and regulations unless a specific exemption has been obtained. 2 5100-360F 3. REQUIREMENTS 3.1 First article. Unless otherwise specified (see 6.2), the item shall be subjected to first article inspection (see 6.3) in accordance with 4.3.1. During the term of the contract the contractor shall be required to notify the contracting officer in writing when a component, or the component supplier, changes in any way; when a major manufacturing process changes in any way; and when a manufacturing location changes. The contracting officer may at any time require the contractor to submit a new first article sample when substantive changes occur during the term of the contract. 3.2 Materials and construction. Materials and construction shall be as specified herein and shall provide finished fusees of sufficient strength and quality to comply with all inspection and test requirements defined in section 4. 3.2.1 Fusee body. Each fusee shall be manufactured in such a manner that it passes the strength test specified in 4.5.1 and the heat exposure test specified in 4.5.8. Each finished fusee shall have a diameter, exclusive of the protective cap and ferrule, of 1 inch +0 inches/-1/4 inch. The length of the fusee, including protective cap and ferrule shall be 13 inches +1 inch/-0 inches. The base shall be closed with a plug made of wood, paper, or other appropriate material. The fusee body and shall be red in color, the shade shall be manufacturer's option. 3.2.2 Ferrule. Each fusee shall have a paper, metal, or composition ferrule of appropriate diameter to provide a snug fit over the fusee body. When constructed of paper, the ferrule shall be similar to the fusee body and shall be equal or greater in strength. The ferrule shall project not less than 23/4 inches beyond the fusee base, and the interior shall be unobstructed to permit insertion of another fusee from which the cap has been removed. The ferrule shall be tested in accordance with 4.5.2 and 4.5.4. 3.2.3 Fusee head. The fusee head shall be the ignition end and shall have affixed to it a bead of friction type striker compound (3.2.3.1) protected by a removable cap (3.2.3.2). 3.2.3.1 Striker compound. The bead of striker compound shall be securely attached to the head of the fusee. The rim of the fusee shall be free of any such compound. The bead shall not break or become detached when the fusee samples are undergoing testing required in 4.5.4 and 4.5.5. The compound shall have an ignition temperature greater than 350 degrees Fahrenheit when tested in accordance with 4.5.7. 3.2.3.2 Protective cap. The head of the fusee shall be protected by a removable protective cap. The protective cap shall be of an appropriate diameter to provide a snug fit over the body of the fusee, and shall be constructed in such a way and of materials to protect the striker compound bead from accidental ignition or exposure. Scratch material (3.2.3.2.1) shall be affixed to the top of the plug. The cap shall be attached to the fusee body in such a manner as to facilitate cap removal but prevent accidental detachment. A secondary cap to protect the scratch material is acceptable. 3.2.3.2.1 Scratch strip. The removable portion of the cap shall include scratch material that shall be protected from exposure and shall ignite the fusee samples after they have been tested for water resistance in accordance with 4.5.4. 3 5100-360F 3.2.4 Fuel composition. Fusees containing sulphur shall contain no more than 2.6% potassium chlorate or an equivalent amount of any other chlorate. Devices containing a chlorate shall not contain ammonium salts. Compactness of the fuel shall be sufficient to pass the test specified in 4.5.5. The fuel shall not spontaneously ignite when tested in accordance with 4.5.6. 3.2.5 Flame. Each fusee shall produce a flame having a minimum temperature of 1400ºF when tested as specified in 4.5.3 and shall not "chimney" in any manner to significantly obscure the flame. Flame length shall be a minimum of 5 inches and flame width a minimum of 3/4 inch at its widest part when tested in accordance with 4.5.3.2. Burning time of the flame shall be a maximum of 13 minutes and a minimum of 10 minutes. Color of the flame shall be either yellow or red. 3.2.6 Waterproofing. Each finished fusee shall be sufficiently coated with a water-resistant material to ensure reliable ignition and burning after long periods of storage under humid conditions and otherwise comply with the test requirements specified in 4.5.4. 3.2.7 Marking. Each fusee shall be marked with the following information in black fade-proof ink and in a size to be clearly legible at up to 3 feet. The removal of the cap instructions shall be modified as necessary to accommodate the removal method if different from the wording stated. DIRECTIONS -- Pull tape over head of cap. Twist off cap. Scratch end of cap against black lighter on head of fusee. ALWAYS POINT FUSEE AWAY FROM FACE AND BODY WHILE IGNITING AND AFTERWARDS. AFTER IGNITING, HOLD 5 SECONDS BUT NOT MORE THAN 10 SECONDS BEFORE DROPPING. (nominal burning time in minutes)1/ (month/year of manufacture)1/ (manufacturer's name)1/ NSN 1370-00-294-1279 1/ Insert appropriate information. 3.3 Material Safety Data Sheet (MSDS). Each box (5.2), shall have an MSDS inserted prior to closing the box. 3.4 Workmanship. All items shall conform to the quality of product established by this document. The occurrence of nonconformities shall not exceed the applicable acceptable quality levels. There shall be no nonconformities that affect use, appearance, or serviceability. 3.5 Metric products. Products manufactured to metric dimensions will be considered on an equal basis with those manufactured using inch/pound units, provided they fall within the tolerances specified using conversion tables contained in the latest revision of IEEE/ASTM SI-10, and all other requirements of this specification are met. 3.6 Recovered materials. The offeror/contractor is encouraged to use recovered material to the maximum extent possible in accordance with paragraph 23.403 of the Federal Acquisition Regulation. 4 5100-360F 4. QUALITY ASSURANCE PROVISIONS 4.1 Responsibility for inspection. Unless otherwise specified in the contract or purchase order, the contractor is responsible for the performance of all inspection and test requirements (examinations and tests) as specified herein. Except as otherwise specified in the contract or purchase order, the contractor may use his/her own or any other facilities suitable for the performance of the inspection requirements specified herein, unless disapproved by the Government. The Government reserves the right to perform any of the inspections set forth in this specification where such inspections are deemed necessary to ensure supplies and services conform to prescribed requirements. 4.1.1 Responsibility for compliance. All items shall meet all requirements of sections 3 and 5. The inspection set forth in this specification shall become a part of the contractor's overall inspection system or quality program. The absence of any inspection requirements in the specification shall not relieve the contractor of the responsibility of ensuring that all products or supplies submitted to the Government for acceptance comply with all requirements of the contract. Sampling inspection as part of manufacturing operations, is an acceptable practice to ascertain conformance to requirements, however, this does not authorize submission of known nonconforming material, either indicated or actual, nor does it commit the Government to accept nonconforming material. 4.1.2 Responsibility for dimensional requirements. Unless otherwise specified in the contract or purchase order, the contractor is responsible for ensuring that all specified dimensions have been met. When dimensions cannot be examined on the end item, inspection shall be made at any point or at all points in the manufacturing process necessary to ensure compliance with all dimensional requirements. 4.1.3 Certificate of compliance. Where certificates of compliance (COC) are submitted, the Government reserves the right to check test such items to determine the validity of the certification (see 4.4.2.1). 4.1.3.1 COC Contents. The COCs shall be supported by test reports, these test reports shall also be submitted as a part of the first article submission. Test reports supplied by the manufacturer are acceptable. The COC shall include the following: Specification with type, class, etc. Quantity purchased Purchase source, address, and telephone number Purchase date 4.2 Sampling for inspections and tests. Sampling for inspections and tests shall be made in accordance with ASQ Z1.4. The inspection level and acceptable quality level (AQL) shall be as specified. All fusees manufactured at one time shall be considered a lot for purposes of acceptance inspection and test. A sample unit shall be one complete fusee. 4.3 Quality conformance inspection. Each end item lot shall be sampled and inspected as specified in 4.3.2. Each lot shall be sampled and tested as specified by 4.5. Test reports showing compliance with 4.5.1 through 4.5.8 shall be submitted as part of quality conformance inspections. The packaging shall be inspected as specified in 4.4. 5 5100-360F 4.3.1 First article inspection and testing. Unless otherwise specified (see 6.2), first articles submitted in accordance with 3.1 shall be inspected as specified in 4.3.2 and tested as specified in 4.5. The presence of any nonconformity or failure to pass any test shall be cause for nonacceptance of the first article. Packaging is not required when first articles are presented. The contractor shall supply the number of fusees specified by the contract for first article inspection and testing along with laboratory test reports documenting findings of the tests specified in 4.5. Such testing shall have been done by a laboratory acceptable to the Government. The contractor shall supply two copies of the test reports to the contracting officer or contracting officer's representative, and include two more copies of the test reports with the first article samples themselves. The test reports shall identify the name of the testing laboratory and shall be signed by the test engineer, chemist, or other appropriate laboratory official. 4.3.2 End item examination. The end items shall be examined for the nonconformities listed in table I. The inspection level shall be I, the acceptable quality level (AQL), expressed in terms of nonconformities per hundred units, shall be 4.0. TABLE I. Classification of nonconformities Classification Major Minor Examine Nonconformity Fusee Overall length of tube not as specified Overall diameter of tube not as specified Any part broken, bent, or otherwise damaged Color not as specified X X X Depth not as specified X Ferrule X Markings Omitted, incomplete, incorrect, illegible, or misplaced X _____________________________________________________________________________ 4.4 Packaging examination. The fully packaged end items shall be examined for the nonconformities in Table II. The sample unit shall be one shipping container fully prepared for delivery except that it need not be closed. Nonconformities of closure listed in Table II shall be examined on shipping containers fully prepared for delivery. The lot size shall be the number of shipping containers in the end item inspection lot. The inspection level shall be S-2 and the AQL, expressed in terms of nonconformities per hundred units, shall be 2.5. Examine Markings Materials Workmanship Contents Table II. Packaging Examination Nonconformity Omitted; incorrect; illegible; of improper size, location, sequence, or method of application. Any component missing or not as specified. Any component damaged, affecting serviceability. Inadequate application of components, such as: incomplete closure of container flaps, improper taping, loose strapping, inadequate stapling. Bulged or distorted container. Number of items per container is more or less than required. 6 5100-360F 4.5 End item testing. Unless otherwise specified, the sample size for testing shall be S-3 and the AQL expressed in terms of nonconformities per hundred units shall be 2.5 for all testing. The samples selected as specified shall be evenly divided into two groups. One group shall be subjected to the tests specified in 4.5.1, 4.5.2, and 4.5.3. The other group shall be subjected to the tests specified in 4.5.4 and 4.5.5. Any sample that fails to comply with its specified tests shall be classified as a nonconforming and rejected. In addition, should the bead of striker compound come loose from its fusee head when attempting to ignite the fusee during testing specified in 4.5.4 and 4.5.5, that sample shall be classified as a nonconforming and rejected. For the tests required in 4.5.6, 4.5.7, and 4.5.8 a separate random sample of 15 fusees, 5 for each test, shall be selected from the lot and tested as specified. If any sample in any test fails, the lot shall be rejected. 4.5.1 Fusee body strength. The strength test to determine compliance with 3.2.1 shall be conducted as described and illustrated in figure 1. Any visible evidence of the fusee breaking within 5 minutes shall constitute a failure of the sample. 4.5.2 Ferrule strength. Ferrule testing to determine compliance with 3.2.2 shall be conducted as illustrated in figure 2. Complete separation of the fusees at the slip joint within 1 minute shall constitute failure of the ferrule and of the sample fusee. 4.5.3 Flame test. The flame as specified in 3.2.5 shall be tested as follows: 4.5.3.1 Flame temperature. The sample torch shall be ignited then inclined, ignition end down, at an angle of approximately 20 degrees from the vertical. The flame temperature shall be determined within the flame, approximately 2 inches from the base of the flame. Any non-conformance to specified requirements shall constitute a failure for that sample. 4.5.3.2 Flame dimension. The flame shall be measured while the torch is held at the same angle as specified for the flame temperature test (4.5.3.1). Flame length shall be measured from the burning end of the torch to the tip of the flame. Flame width shall be measured near its middle or apparent maximum width. 4.5.3.3. Burning time. To determine burning time, the fusee shall be held in the same position as for the flame temperature test (see 4.5.3.1). 4.5.4 Water Resistance. The torch shall be submerged horizontally to a depth of 1 inch in water maintained at room temperature (70° 5°F) for 20 minutes. Immediately after the soak period, the torch shall be ignited by use of the ignition cap provided and shall burn for a minimum of 1 minute before proceeding to the test in 4.5.5. Any non-conformance to specified requirements shall constitute a failure of the sample. Also any noticeable decrease in ferrule strength of the sample, after soaking, shall constitute failure of the sample. 7 5100-360F 4.5.5 Fuel compactness. This test shall be performed immediately after the test specified in 4.5.4 and with the same sample. After the fusee has been allowed to burn for a minimum of 1 minute from the previous test, the tester shall grasp the fusee by the ferrule, holding the sample 45 degrees from the horizontal, with the arm fully extended horizontally in front of the body. In this position, the tester shall swing the fusee through a 90° arc starting straight out (horizontally) from the body to straight down (vertically) and backup up to complete one cycle. Each cycle shall be completed in 1 second and five consecutive cycles shall be made to complete the test. If the sample does not remain ignited throughout the test, the sample shall be considered nonconforment and rejected. Note: Re-ignition of the fuel by the flame from the burning paper tube shall not be considered as maintaining ignition of the fuel. 4.5.6 Spontaneous ignition. A 20-gram sample of the fuel shall be taken from each of the 5 sample fusees. Each 20-gram sample shall be moistened with 5 grams of water then placed in separate, loosely covered vessels (beakers). The vessels shall then be placed in an oven for 72 consecutive hours maintained at a temperature of 212°F 5°F. If spontaneous combustion occurs to 1 or more samples during the 72-hour exposure period, the lot shall be rejected. 4.5.7 Ignition temperature. The ignition head and 20 grams of fuel shall be taken from each of 5 sample fusees. Each ignition head and each 20-gram fuel sample shall be placed in separate vessels. The 10 vessels shall then be placed in an oven maintained at a temperature of 350°F 5°F for 1 hour. Ignition or explosion of any ignition head or fuel sample shall cause nonacceptance of the lot. An oven warm-up period may be permissible provided the vessels remain in the oven at 350F for one hour. 4.5.8 Heat exposure. Five sample fusees shall be placed in an oven maintained at a temperature of 167 -0° +5°F for 48 hours. If any sample ignites or shows visible decomposition or failure of components, except for the exterior waterproofing, the lot shall be rejected. 5. PACKAGING 5.1 Preservation. Preservation shall be as specified in the contract or purchase order. 5.2 Packing. Seventy-two (72) fusees together with an appropriate material safety data sheet shall be packed into a fiberboard box meeting the requirements of 49 CFR 178.516. The box shall conform to the latest version of ASTM D 5118 and comply with the National Motor Freight Classification. The size of the box shall be 14-1/2 inches by 12-1/2 inches by 5-3/4 inches, +/- 1/2 inch. Closure shall be with a nonmetallic banding. 5.3 Marking. In addition to any special marking required by this specification, marking shall be in accordance with the contract or purchase order. 6. NOTES 6.1 Intended use. This fusee is designed to be used by wildland firefighters for backfiring and by individuals conducting controlled burning operations. The ferrule is designed to have another fusee, or a properly sized stick, inserted to lessen the need to bend over to use. 8 5100-360F 6.2 Acquisition requirements. Acquisition documents should specify the following: a. b. c. d. Title, number, and date of the specification. When first article samples are not required (see 3.1, 4.3.1, and 6.3). When certificates of compliance are acceptable in lieu of lot by lot testing (see 4.3.1). Preservation, packing, and marking required in addition to specification requirements (see section 5). 6.3 First article. First articles are required and shall be inspected and approved under the appropriate provisions of FAR 52.209. The contracting officer should specify the appropriate type of first article and the number of units to be furnished. The contracting officer should include specific instructions regarding arrangements for selection, inspection, and approval of the first articles. 6.4 Preparing activity. USDA Forest Service, Missoula Technology and Development Center, 5785 Highway 10 West, Missoula, MT 59808, ddavis02@fs.fed.us. 9 5100-360F 10 5100-360F 11
