Quick Start for Acellus 7
advertisement

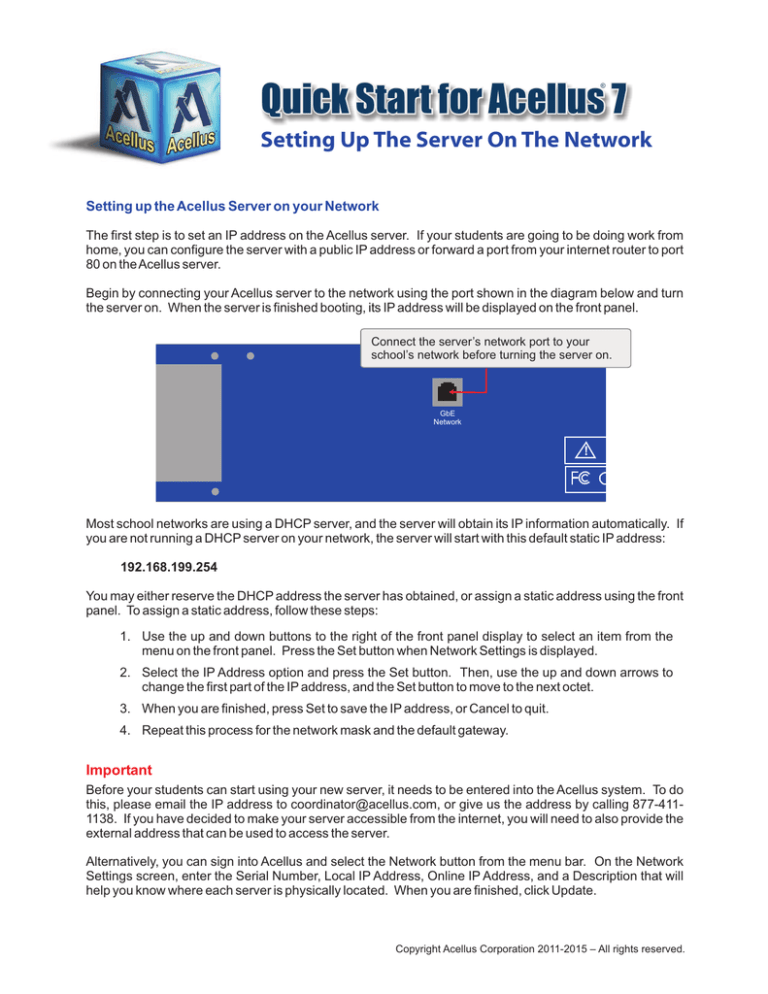
Quick Start for Acellus 7 ® Setting Up The Server On The Network Setting up the Acellus Server on your Network The first step is to set an IP address on the Acellus server. If your students are going to be doing work from home, you can configure the server with a public IP address or forward a port from your internet router to port 80 on the Acellus server. Begin by connecting your Acellus server to the network using the port shown in the diagram below and turn the server on. When the server is finished booting, its IP address will be displayed on the front panel. Connect the server’s network port to your school’s network before turning the server on. GbE GbE Network Network ! Most school networks are using a DHCP server, and the server will obtain its IP information automatically. If you are not running a DHCP server on your network, the server will start with this default static IP address: 192.168.199.254 You may either reserve the DHCP address the server has obtained, or assign a static address using the front panel. To assign a static address, follow these steps: 1. Use the up and down buttons to the right of the front panel display to select an item from the menu on the front panel. Press the Set button when Network Settings is displayed. 2. Select the IP Address option and press the Set button. Then, use the up and down arrows to change the first part of the IP address, and the Set button to move to the next octet. 3. When you are finished, press Set to save the IP address, or Cancel to quit. 4. Repeat this process for the network mask and the default gateway. Important Before your students can start using your new server, it needs to be entered into the Acellus system. To do this, please email the IP address to coordinator@acellus.com, or give us the address by calling 877-4111138. If you have decided to make your server accessible from the internet, you will need to also provide the external address that can be used to access the server. Alternatively, you can sign into Acellus and select the Network button from the menu bar. On the Network Settings screen, enter the Serial Number, Local IP Address, Online IP Address, and a Description that will help you know where each server is physically located. When you are finished, click Update. Copyright Acellus Corporation 2011-2015 – All rights reserved. Quick Start for Acellus® 7 (Page 2) The Science of Learning Client Software Installation Before Acellus can be used, the workstations must have the proper software installed. No additional software is required while using a supported HTML 5-compliant browser. Adobe Flash Player or Silverlight are required to use certain versions of Internet Explorer. The browsers supported by Acellus 7 are: 1. Internet Explorer 9, 10, and 11 2. Internet Explorer 7 and 8 (with Adobe Flash Player or Silverlight installed) 3. Google Chrome 4. Mozilla Firefox 5. Safari To make it easier for your students to log in, we recommend that you also set your browser’s home page to one of the following locations: http://www.acellus.com http://signin.acellus.com Alternatively, you may create a desktop icon for your students that takes them to one of the locations listed above. Customer Support If you need additional assistance, please refer to the online documentation or contact the Acellus Support Center at 877-411-1138. Thank you for choosing Acellus! Trademarks Acellus is a registered trademark of Acellus Corporation. Adobe and Flash are registered trademarks of Adobe Systems Incorporated. Apple and Safari are registered trademarks of Apple Inc. Google and Google Chrome are trademarks of Google Inc. Internet Explorer, Microsoft, and Silverlight are registered trademarks of Microsoft Corporation. Firefox and Mozilla are registered trademarks of The Mozilla Foundation. Copyright Acellus Corporation 2011-2015 – All rights reserved.

