MS Powerpoint 2010 Manual
advertisement
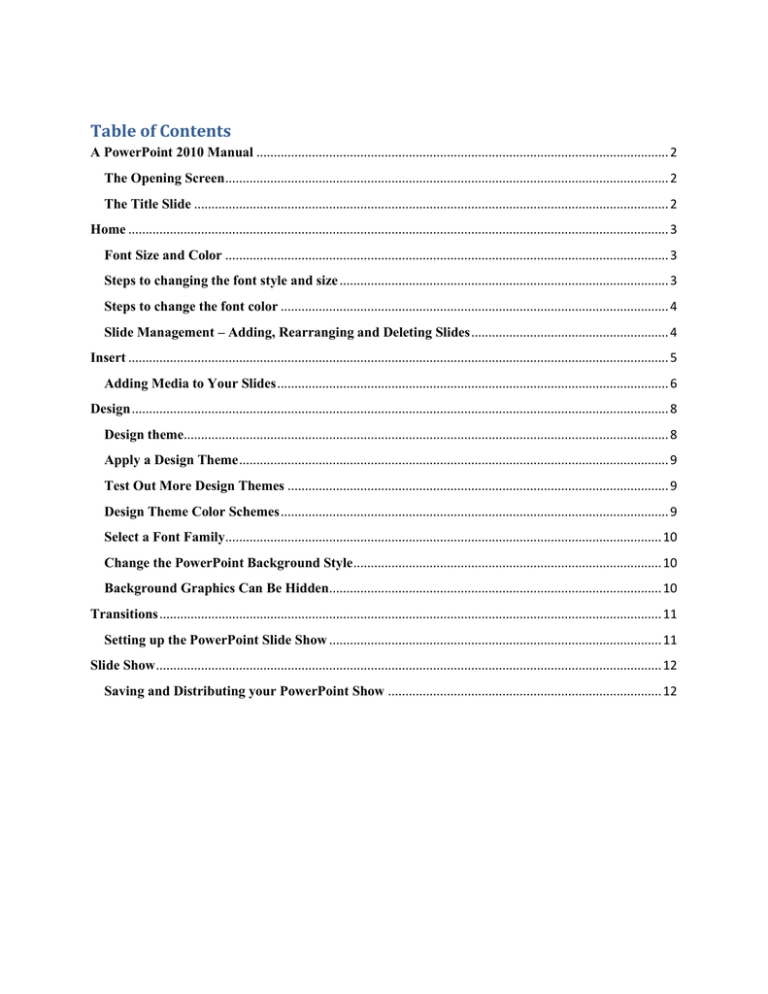
Table of Contents A PowerPoint 2010 Manual ....................................................................................................................... 2 The Opening Screen................................................................................................................................ 2 The Title Slide ......................................................................................................................................... 2 Home ............................................................................................................................................................ 3 Font Size and Color ................................................................................................................................ 3 Steps to changing the font style and size ............................................................................................... 3 Steps to change the font color ................................................................................................................ 4 Slide Management – Adding, Rearranging and Deleting Slides ......................................................... 4 Insert ............................................................................................................................................................ 5 Adding Media to Your Slides ................................................................................................................. 6 Design ........................................................................................................................................................... 8 Design theme............................................................................................................................................ 8 Apply a Design Theme ............................................................................................................................ 9 Test Out More Design Themes .............................................................................................................. 9 Design Theme Color Schemes ................................................................................................................ 9 Select a Font Family.............................................................................................................................. 10 Change the PowerPoint Background Style ......................................................................................... 10 Background Graphics Can Be Hidden................................................................................................ 10 Transitions ................................................................................................................................................. 11 Setting up the PowerPoint Slide Show ................................................................................................ 11 Slide Show .................................................................................................................................................. 12 Saving and Distributing your PowerPoint Show ............................................................................... 12 A PowerPoint 2010 Manual The Opening Screen You will see the default opening screen is actually composed of three parts: 1. The Slides/Outline tabs on the left which displays thumbnails or lists of all slides 2. The main Slide pane (center) which allows you to work on individual slides. 3. Notes Pane (bottom): In the Notes pane, you can type notes about the current slide. You can distribute your notes to your audience or see your notes in Presenter view when you give your presentation. By default, PowerPoint 2010 applies the Blank Presentation template, which appears in the previous illustration, to new presentations. Blank Presentation is the simplest and most generic of the templates in PowerPoint 2010, and is a good template to use when you first start to work with PowerPoint. To create a new presentation that is based on the Blank Presentation template, do the following: 1. Click the File tab. 2. Point to New, and under Available Templates and Themes select Blank Presentation. 3. Click Create. The Title Slide When you open a new presentation in PowerPoint 2010, the program assumes that you will begin your slide show with a Title slide. Adding a title and subtitle to this slide layout is as easy as clicking in the text boxes provided and typing. Home Font Size and Color A number of factors, such as room lighting and room size, can affect the readability of your slides during a presentation. Therefore, when creating your slides, choose font colors, styles and a font size that will make it easy for your audience to read what is on the screen, no matter where they are seated. When changing font colors; choose ones that contrast strongly with your background. When choosing a font / background color combination, you might also want to consider the room you will be presenting in. Light color fonts on a dark background are often easier to read in a very dark room. Dark color fonts on light backgrounds, on the other hand, work better in rooms with some light. In the case of font styles, avoid fancy fonts such as script styles. Difficult to read at the best of times on a computer screen, these fonts are almost impossible to decipher when projected on to a screen. Stick to standard fonts such as Arial, Times New Roman or Verdana. The default sizes of fonts used in a PowerPoint presentation - 44 point text for titles and 32 point text for subtitles and bullets - should be the minimum sizes you use. If the room you are presenting in is very large you might need to increase the font size. Font sizes may be smaller if the presentation is meant to be viewed on a computer screen. Steps to changing the font style and size 1. Select the text you wish to change by dragging your mouse over the text to highlight it. 2. Click the font drop-down list. Scroll through the available fonts to make your selection. 3. While the text is still selected, choose a new size for the font from the font size drop-down list. Steps to change the font color 1. Select the text. 2. Locate the Font Color button on the toolbar. It is the letter A button to the left of the Design button. The colored line under the letter A on the button indicates the current color. If this is the color you want to use, simply click the button. 3. To change to a different font color, click the drop-down arrow beside the button to display other color choices. You may choose a standard color shown, or click the More Colors... button to see other options. 4. De-select the text to see the effect. Slide Management – Adding, Rearranging and Deleting Slides So far we have looked at creating only one slide, but you will actually want to create a number of them to develop a slide show. And once you have several slides, you may find you want to reorder them or delete some of them altogether. Here is how to do that. 1. Use the New Slide Button Click on the New Slide button on the Home tab of the ribbon to add a new slide to your presentation. Any new slides created will retain the design theme you set for your slideshow in the first slide. 2. Deleting a Slide in the Slide tab Slide Views: Use the Slide View That is Right for the Task Slides in any PowerPoint presentation can be viewed in a variety of ways depending on the task at hand. To access all the different slide views, click on the View tab of the ribbon at the top of the PowerPoint screen. On the left end of the ribbon you will see buttons with the different options to view your slides. Deleting Slides Select the Slide to be Deleted On the Slides tab of the Slides / Outline task pane on the left of your screen, click on the thumbnail of the slide you wish to delete. Press the Delete key on your keyboard. 3. Move Slides Using the Slides / Outline Pane a. Click on the slide you wish to move, to select it. b. Drag the slide to the new location. c. A horizontal line appears as you drag the slide. When the horizontal line is in the correct location, release the mouse. d. The slide moves to the new location. Insert The Insert Tab is the key screen for adding elements to your presentation. Here you can add images, illustrations, links, text, symbols and media. Adding Media to Your Slides 1. Add Clip Art and Pictures Using a Content Slide Layout PowerPoint 2010 offers you a number of different ways to add clip art and pictures to a presentation. Perhaps the easiest way to do so is to select a slide layout that contains a placeholder for content such as clip art and pictures. On the Home tab of the ribbon either click on the New Slide button or change the current slide layout by clicking on the drop down arrow beside Layout. There are a number of different Content slide layouts available for you to choose from. To add a single picture or a piece of clip art, click on a simple layout such as Title and Content and the layout of your current slide will change to match your choice. If you have chosen one of the simple content layouts, your PowerPoint 2010 slide should resemble the graphic below. The content icon in the middle of the slide contains links to six different types of content that you can add to the slide. The clip art button is in the middle of the bottom row of icons. Tip - If in doubt about which button to use, simply place your mouse over a button until the little help balloon appears. These balloons or Tool Tips will identify what the button is used for. 2. Resize Clip Art Clip art comes in different sizes. Some will be larger than your slide while others will be tiny. Either way you may need to resize the image you want to include in your presentation. When you click on a clip art image, a border and tiny white circles appear on the edges of the image. These circles are called resizing handles (or selection handles). Dragging one of these handles allows you to enlarge or shrink your picture. The best way to resize clip art or any picture, is to use the resizing handles located on corners of the picture, rather than the ones at the top, bottom or sides of the picture. Using the corner handles will keep your image in proportion as you resize it. If you don't maintain your image's proportion it is likely to end up looking distorted or fuzzy in your presentation. 3. Inserting Photos Like clip art, photographs and other pictures can be added to a slide by choosing a Content Layout slide and clicking on the appropriate icon (for pictures it's the mountain icon). An alternative to this method is to select the Insert tab on the ribbon and click on the Picture icon, as shown in the image at the top of this page. An advantage of using this approach for either pictures or clip art is that you do not need to use one of the preset slide layouts containing a content icon to insert an image into your slide. The example shown in the following pages, inserts the picture into a Title slide layout. Search Your Computer for the Photos If you have made no changes to the settings in PowerPoint 2010 since the original install, PowerPoint will default to the My Pictures folder to look for your pictures. If this is where you have stored them, then select the correct picture and click on the Insert button. If your pictures are located elsewhere on your computer, use the drop-down arrow at the end of the Look in box and find the folder containing your pictures. 4. Crop Unnecessary Elements from the Photos Once the photo has been inserted into the PowerPoint 2010 slide, you may wish to remove extra elements from the picture. Most photos can be made just a little better by cropping unnecessary elements, such as background walls, floors, shoes or other unnecessary objects that do not enhance the photo. Here’s How to Crop your Image: Picture Tools Click on the picture to select it. This will activate the Picture Tools link above the ribbon. Click the Picture Tools link to reveal all the options relating to pictures. Crop Tool The Crop tool is located on the right side of the Picture Tools. Click the crop tool and you will notice that there are black "crop" handles around the border of the picture. Drag these handles to remove the excess elements that are unnecessary to the picture. Note - It is important to note that even though the picture has been modified by cropping, these extra elements are simply hidden from view and are still part of the picture. Think in terms of a piece of paper that you rolled partly up, like a scroll. The items on the rolled part are still there, but simply hidden from view. Design The Design Tab allows you set a common theme for your presentation as well as adjusting margins, and slide orientation. Design theme One of the first things you will want to think about is the “look” or design theme of your slides. PowerPoint has a number of built in themes you can choose from. Design themes were first introduced in PowerPoint 2007. They work in a similar way as the design templates in earlier versions of PowerPoint. A really nice feature of the design themes is that you can immediately see the effect reflected on your slides, before making your decision. Apply a Design Theme a. Click on the Design tab of the ribbon. b. Moving your mouse over any of the design theme icons shown. c. The design is reflected immediately on your slide, so you can see how it will look if you apply this design theme to your presentation. d. Click the design theme icon when you find one that suits your needs. This will apply that theme to your presentation. Test Out More Design Themes The design themes that are immediately visible on the Design tab of the ribbon are not all the themes available. You can scroll through the existing design themes by clicking on the up or down arrows to the right of the themes shown, or click the drop down arrow to reveal all of the available design themes at one time. More design themes are available to download from the Microsoft site, by clicking on that link. Design Theme Color Schemes Once you have selected a style of design theme that you like for your PowerPoint presentation, you are not limited to the color of the theme as it is currently applied. 1. Click on the Colors button at the right end of the design themes on the Design tab of the ribbon. 2. Moving your mouse over the various color schemes shown in the drop down list. The current choice will be reflected on the slide. 3. Click the mouse when you find the right color scheme. Select a Font Family Each design theme is assigned a font family. Once you have selected the design theme for your PowerPoint presentation, you can change the font family to one of the many groupings within PowerPoint 2010. 1. Click the Fonts button at the right end of the design themes shown on the Design tab of the ribbon. 2. Moving your mouse over any of the font families to see how this group of fonts will look in your presentation. 3. Click the mouse when you have made your selection. This font family will be applied to your presentation. Change the PowerPoint Background Style Just as you were able to change the background on a plain PowerPoint slide, you can do the same while using one of the many design themes. 1. Click the Background Styles button on the Design tab of the ribbon. 2. Hover your mouse over any of the background styles. 3. The background style will be reflected on the slide for you to evaluate. 4. Click the mouse when you find a background style that you like. Background Graphics Can Be Hidden Sometimes you want to show your slides with no background graphics. This is often the case for printing purposes. The background graphics will remain with the design theme, but can be hidden from view. 1. Check the Hide Background Graphics box on the Design tab of the ribbon. 2. The background graphics will disappear from your slides, but can be turned back on at any later time, by simply removing the check mark in the box. Transitions Adding transitions between slides adds movement to the presentation. However be conservative, going overboard will be a distraction to the audience. Your message will get lost in the delivery. Setting up the PowerPoint Slide Show 1. Click on the Transitions tab of the ribbon to access the slide transition options. The most common slide transitions are shown as icons on the ribbon. 2.Click the drop down arrow to see the complete list of transitions available, or scroll through the list, one row at a time. With PowerPoint 2010, you have the ability to see the transition effect on the slide by hovering the mouse over the transition choice, prior to making your selection. There are several options that you can choose to add to your PowerPoint 2010 slides. •Sound •Duration •Whether to apply to this slide or Apply to All •How to advance the slide •on mouse click •or automatically after a set number of seconds There are Many Sound Effects to Choose From Sound effects can be effective if applied wisely to PowerPoint slide transitions. For example -- a presentation that is about the increasing sales figures might be effective with a cash register sound effect on a slide transition. There is also an option to Loop Until Next Sound which you can apply to the slide transition. In my opinion, this should be used only sparingly, and only in certain situations (such as a presentation for small children). The sound effect will keep repeating until another sound effect is reached, and could be very distracting to the audience. A single sound effect will certainly make your point. Slide Show The Slide Show Tab is used to manage your presentation delivery. You can preview the show and adjust timings. Previewing your Show The Slideshow tab will let you set up how your show will progress. First you may want to preview your raw show to see if the slides seem in the proper order and if you like the transitions. To preview, click the Slideshow tab and select either From Beginning (to see show from the first slide on) or From Current Slide (to see show from a slide selected in the Slide Pane onwards). 3. Using the Set Up Show feature to create the delivery of your show Note that timings for your slides were supposed to be set up in the Slide Transitions step. You can always go back and adjust them. The easiest way to set the slide timings is to rehearse and time your PowerPoint presentation by progressing through the slides as if you were seeing them for the first time. As you click the mouse to advance the slides, PowerPoint can record the timings on the slides for you. Saving and Distributing your PowerPoint Show 1. Name and save your presentation As with any software program, it is a good idea to name and save your presentation immediately and then to save your changes frequently while you work: Click the File tab. Click Save As, and then do one of the following: For a presentation that can be opened only in PowerPoint 2010 or PowerPoint 2007, in the Save as type list, select PowerPoint Presentation (*.pptx). For a presentation that can be opened in either PowerPoint 2010 or earlier versions of PowerPoint, select PowerPoint 97-2003 Presentation (*.ppt). On the left-hand pane in the Save As dialog box, click the folder or other location where you want to save your presentation. In the File name box, type a name for your presentation, or do nothing to accept the default file name, and then click Save. There are other formats to which you can save if you are not sure whether your end users have access to PowerPoint. These include PDF and video. 2. Printing your show for handouts To set your printing options (including number of copies, printer, slides to print, number of slides per page, color options, and more) and then print your slides, do the following: Click the File tab. Click Print, and then under Print, in the Copies box, enter the number of copies that you want to print. Under Printer, select the printer that you want to use. Tip If you want to print in color, be sure to select a color printer. Under Settings, do one of the following: To print all slides, click Print All Slides. To print one or more slides that you selected, click Print Selection. Note: It is always a good idea to set your printing to more than 1 slide per page to save paper. Tip To select multiple slides to print, click the File tab, and then in Normal view, in the left-hand pane that contains the Outline and Slides tabs, click the Slides tab, and then press and hold CTRL while you select the slides that you want. 3. Follow these steps to create a CD to present your slide show on another computer. Open the presentation that you want to copy, or, if you are working with a new presentation that has not been saved, save the presentation. If you want to save your presentation to a CD, rather than to a network or to a local disk drive on your computer, insert a CD into the CD drive. Click the File tab. Click Save & Send, click Package Presentation for CD, and then in the right pane, click Package for CD. To choose the presentations that you want to copy and the order in which you want them to play, do the following: To add a presentation, in the Package for CD dialog box, click Add, and then in the Add Files dialog box, select the presentation that you want to add and click Add. Repeat this step for each presentation that you want to add. Repeat this step also if you want to add other related, non-PowerPoint files to the package. If you add more than one presentation, the presentations will appear on a Web page that lets you navigate to the contents of the CD in the order in which they are listed in the Files to be copied list in the Package for CD dialog box. To change the order, select a presentation that you want to move, and then click the arrow buttons to move the presentation up or down in the list. To remove a presentation or file from the Files to be copied list, select the presentation or file, and then click Remove. Click Options, and then under Include these files, do one or both of the following: 1. To ensure that files that are linked to your presentation are included in the package, select the Linked files check box. Files that are linked to your presentation can include Microsoft Office Excel worksheets that are linked to charts, sound files, movie clips, and more. 2. To use embedded (embedded object: Information (object) contained in a source file and inserted into a destination file. Once embedded, the object becomes part of the destination file. Changes you make to the embedded object are reflected in the destination file.)TrueType fonts (TrueType font: A font (typeface) that appears on a printed document exactly the way it appears on the screen. TrueType fonts are scalable to any font size. Several of these fonts are installed Notes 1. If your presentation does not currently include embedded fonts, checking the Embedded TrueType fonts check box includes the fonts when packaged. The Embedded TrueType fonts check box applies to all presentations that are copied, including linked ones. 2. If your presentation already includes embedded fonts, PowerPoint automatically honors the setting of the presentation to include the embedded fonts automatically when you install Windows.), select the Embedded TrueType fonts check box. Click OK to close the Options dialog box. Next o one of the following: 1. If you are copying your presentation to a network or to a local disk drive on your computer, click Copy to Folder, enter a folder name and location, and then click OK. 2. If you are copying your presentation to a CD, click Copy to CD. 4. Save your presentation as a video Why turn your presentation into a video? When you want to give a high-fidelity version of your presentation to colleagues or customers (either as an e-mail attachment, published to the web, on a CD or DVD), save it and let it play as a video. It is also an excellent format to include in Blackboard or post on YouTube. In PowerPoint 2010, you can now save your presentation as a Windows Media Video (.wmv) file, and distribute it confidently, knowing that your animated, narrated, multimedia presentation will play without a glitch. If you do not want to use the .wmv file format, you can use a preferred third party utility to convert your file to another format (.avi, .mov, etc). Some tips to remember when recording your presentation as a video: You can record and time voice narration and laser pointer movements in your video. You can control the size of the multimedia file and the quality of your video. You can include animations and transitions in your movie. Viewers do not need to have PowerPoint installed on their computers to watch it. If your presentation contains an embedded video, the video will play correctly without your needing to control it. Depending on the size your presentation, creating a video can take a long time to create. The longer the presentation and the more animations, transitions, and other media that you include, the longer it will take. However, you can continue to use PowerPoint while you wait. Here’s how to do it: 1. Create your presentation. 2. (Optional) Record and time narration in a slide show and Turn your mouse into a laser pointer. 3. Save the presentation. 4. On the File menu, click Save & Send. 5. Under Save & Send, click Create a video. 6. To display all video quality and size options, under Create a video, click the Computer & HD Displays down arrow. 7. Do one of the following: To create a video with very high quality, yet a large file size, click Computer & HD Displays. To create a video with a moderate file size and medium quality, click Internet & DVD. To create a video with the smallest file size, yet low quality, click Portable Devices. Click the Don't Use Recorded Timings and Narrations down arrow and then, do one of the following: 8. If you did not record and time voice narration and laser pointer movements, click Don't Use Recorded Timings and Narration. Tip The default time spent on each slide is set to 5 seconds. To change that, to the right of Seconds to spend on each slide, click the up arrow to increase, or the down arrow to decrease the seconds. 9. If you recorded and timed narration and pointer movements, click Use Recorded Timings and Narrations. 10. Click Create Video. 11. In the File name box, enter a file name for the video, browse for folder that will contain this file, and then click Save. You can track the progress of the video creation by looking at the status bar at the bottom of your screen. The video creation process can take up to several hours depending on the length of the video and the complexity of the presentation. Tip For longer videos, you can set it up so that they create overnight. That way, they’ll be ready for you the following morning. 12. To play your newly-created video, go to the designated folder location, and then double-click the file.

