Tools needed to complete this kit
advertisement
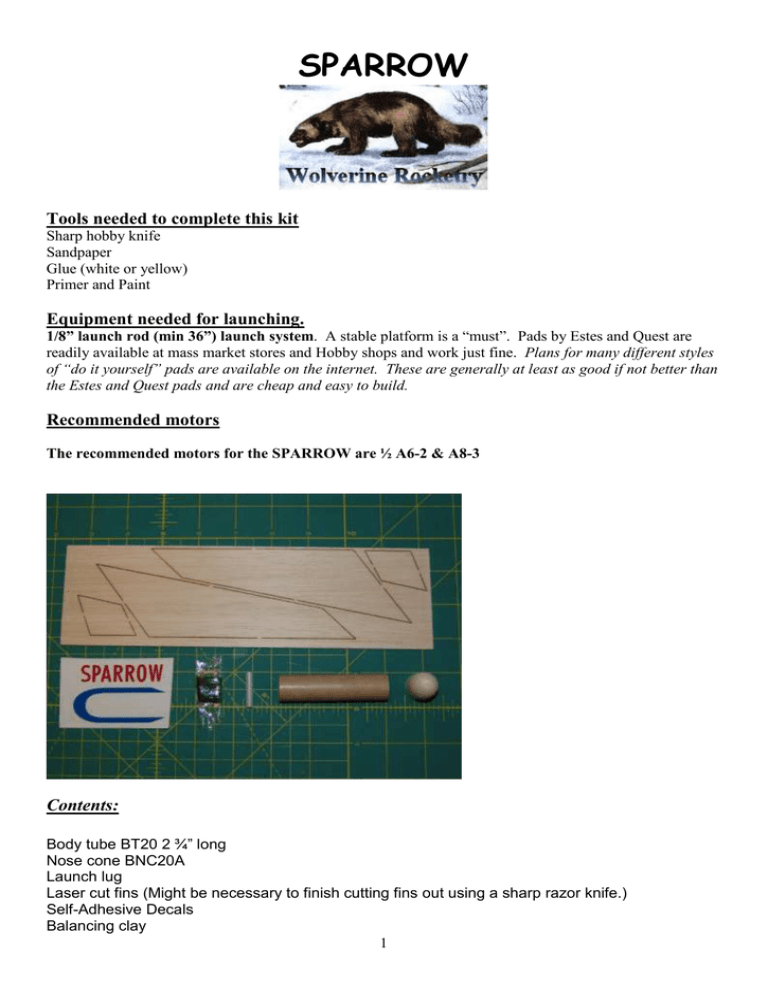
SPARROW Tools needed to complete this kit Sharp hobby knife Sandpaper Glue (white or yellow) Primer and Paint Equipment needed for launching. 1/8” launch rod (min 36”) launch system. A stable platform is a “must”. Pads by Estes and Quest are readily available at mass market stores and Hobby shops and work just fine. Plans for many different styles of “do it yourself” pads are available on the internet. These are generally at least as good if not better than the Estes and Quest pads and are cheap and easy to build. Recommended motors The recommended motors for the SPARROW are ½ A6-2 & A8-3 Contents: Body tube BT20 2 ¾” long Nose cone BNC20A Launch lug Laser cut fins (Might be necessary to finish cutting fins out using a sharp razor knife.) Self-Adhesive Decals Balancing clay 1 Please read the instructions carefully and make sure you understand them before building. Adult supervision suggested for ages 15 and under. Step 1 Assemble main tube & nose cone [] Glue the nose cone BNC20-A to the body tube. Step 2 Install rudders [] Glue the rudder fins on the end of each wing so they are at a 90 degree angle. Step 3 Wing assembly [] Apply a small bead of glue along the root edge of the wings. Turn the wings over so that the rudders are facing downward. Now glue the two wing halves together. This will provide the proper angle for the gliders wings. Make certain the alignment of the joined wings is straight. If necessary, adjust while the glue is still wet. After the glue is completely dry, apply a small bead of glue to the top of the wing. Then position the wing at the center of the body tube. 2 Step 4 Glue body tube to wings [] After the glue is completely dry, apply a small bead of glue to the top of the wing. Then position the wing at the center of the body tube. Step 5 Install launch lug [] Apply glue to the launch lug and place it along the front of the leading edge of the wing. Step 6 Sealing the balsa [] After all the glue is dry apply a coat of sanding sealer to the wings, rudders & nose cone. When the sealer is dry lightly sand all the balsa surfaces. Repeat this process until all balsa surfaces are smooth. Step 7 Paint [] Paint your glider with your favorite colored paint. To hold your glider during spray painting roll a piece of paper and insert it into the end as a handle while you apply the paint. Step 8 Decals [] Cut out the decals, peel off the backing and apply them as shown on the cover card. Step 9 Balancing your SPARROW [] To balance the model lightly toss the glider aiming about 25ft in front of you. The glider should fly in a steady glide. If the nose drops down add a small amount of clay to the tail and keep adjusting the amount of clay to give a good glide angle. If the nose climes then drops add a little clay to the front of the wing and keep adjusting the amount of clay to give a good glide angle. Prep for flight. Install and prep motor as per the motor manufacturer’s directions. 3 Always follow the Model Rocket Safety Code when launching your model. Model Rocket Safety Code 1. 2. Materials. I will use only lightweight, non-metal parts for the nose, body, and fins of my rocket. Motors. I will use only certified, commercially-made model rocket motors, and will not tamper with these motors or use them for any purposes except those recommended by the manufacturer. 3. Ignition System. I will launch my rockets with an electrical launch system and electrical motor igniters. My launch system will have a safety interlock in series with the launch switch, and will use a launch switch that returns to the "off" position when released. 4. Misfires. If my rocket does not launch when I press the button of my electrical launch system, I will remove the launcher's safety interlock or disconnect its battery, and will wait 60 seconds after the last launch attempt before allowing anyone to approach the rocket. 5. Launch Safety. I will use a countdown before launch, and will ensure that everyone is paying attention and is a safe distance of at least 15 feet away when I launch rockets with D motors or smaller, and 30 feet when I launch larger rockets. If I am uncertain about the safety or stability of an untested rocket, I will check the stability before flight and will fly it only after warning spectators and clearing them away to a safe distance. 6. Launcher. I will launch my rocket from a launch rod, tower, or rail that is pointed to within 30 degrees of the vertical to ensure that the rocket flies nearly straight up, and I will use a blast deflector to prevent the motor's exhaust from hitting the ground. To prevent accidental eye injury, I will place launchers so that the end of the launch rod is above eye level or will cap the end of the rod when it is not in use. 7. Size. My model rocket will not weigh more than 1,500 grams (53 ounces) at liftoff and will not contain more than 125 grams (4.4 ounces) of propellant or 320 N-sec (71.9 pound-seconds) of total impulse. If my model rocket weighs more than one pound (453 grams) at liftoff or has more than four ounces (113 grams) of propellant, I will check and comply with Federal Aviation Administration regulations before flying. 8. Flight Safety. I will not launch my rocket at targets, into clouds, or near airplanes, and will not put any flammable or explosive payload in my rocket. 9. Launch Site. I will launch my rocket outdoors, in an open area at least as large as shown in the accompanying table below, and in safe weather conditions with wind speeds no greater than 20 miles per hour. I will ensure that there is no dry grass close to the launch pad, and that the launch site does not present risk of grass fires. 10. Recovery System. I will use a recovery system such as a streamer or parachute in my rocket so that it returns safely and undamaged and can be flown again, and I will use only flame-resistant or fireproof recovery system wadding in my rocket. 11. Recovery Safety. I will not attempt to recover my rocket from power lines, tall trees, or other dangerous places. LAUNCH SITE DIMENSIONS Installed Total Impulse (N-sec) Equivalent Motor Type Minimum Site Dimensions (ft.) 0.00--1.25 1/4A, 1/2A 50 1.26--2.50 A 100 2.51--5.00 B 200 5.01--10.00 C 400 10.01--20.00 D 500 20.01--40.00 E 1,000 40.01--80.00 F 1,000 80.01--160.00 G 1,000 160.01--320.00 Two Gs 1,500 Be Safe, Fly High and above all HAVE FUN! Limitation of Liability: Model rockets are not toys. Model rockets are functional rockets constructed of lightweight materials and launched using pre-manufactured, NAR safety certified model rocket motors in accordance with the NAR Model Rocket Safety Code. Model rockets, if misused, can cause injury, property damage and even death. Manufacturer certifies that it has exercised reasonable care in the design and manufacture of its products. Once sold, we cannot assume any liability for product storage, transportation or usage. The Manufacturer shall not be held responsible for any property damage or personal injury whatsoever arising from the handling, storage, use or misuse of our product. The buyer assumes all risks and liabilities there from and accepts and uses the products on these conditions. By purchasing any Rocketry product from us you are agreeing with the terms stated above. 4
